I thought it would be helpful to put together a more instructional post showing the process I used to create a decorative lattice pie crust. I hope that this simple step by step guide complete with a stop motion video and reference photos will encourage you to try a lattice crust pie yourself!
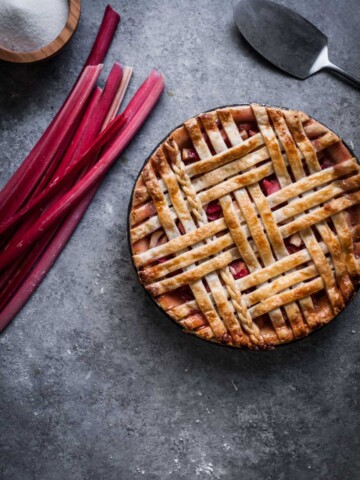
You can refer to my cherry rhubarb pie post for Sister Pie's deliciously flaky pie dough that performs well when building a lattice, or you can use your preferred pie dough recipe and follow the step by step process detailed below.
King Arthur Flour has an excellent reference page that also provides recipes and addresses many basic questions relating to pie crust. To make a lattice crust, you will need a pie crust recipe that provides you with enough pie dough for both the bottom crust and the decorative top.
Chilling the Pie Dough
When starting the crust making process, use dough that has already had time to chill for at least 30 minutes in the refrigerator. This chilling period allows the gluten in the flour some time to relax. This creates a dough that is much easier to roll out as you won't be fighting the gluten's elasticity as much. Keeping the dough in the fridge also helps the fat in the dough (in this case, butter) to remain at the right consistency - fairly firm.
Instructions
After making the dough, divide it into two pieces, flatten each into salad-plate sized discs, wrap in plastic wrap, and place into the fridge to chill.
Remove one disc of pie dough from the fridge and let it rest on the counter for 10-20 minutes, or until it is workable with a rolling pin without too much effort. On a lightly floured surface, roll the dough out with firm strokes, starting in the center of the disc and working your way outward towards each side. If necessary, turn the dough 90 degrees before rolling further to maintain a mostly circular shape. Only add flour if the dough is sticking to the worktop or the rolling pin.
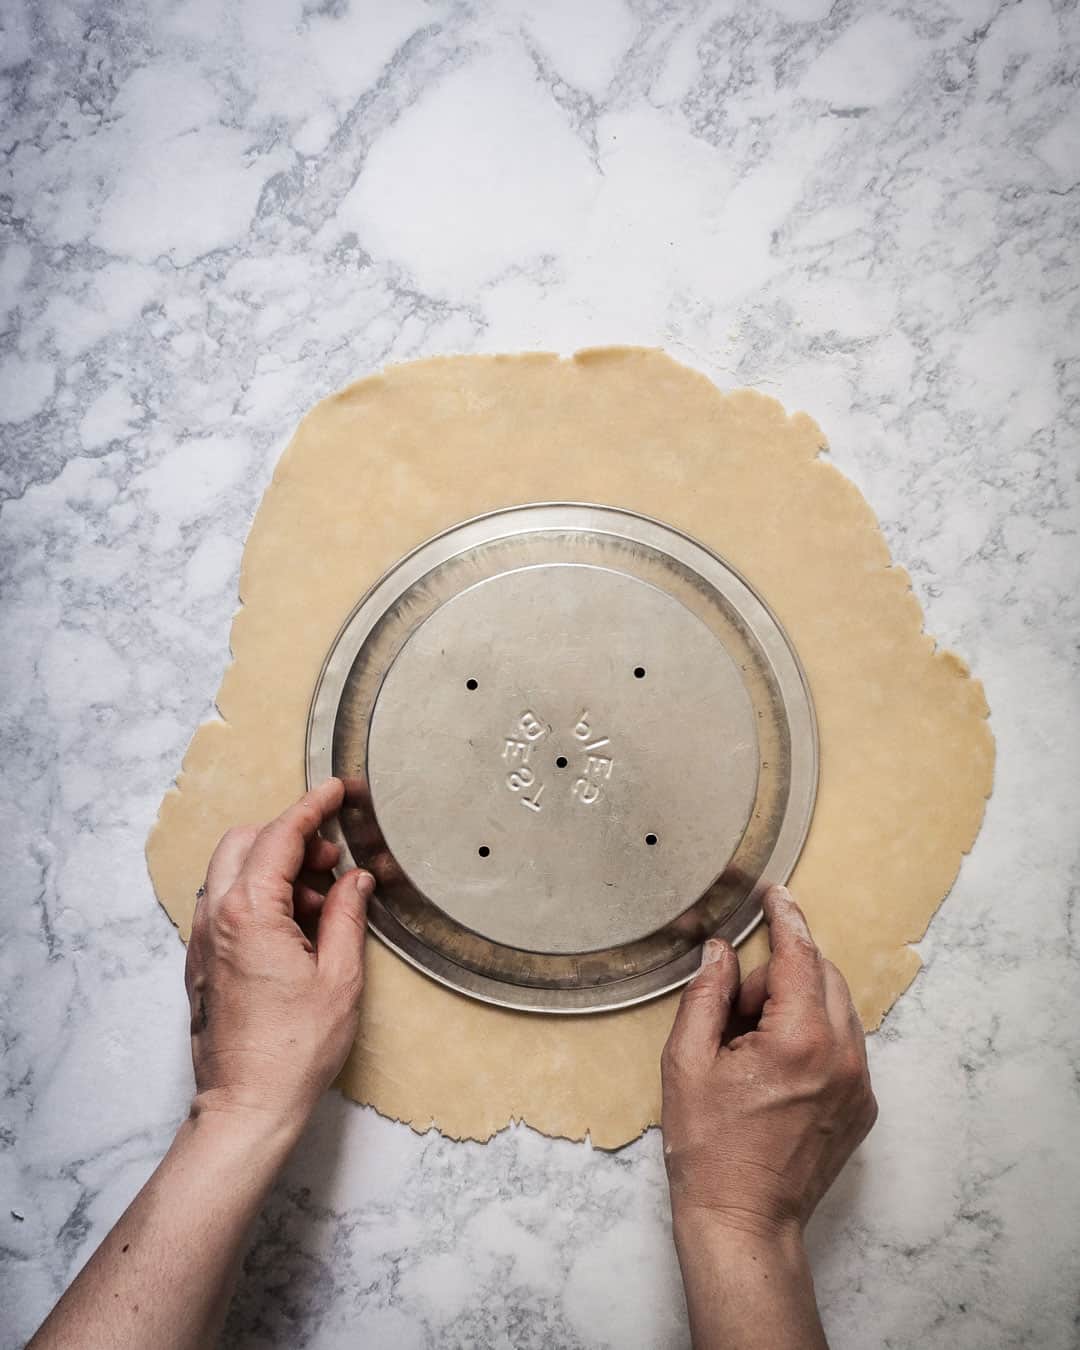
You want the dough to extend an inch or two past your pie dish. Place the dish upside down on top of the dough circle to see if it will have enough room.
To transfer the dough to the pie dish, place the rolling pin on the dough, and gently roll the dough onto the rolling pin. Unroll it onto the pie dish so that it is centered.
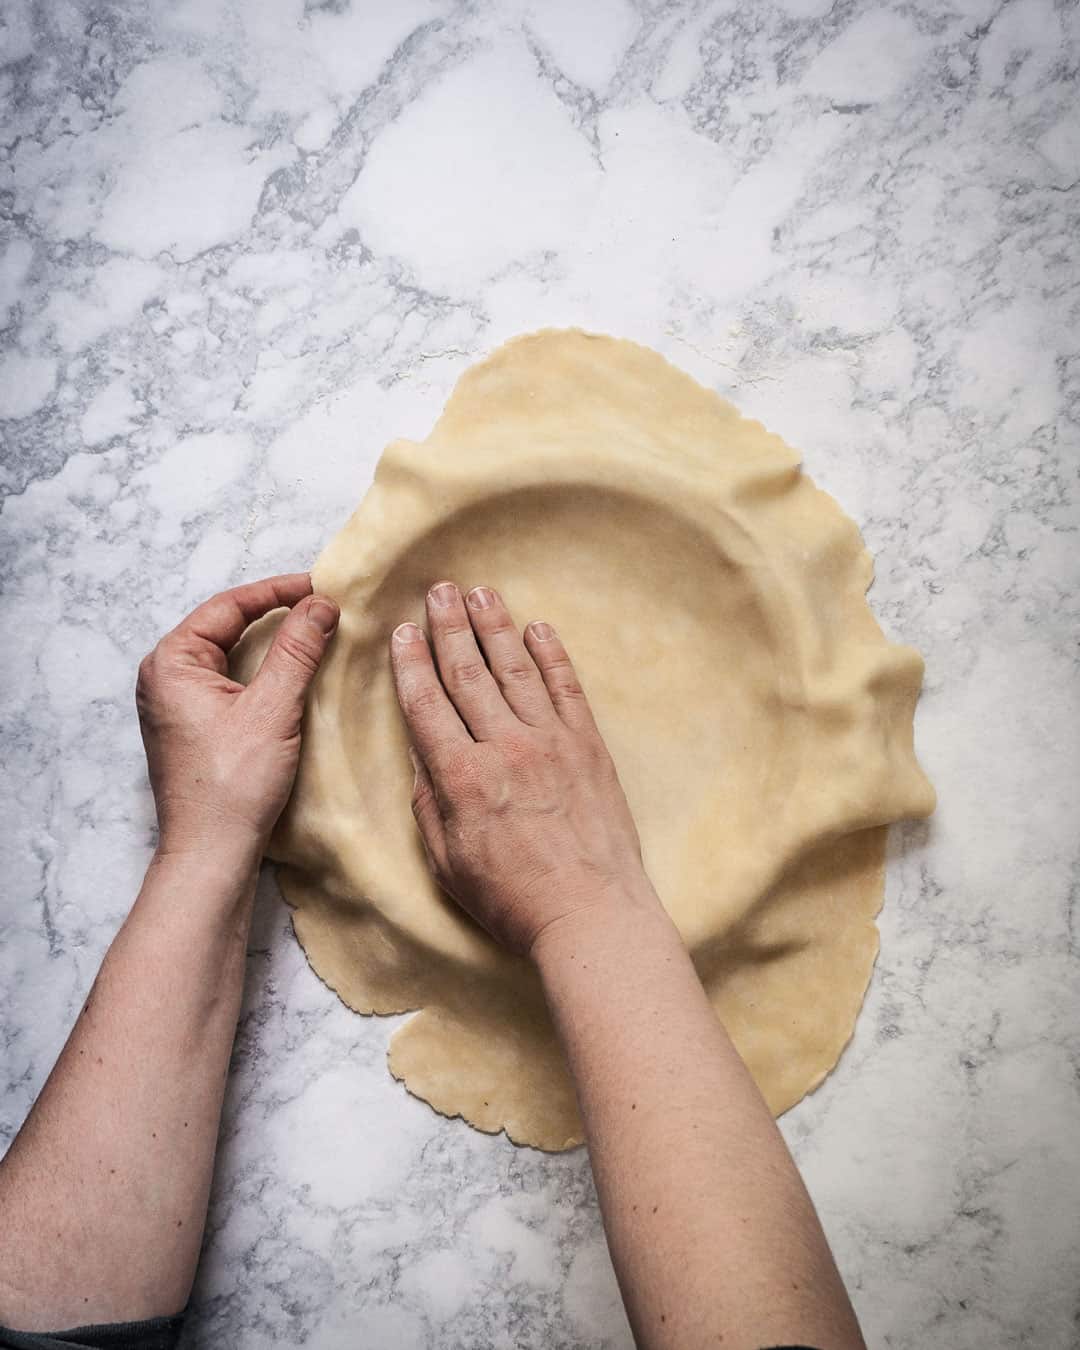
Lift the edges of the dough slightly to allow it to drop down into the pie dish; press the dough lightly against the pie dish so that there are no air pockets.
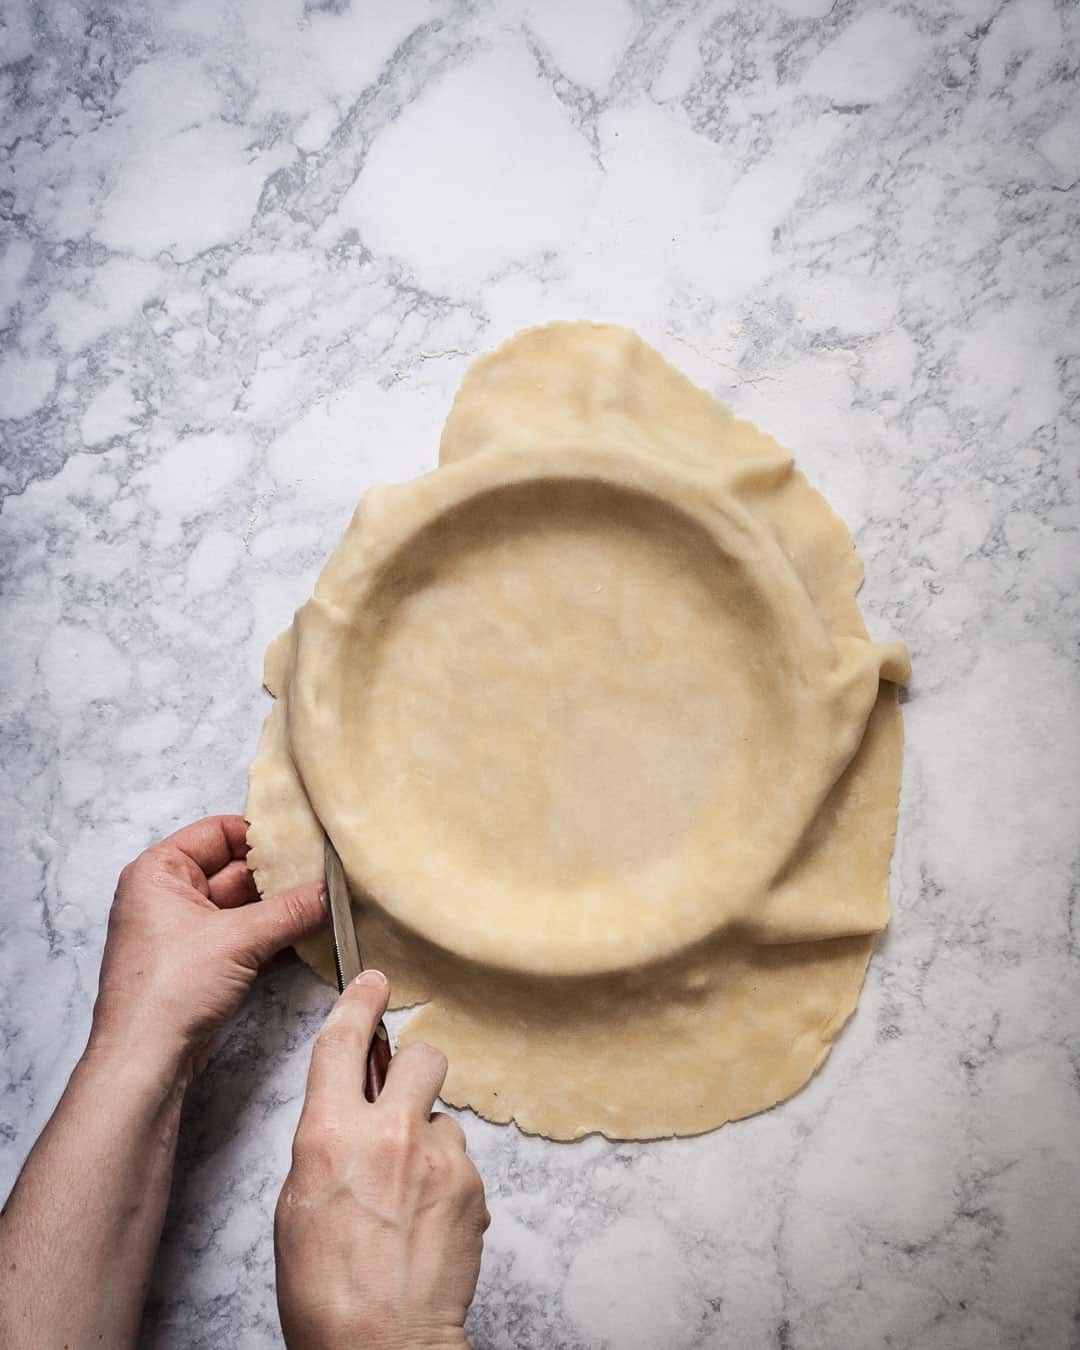
Using a knife, trim the excess dough from the edge of the pie dish. Place the pie dish in the fridge to chill while you work on the lattice.
Remove the second disc of pie dough from the fridge and let it rest on the counter for 10-20 minutes, or until it is workable. Roll it out in similar fashion, making sure the dough is wide enough to extend an inch past the pie dish on all sides.
Transfer this rolled out dough to a large baking sheet and place it into the fridge to chill for 15 minutes. I find it helps to place a piece of parchment onto the baking sheet and then transfer the dough to the baking sheet using the rolling pin.
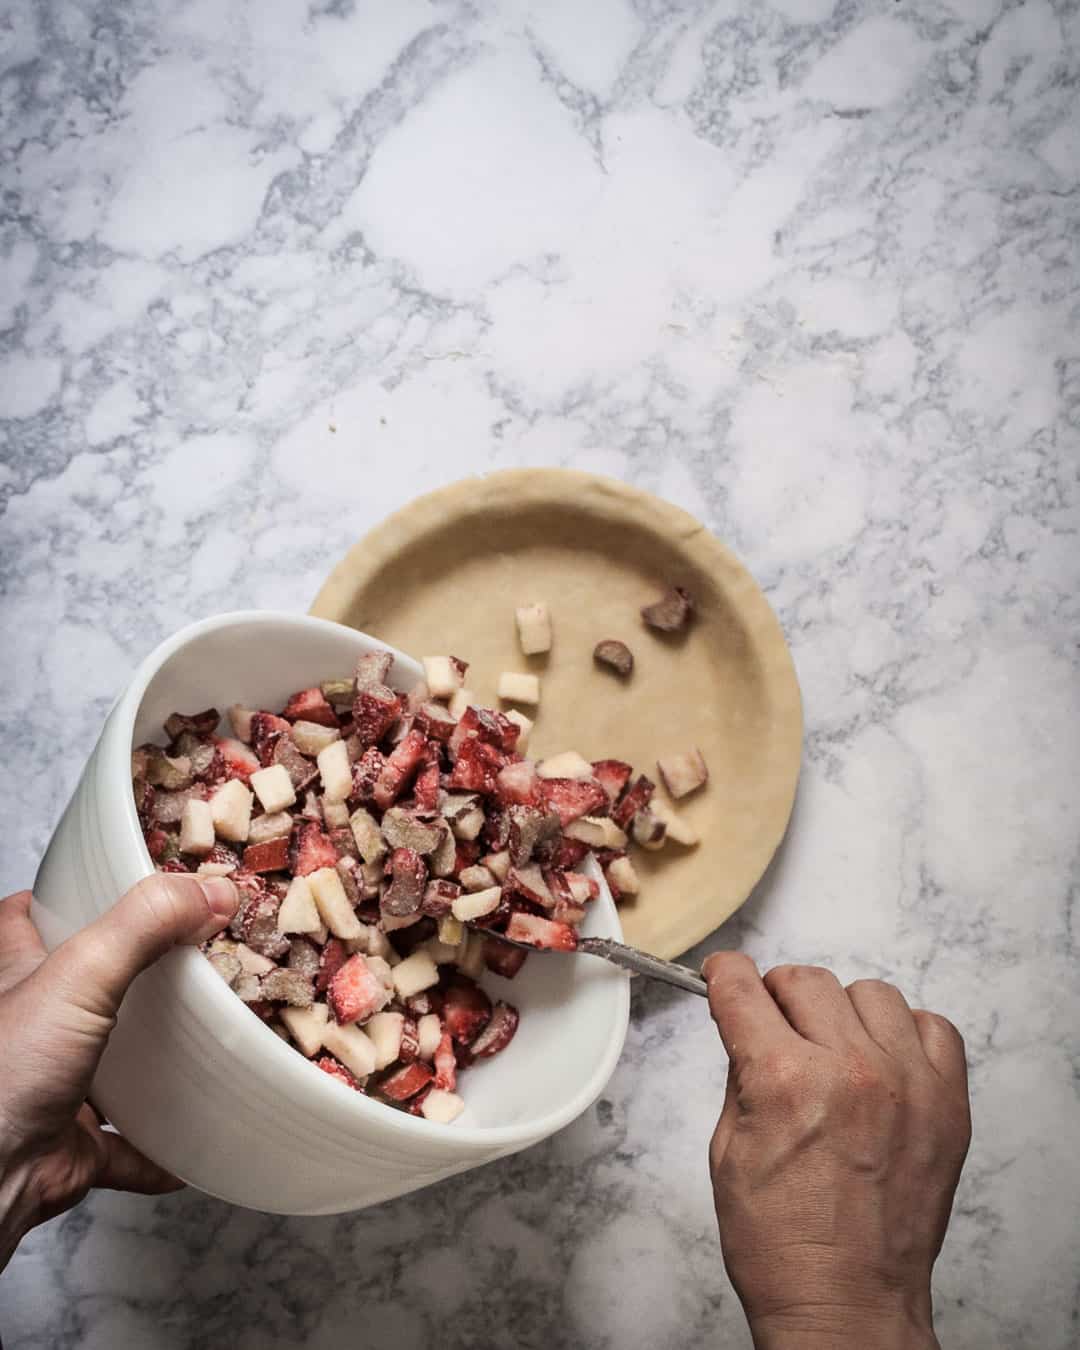
Meanwhile, prepare your pie filling and pour it into the bottom crust. Chill in the fridge while you prepare the lattice top.
Remove the baking sheet with the now-chilled rolled out dough from the fridge and transfer the dough to a work surface. For this lattice pie dough design, we will use 18 strips total, one of which is a braid made from 3 smaller strips. Using a ruler and a sharp knife (or a pastry wheel or pizza cutter), carefully cut the dough into 17 half-inch (½") strips and 3 slightly-less-than-quarter-inch strips (~¼"). Measure in advance to make sure you've rolled the dough large enough to accommodate that many strips! If the dough is oval shaped, orient your ruler so that your strips run down the longest side of the dough.
If at any time during this process, you feel the dough becoming too warm and soft, pause and place it back into the fridge to chill for 10-15 minutes. It will help keep your final lattice design crisp and neat.
To make the braid, take the three narrowest strips of dough and lay them down together in a bunch. Pinch all three strips together at one end and carefully braid them together, trying to keep each individual strip as flat as possible with no twisting. If you've never tried a braid, you can reference all kinds of three-strand braiding tutorials online. The secret of braiding pie dough is to keep it well chilled and to bend the dough as minimally as possible to prevent breakage. If needed, stop partway through construction of the braid to chill the dough before continuing.
After you have your braid and strips prepared, chill them in the fridge for 10-15 minutes. Are you seeing a theme here? Cold dough and patience are the best guarantee of a beautiful lattice pie crust.
Building the Lattice Top
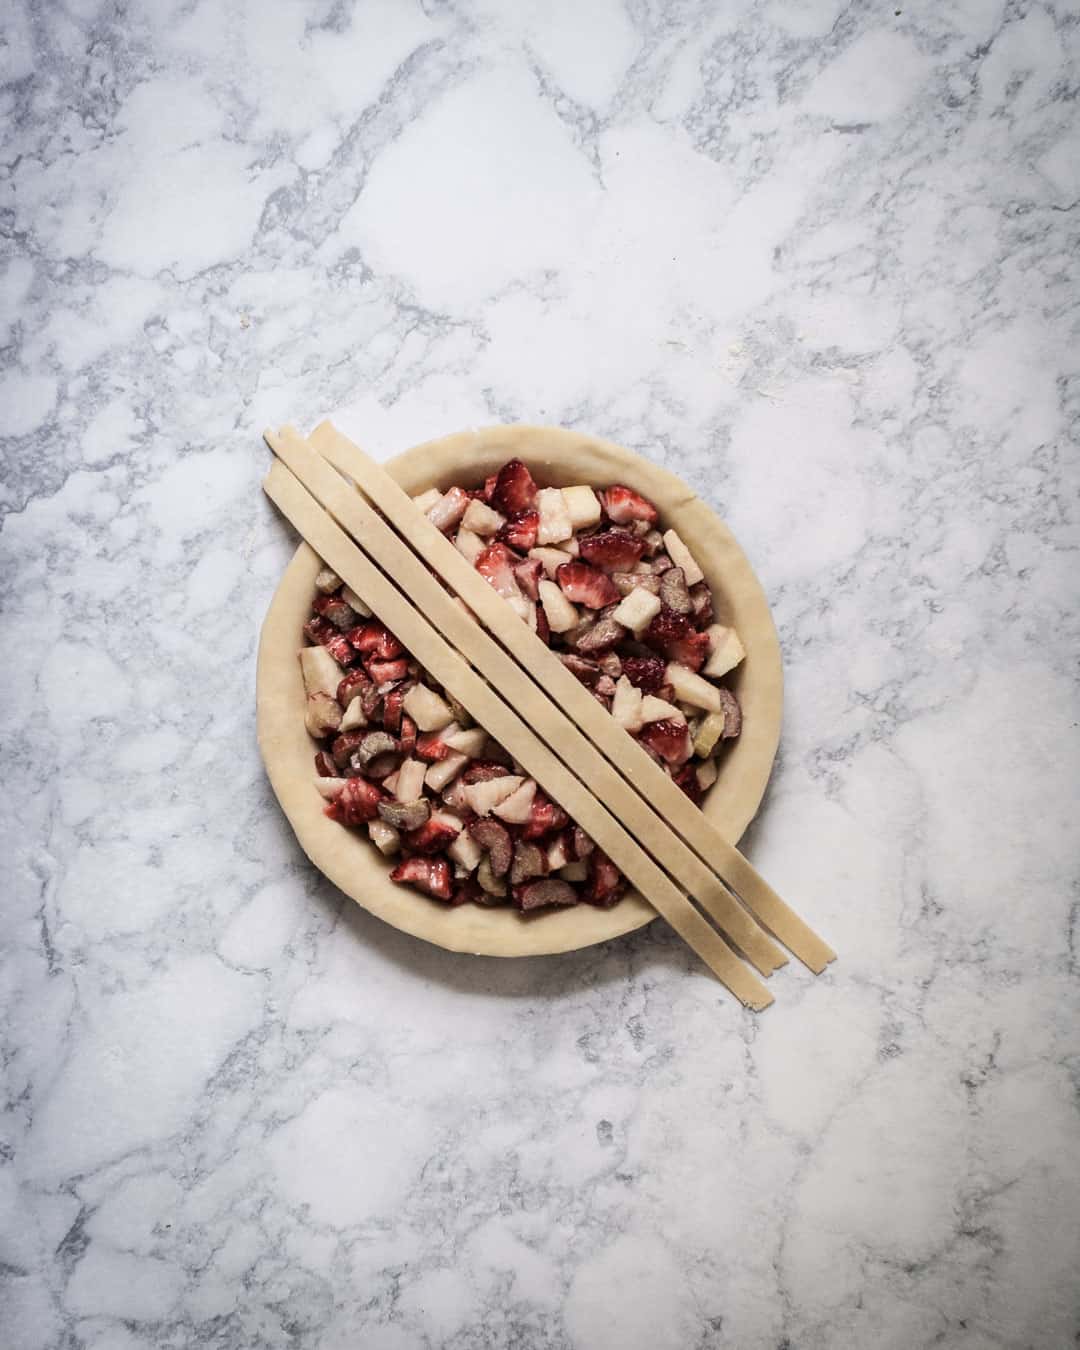
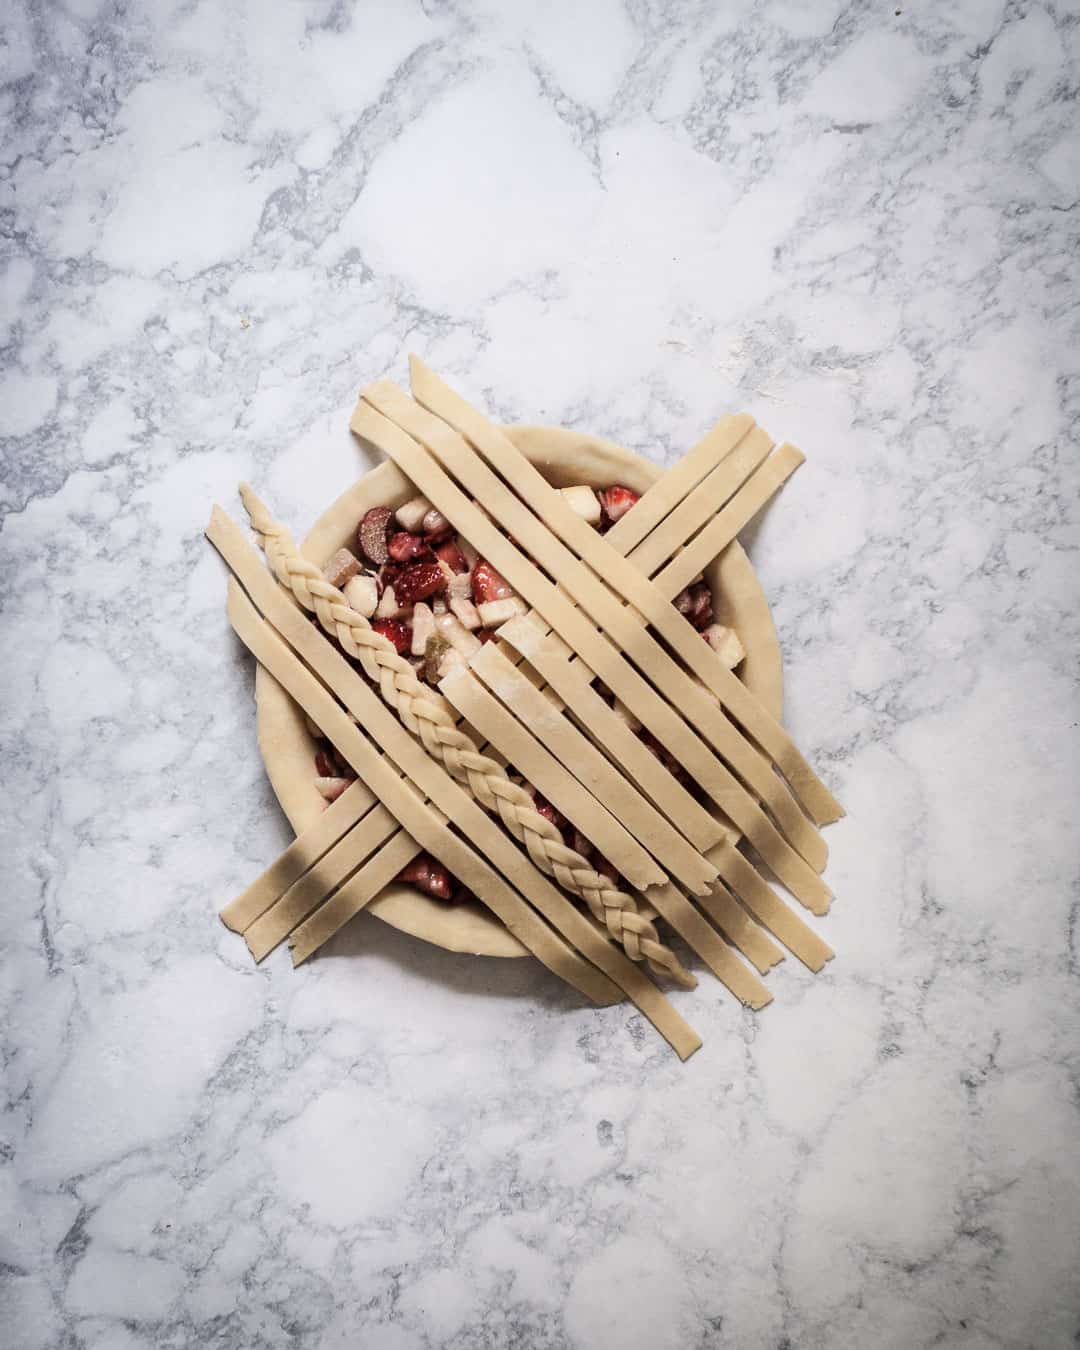
Remove the filled pie dish and the lattice strips from the fridge. Place three of the longest pie dough strips directly across the middle of the pie, leaving just enough space between each to see the pie filling underneath.
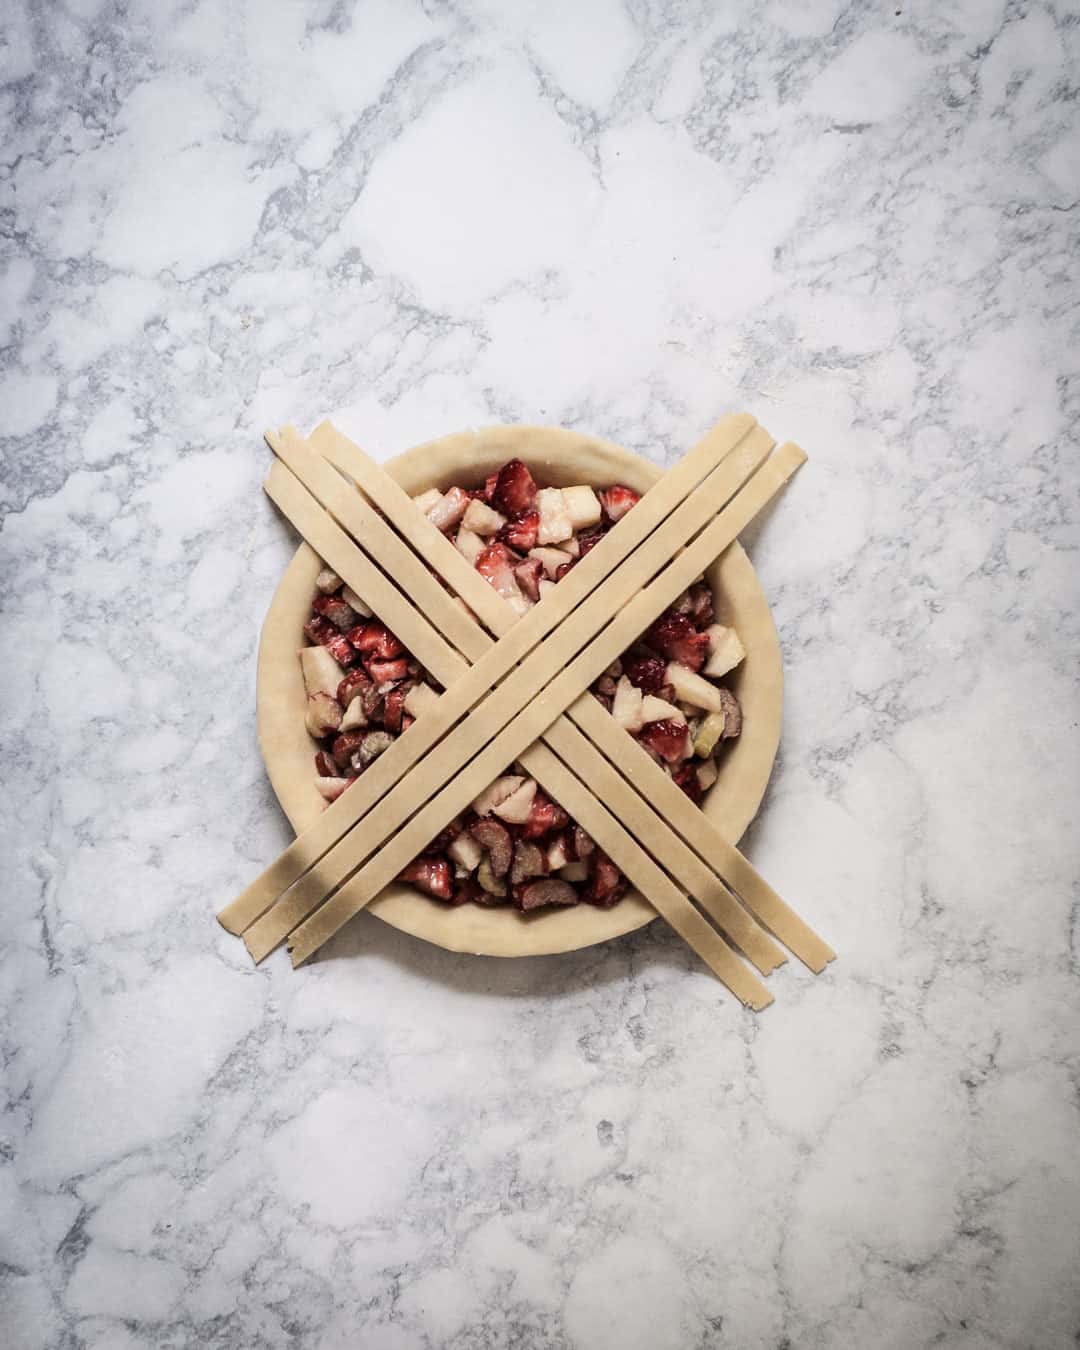
Repeat with the next three longest pie dough strips, placing them at a 90 degree angle on top of the first three strips, forming an X shape.
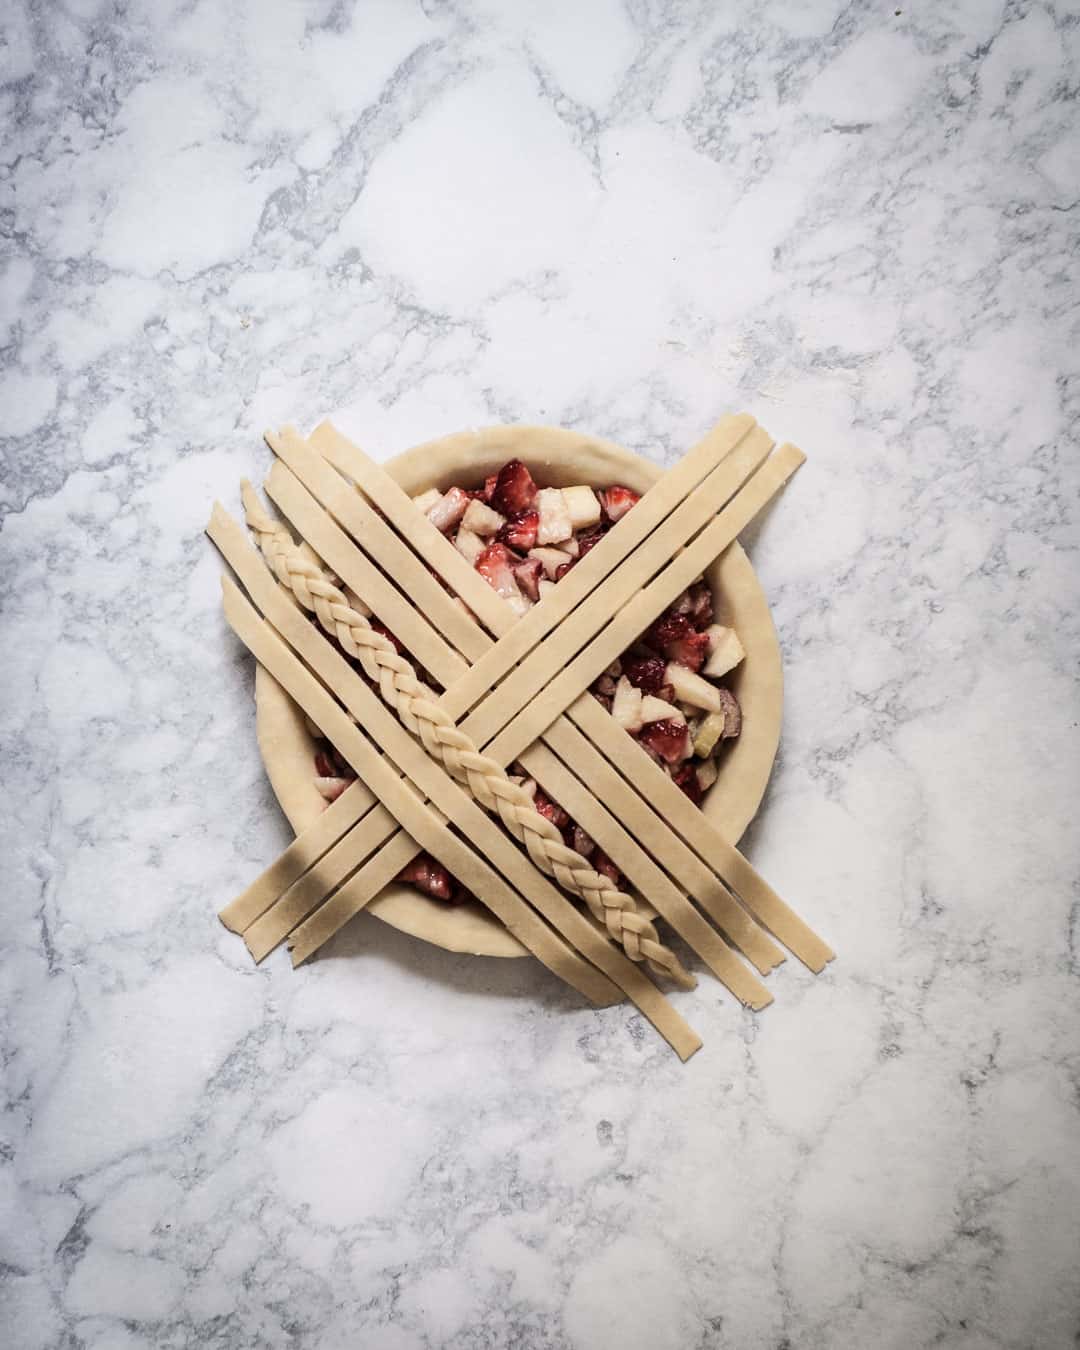
Place the braid and two other strips parallel to the left of the original three strips, leaving approximately a ¼ inch gap between the groupings to delineate the spacing slightly. *NOTE: If you want the braid to show more (see here for reference), use three plain strips at this step and save the braid for later on.
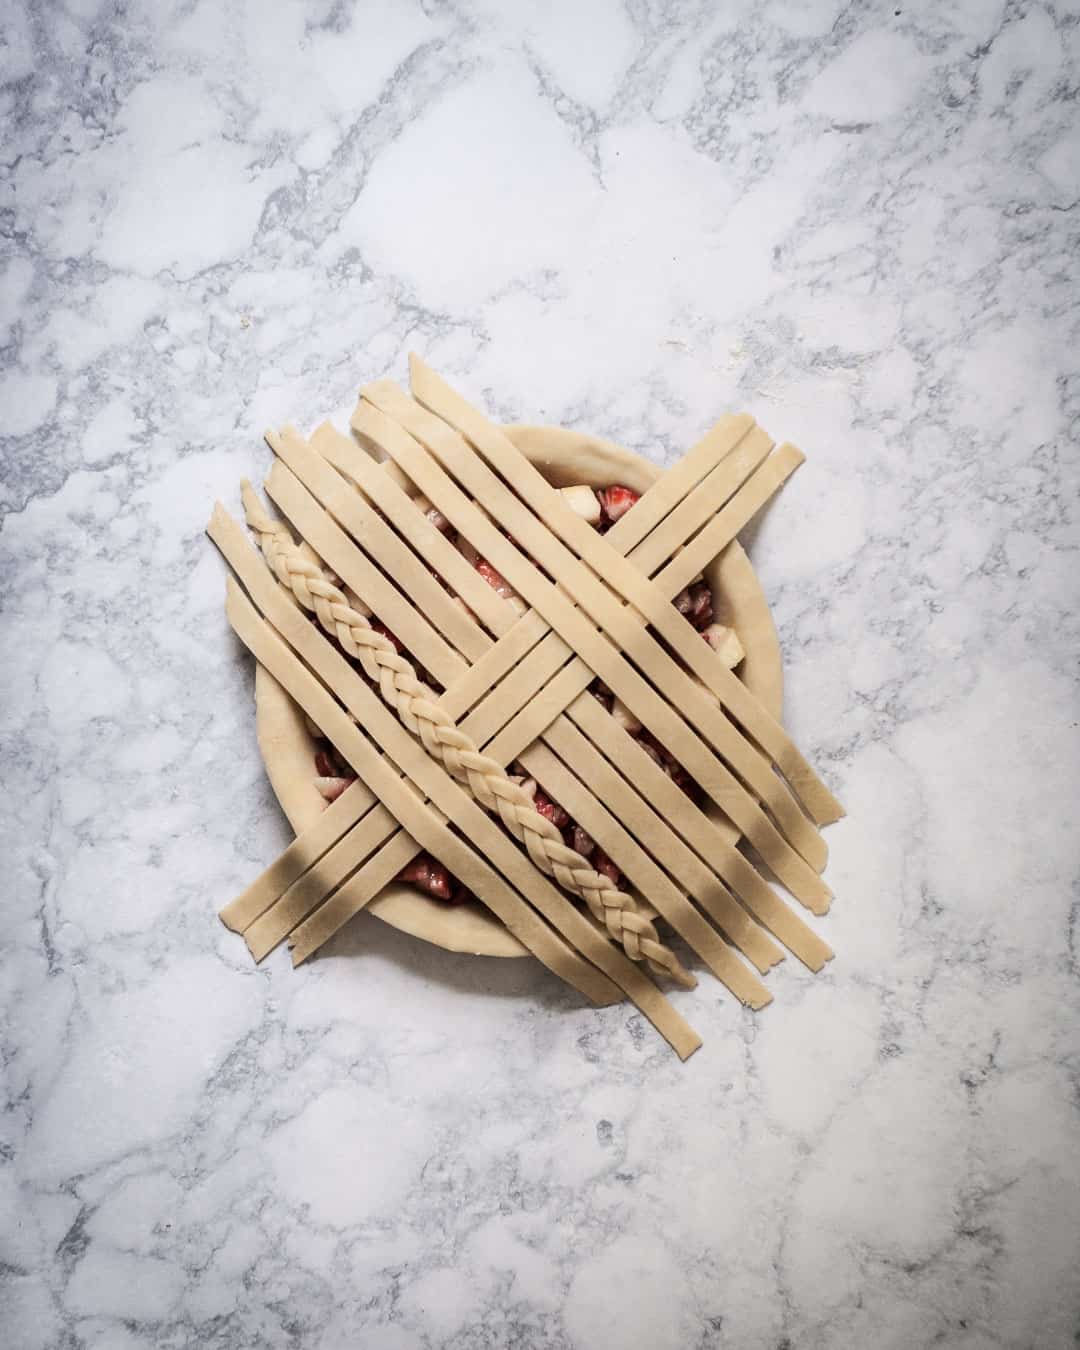
Place another three strips parallel to the right of the original three strips, leaving approximately a ¼ inch gap between the groupings to delineate the spacing slightly.
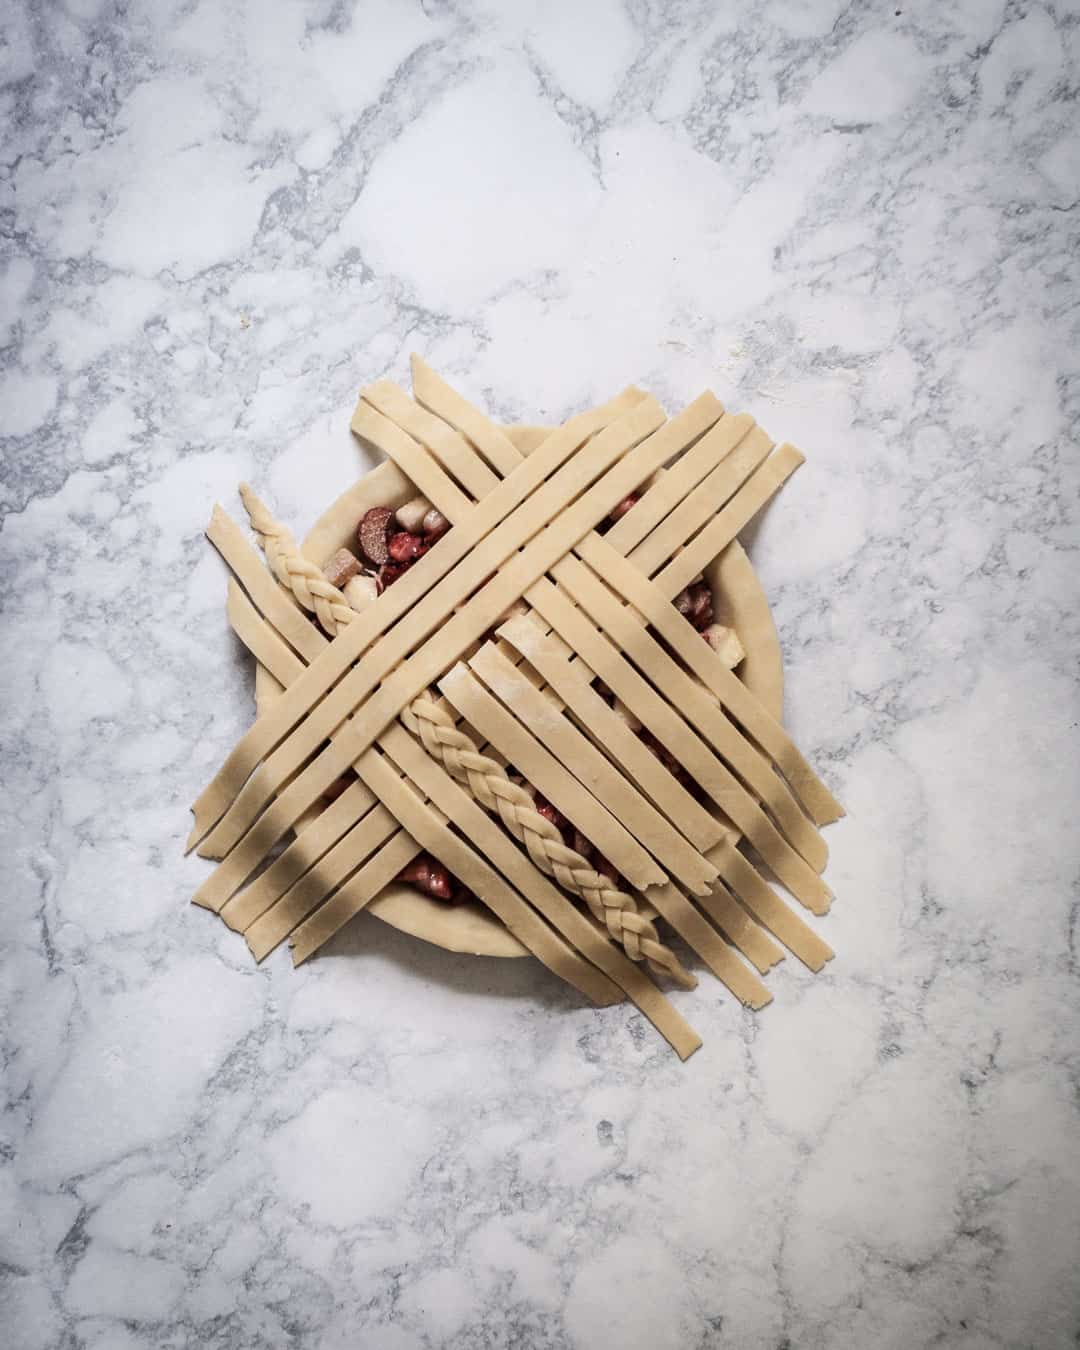
Carefully flip the top side of the middle three strips up to allow lattice strips to be placed at a perpendicular angle underneath.
Place three strips parallel to the original center three lattice strips.
Place the folded strips back up to cover the newly added upper lattice.
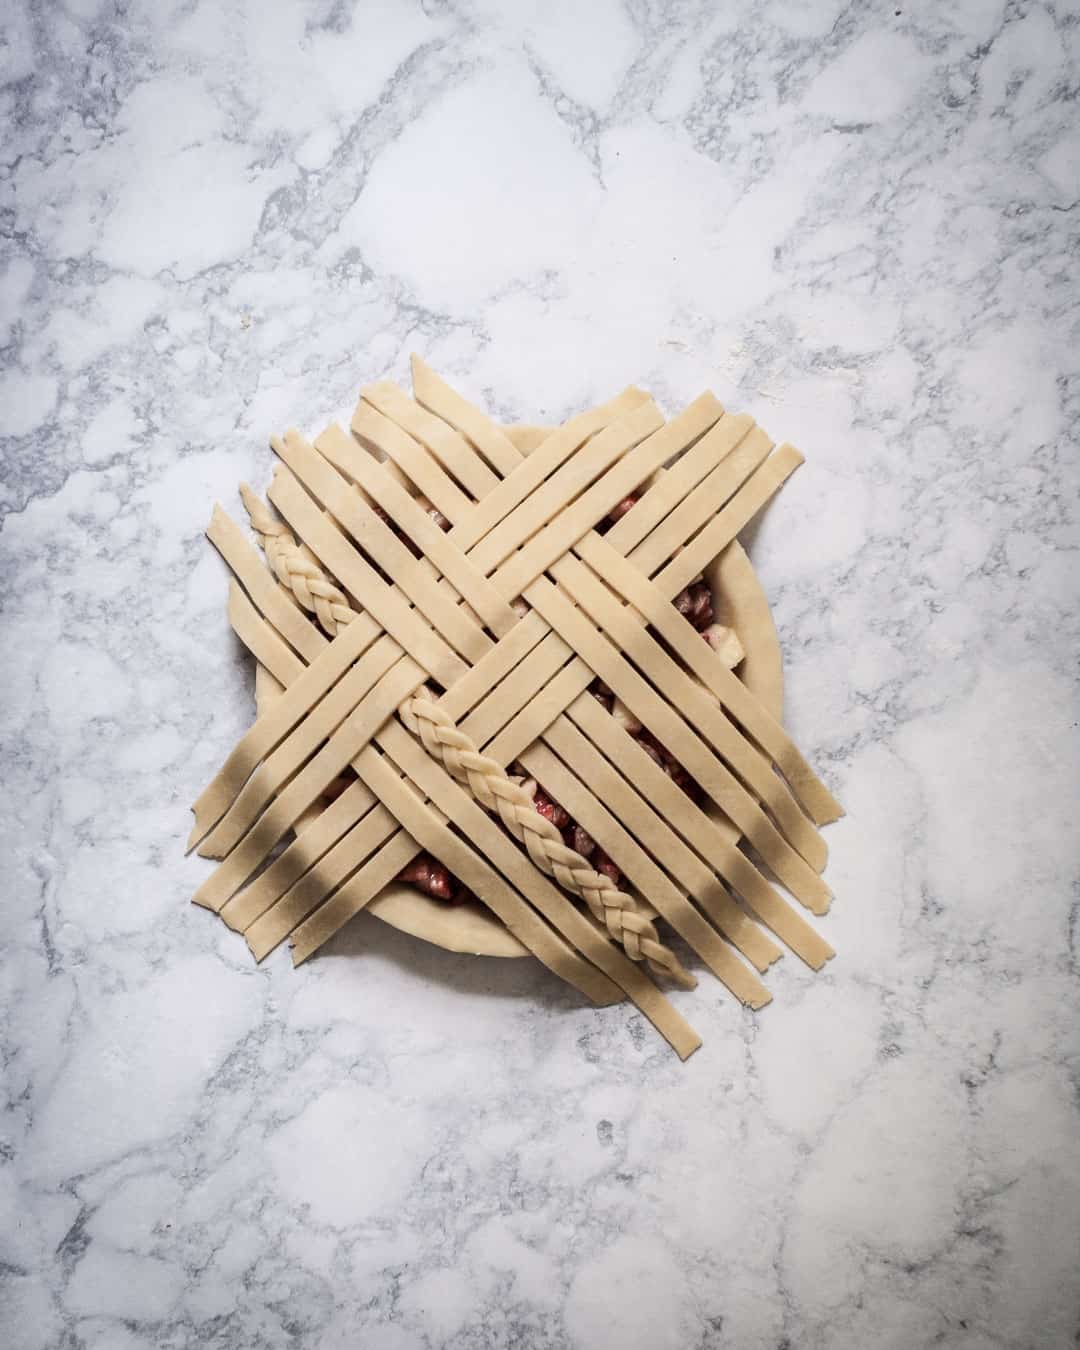
Carefully flip the bottom side of the middle three strips up to allow lattice strips to be placed at a perpendicular angle underneath.
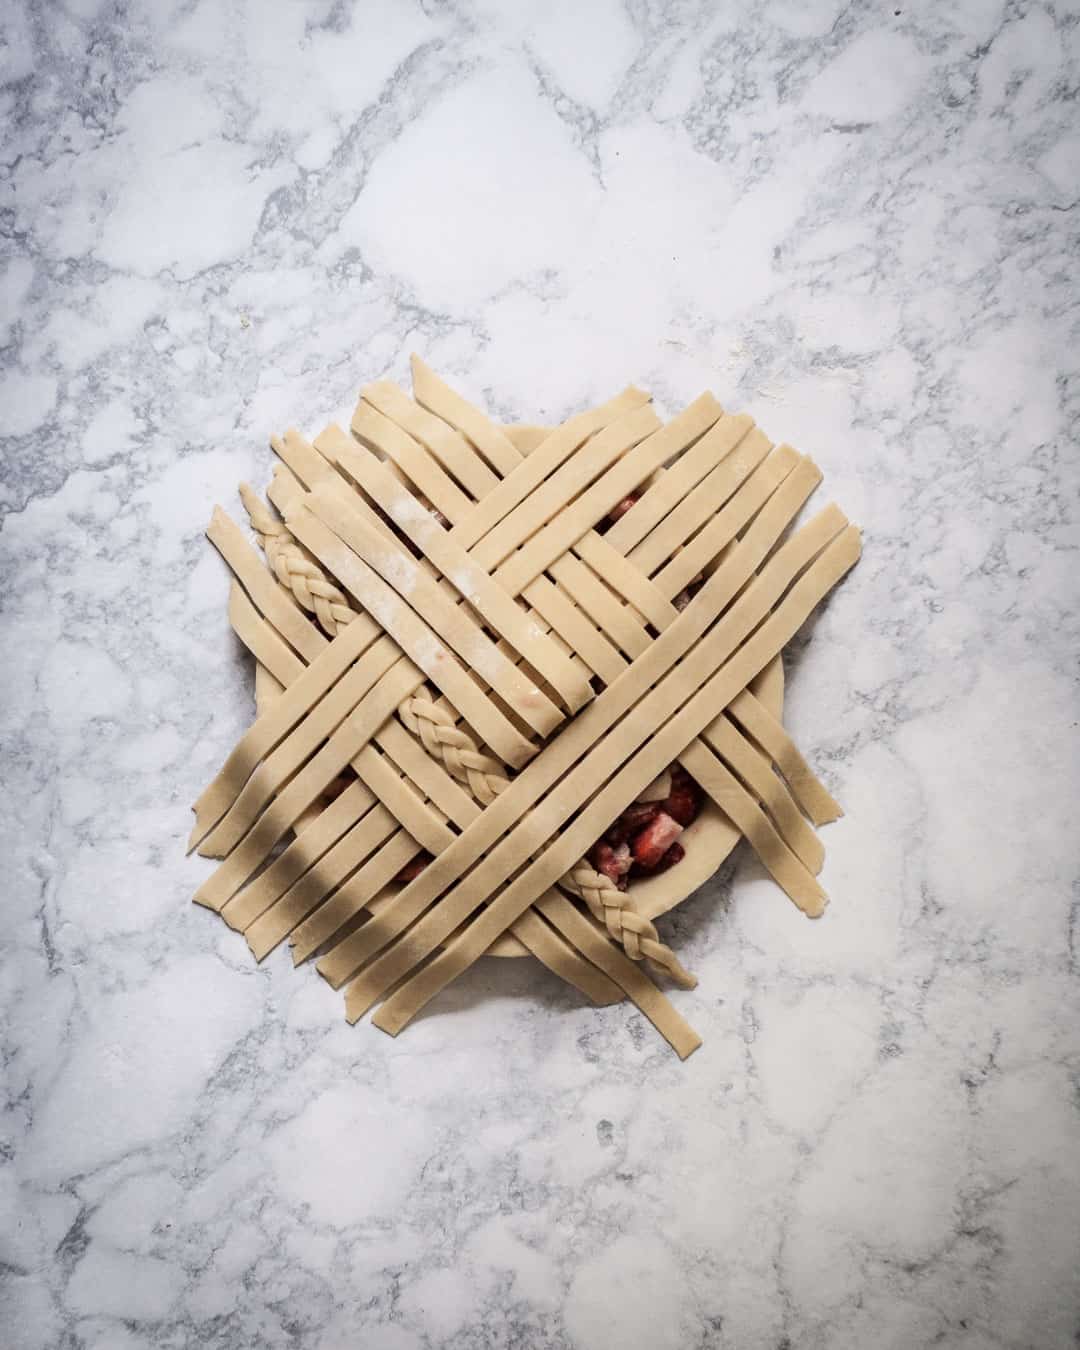
Place the last three lattice strips at bottom. *NOTE: If you want the braid to show more (see here for reference), place the braid at this step rather than earlier on.)
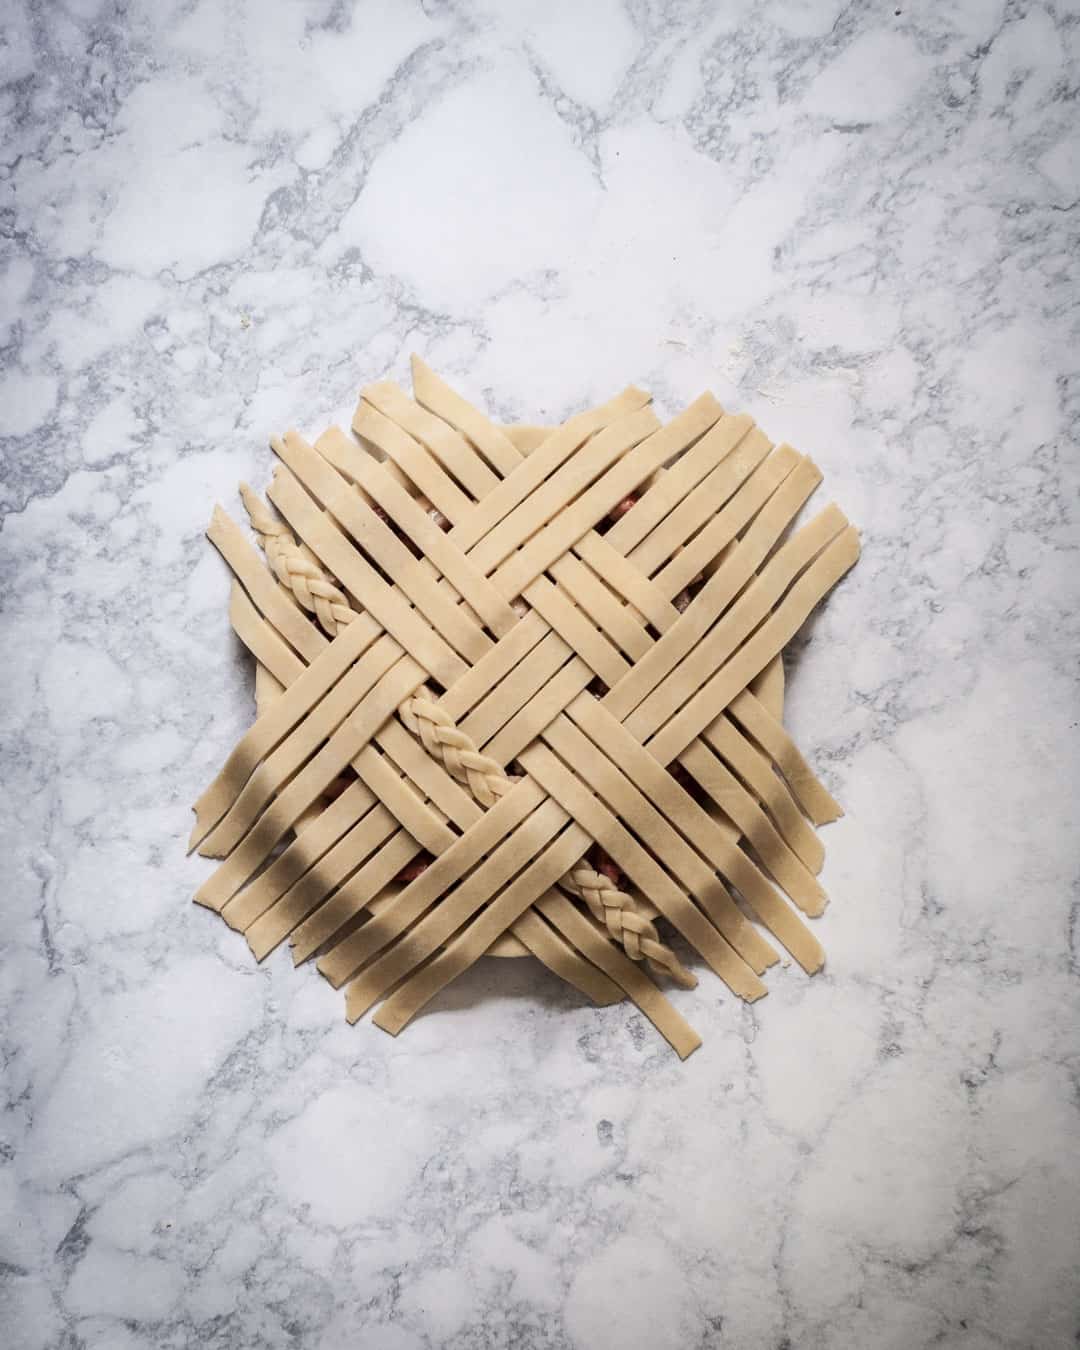
Fold back the middle three strips to cover the last of the lower strips.
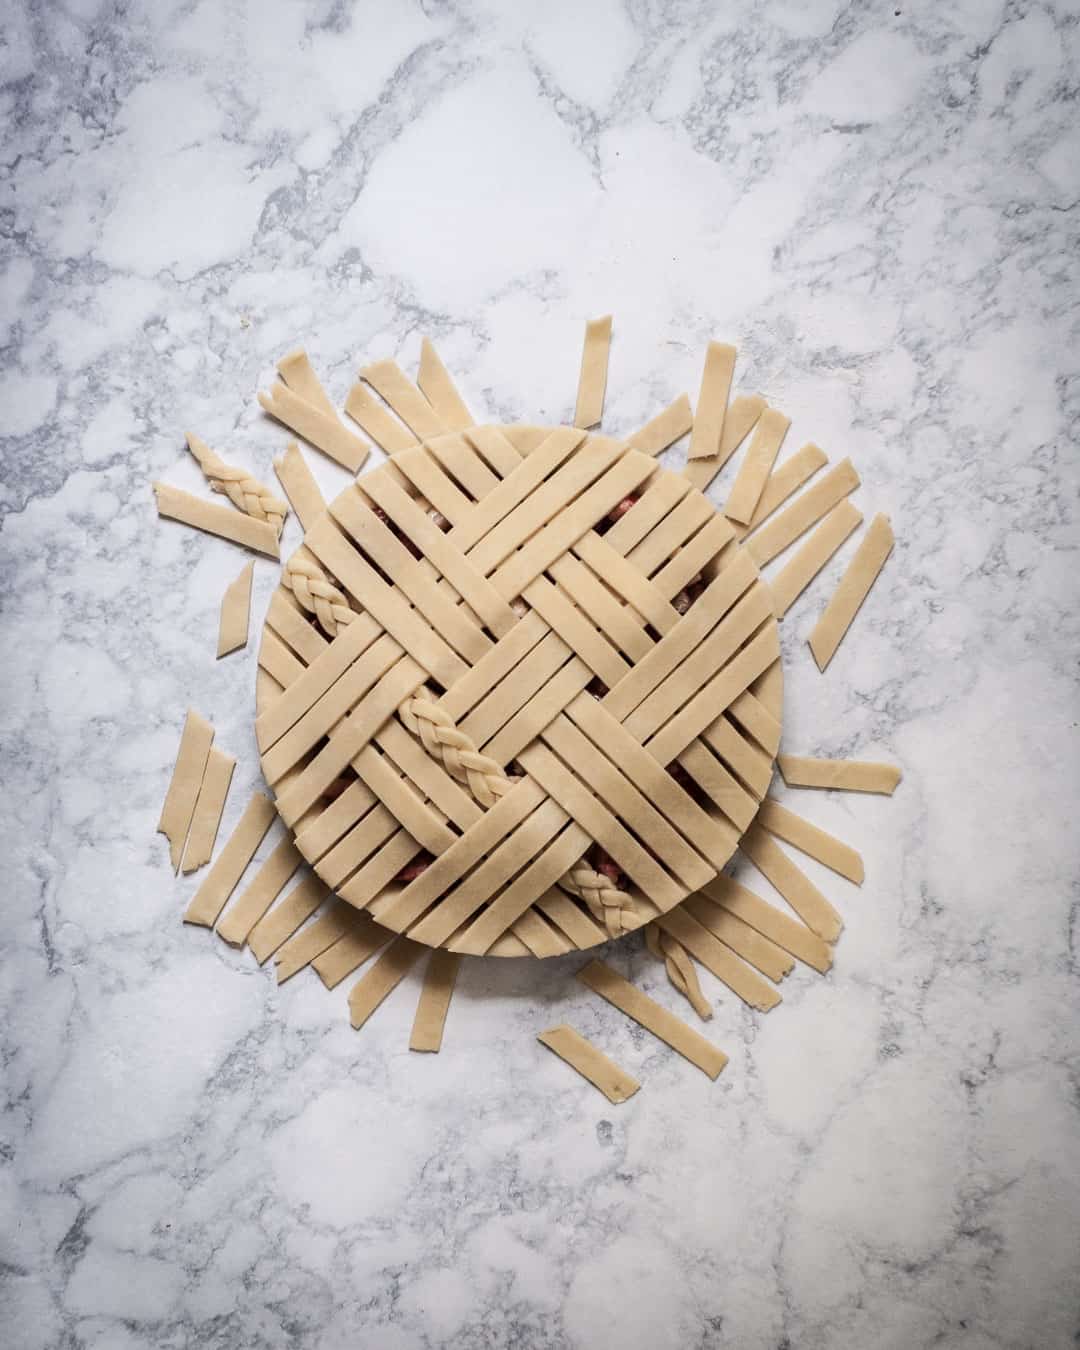
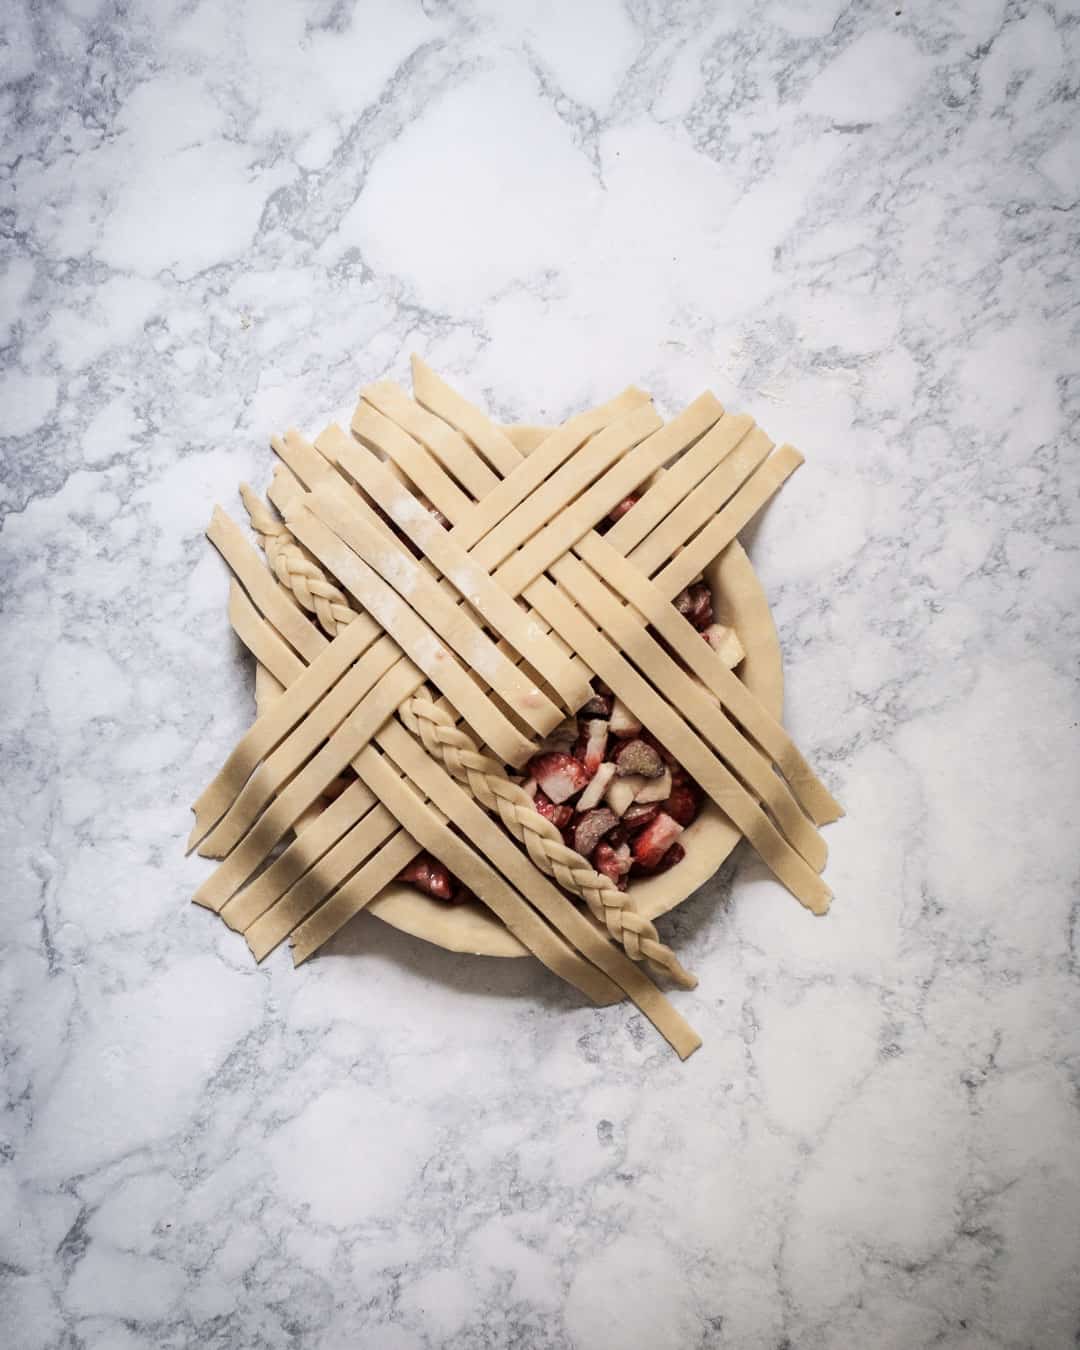
Using a knife, trim the excess lattice strips that are overhanging the pie dish. Using your fingers, gently press the lattice ends so that they adhere to the bottom crust.
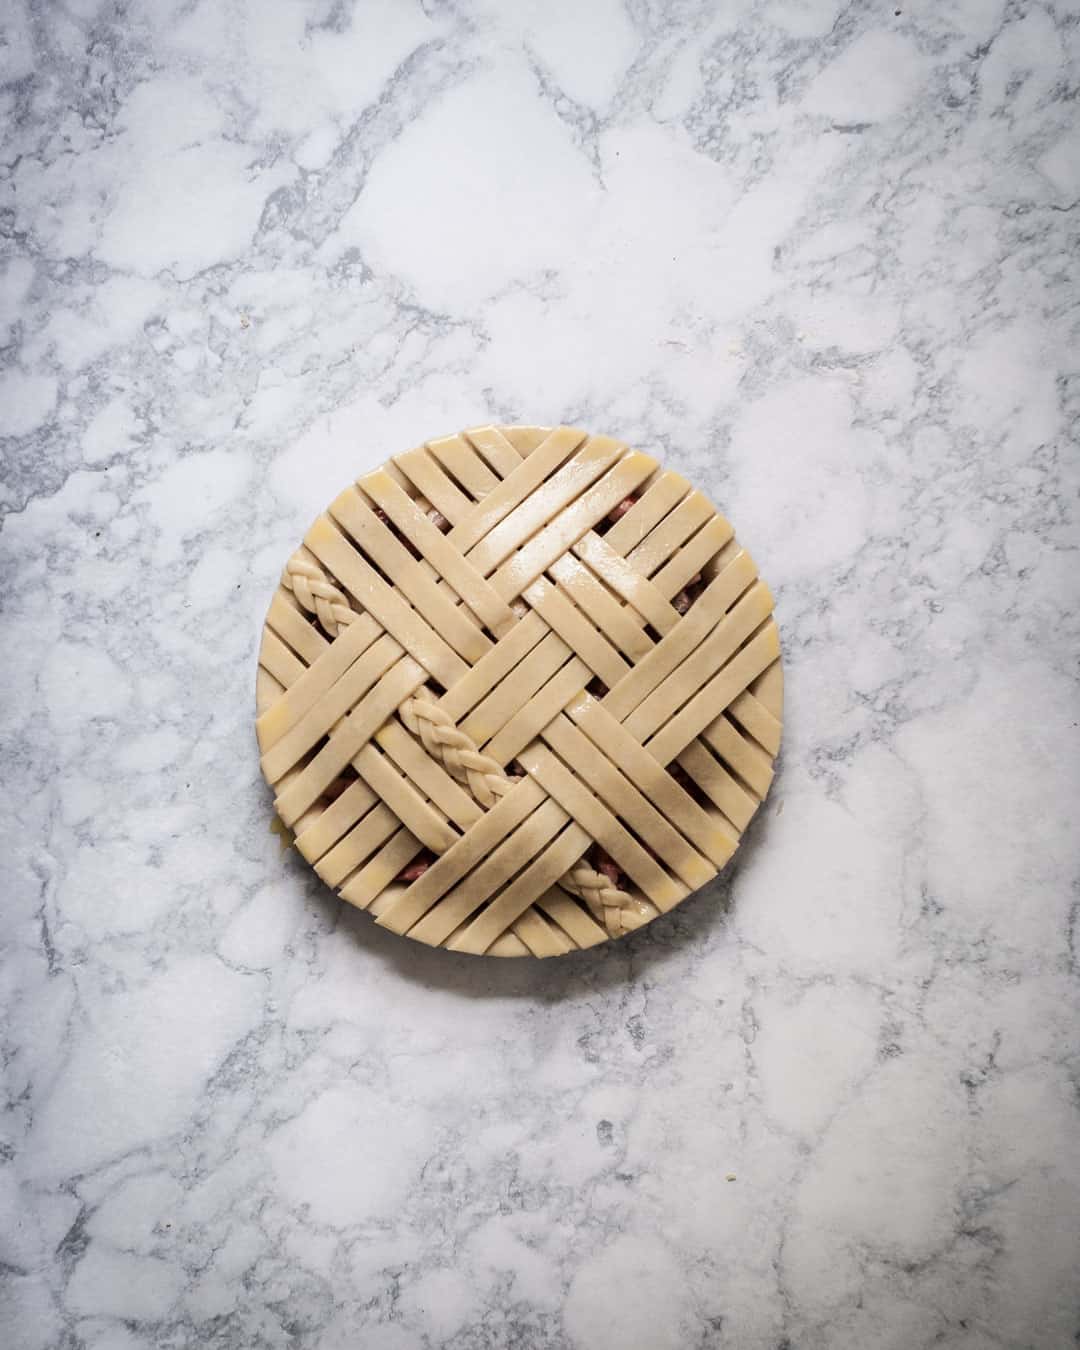
Brush an egg wash (I use a beaten egg with about 1 teaspoon of water) onto the entire crust. Sprinkle the crust with sugar. You can use granulated sugar, or for additional crunch and texture, try Turbinado (raw) sugar
Refrigerate pie for an additional 30 minutes while you preheat your oven. This will help the butter in the dough remain cool enough for your lattice to retain its shape during baking. Critically important after all of that work!
Bake according to your recipe.
Admire your beautiful lattice pie crust - you did it!
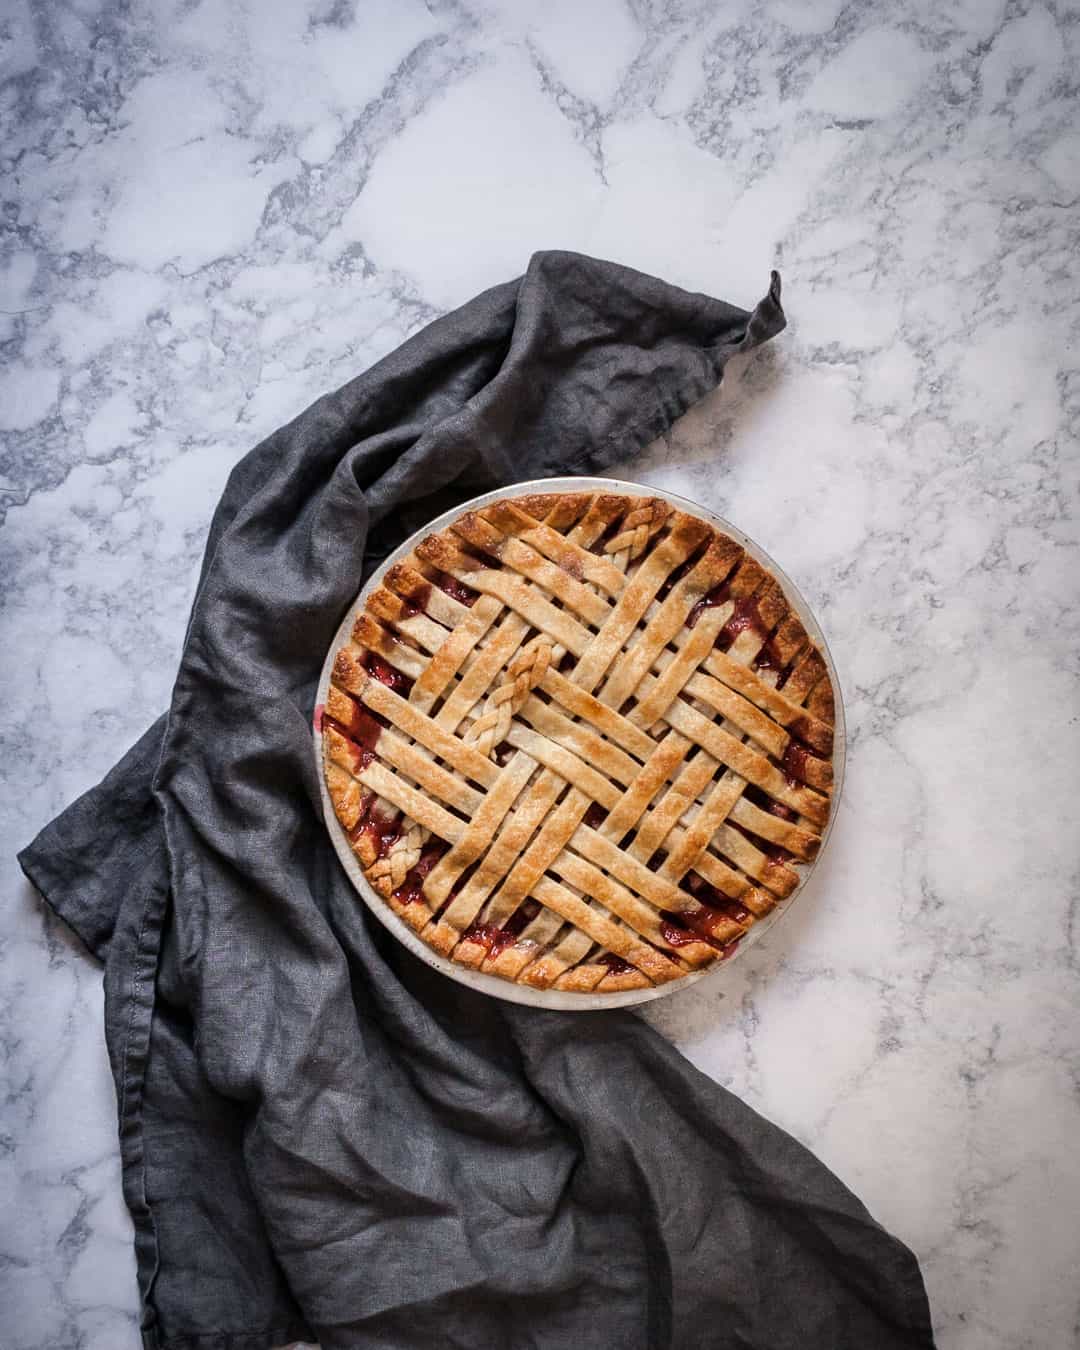
Lattice Braid Tip
After putting together this step by step on lattice pie crust making, I realized that I could have made one improvement not pictured in the photos above (you can see my preferred version in the photos for my rhubarb apple pie here.)
To show off the braid in the best way possible, it should be woven into the lattice pattern so that it is most prominent. This means the braid should be placed so that it is woven OVER-under-OVER, allowing the braid to be visible in two areas, covered in only one.
In order to achieve this, insert the braid in one of the last two groupings of strips, rather than towards the beginning. Either way, you'll have a wonderful end result; the second method just highlights the braid further.
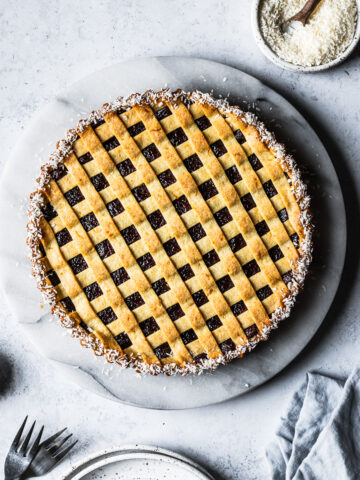
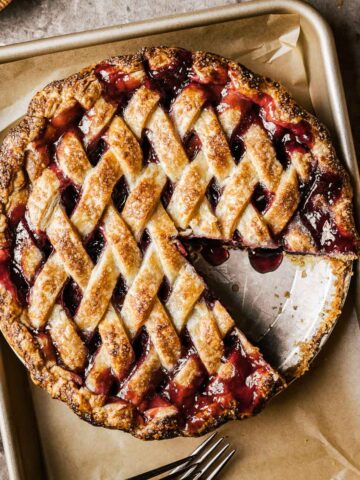
More Lattice Topped Pies
Give this lattice pie crust tutorial a try with one of the following recipes for lattice pies!

Comments
No Comments