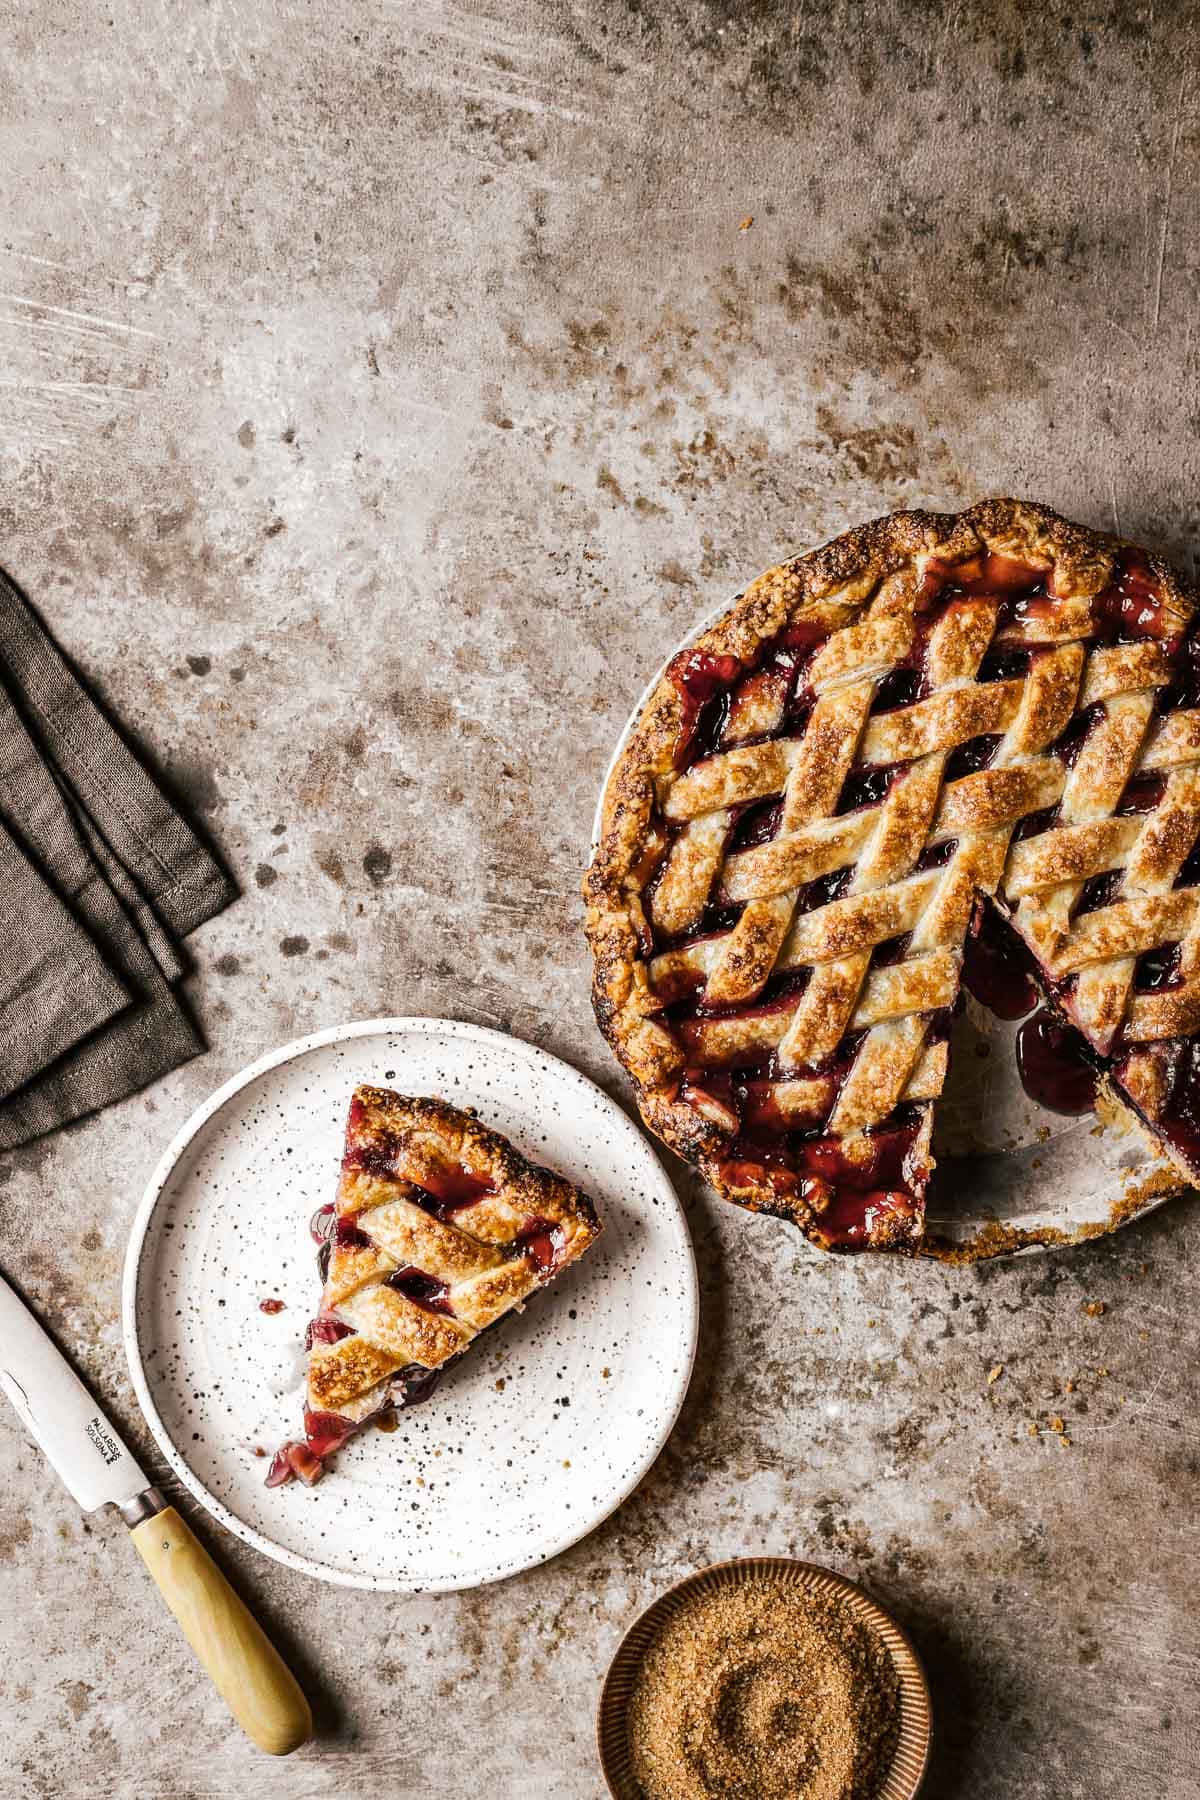
This cherry rhubarb pie features a sweet, jammy filling that brings out the bright, fresh flavors of rhubarb and cherries. Whether you choose tart sour cherries or sweeter varieties, the result is a beautifully balanced pie that lets the fruit shine.
It's made for fruit lovers who appreciate simple, vibrant flavors in every bite. The crust is exceptionally flaky and easy to make and handle, adding a delicious homemade touch. Using fresh or frozen fruit means you can enjoy this classic cherry and rhubarb taste any time of year.

Sour cherries are a fantastic fruit for pie-making, thanks to their unique combination of tart and sweet flavors. Their bright red color adds beautiful visual appeal, and their juicy, plump texture provides a satisfying bite.
They hold up well in baking, maintaining their shape and texture, and their distinct flavor pairs wonderfully with rhubarb and a variety of other fruits and spices.
Whether you choose tart sour cherries or sweeter varieties, the sugar in this recipe can be adjusted to balance the filling perfectly, creating a harmonious taste that lets the natural fruit flavors shine.
This recipe makes enough all-butter pie dough for both a bottom crust and a dramatic diamond lattice top.
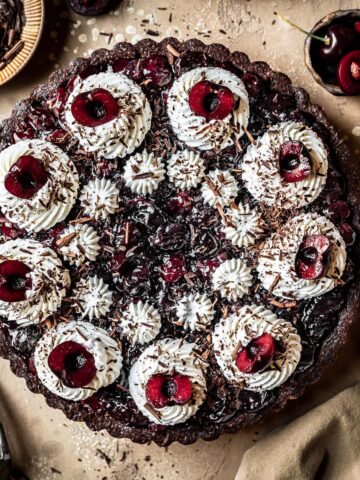
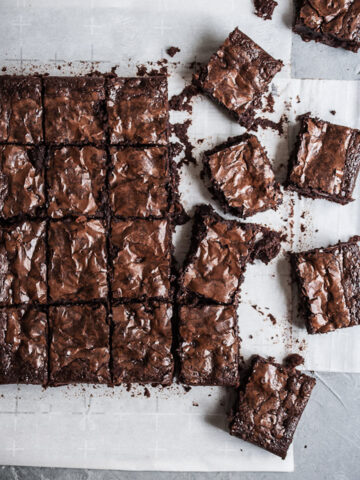
For more cherry desserts, check out this black-forest inspired sour cherry chocolate tart and these brownies with port wine soaked cherries.
And for more pies, try this rhubarb apple pie, rhubarb and strawberry slab pie, and this easy blueberry pie made with frozen blueberries.
Jump to:
Ingredients
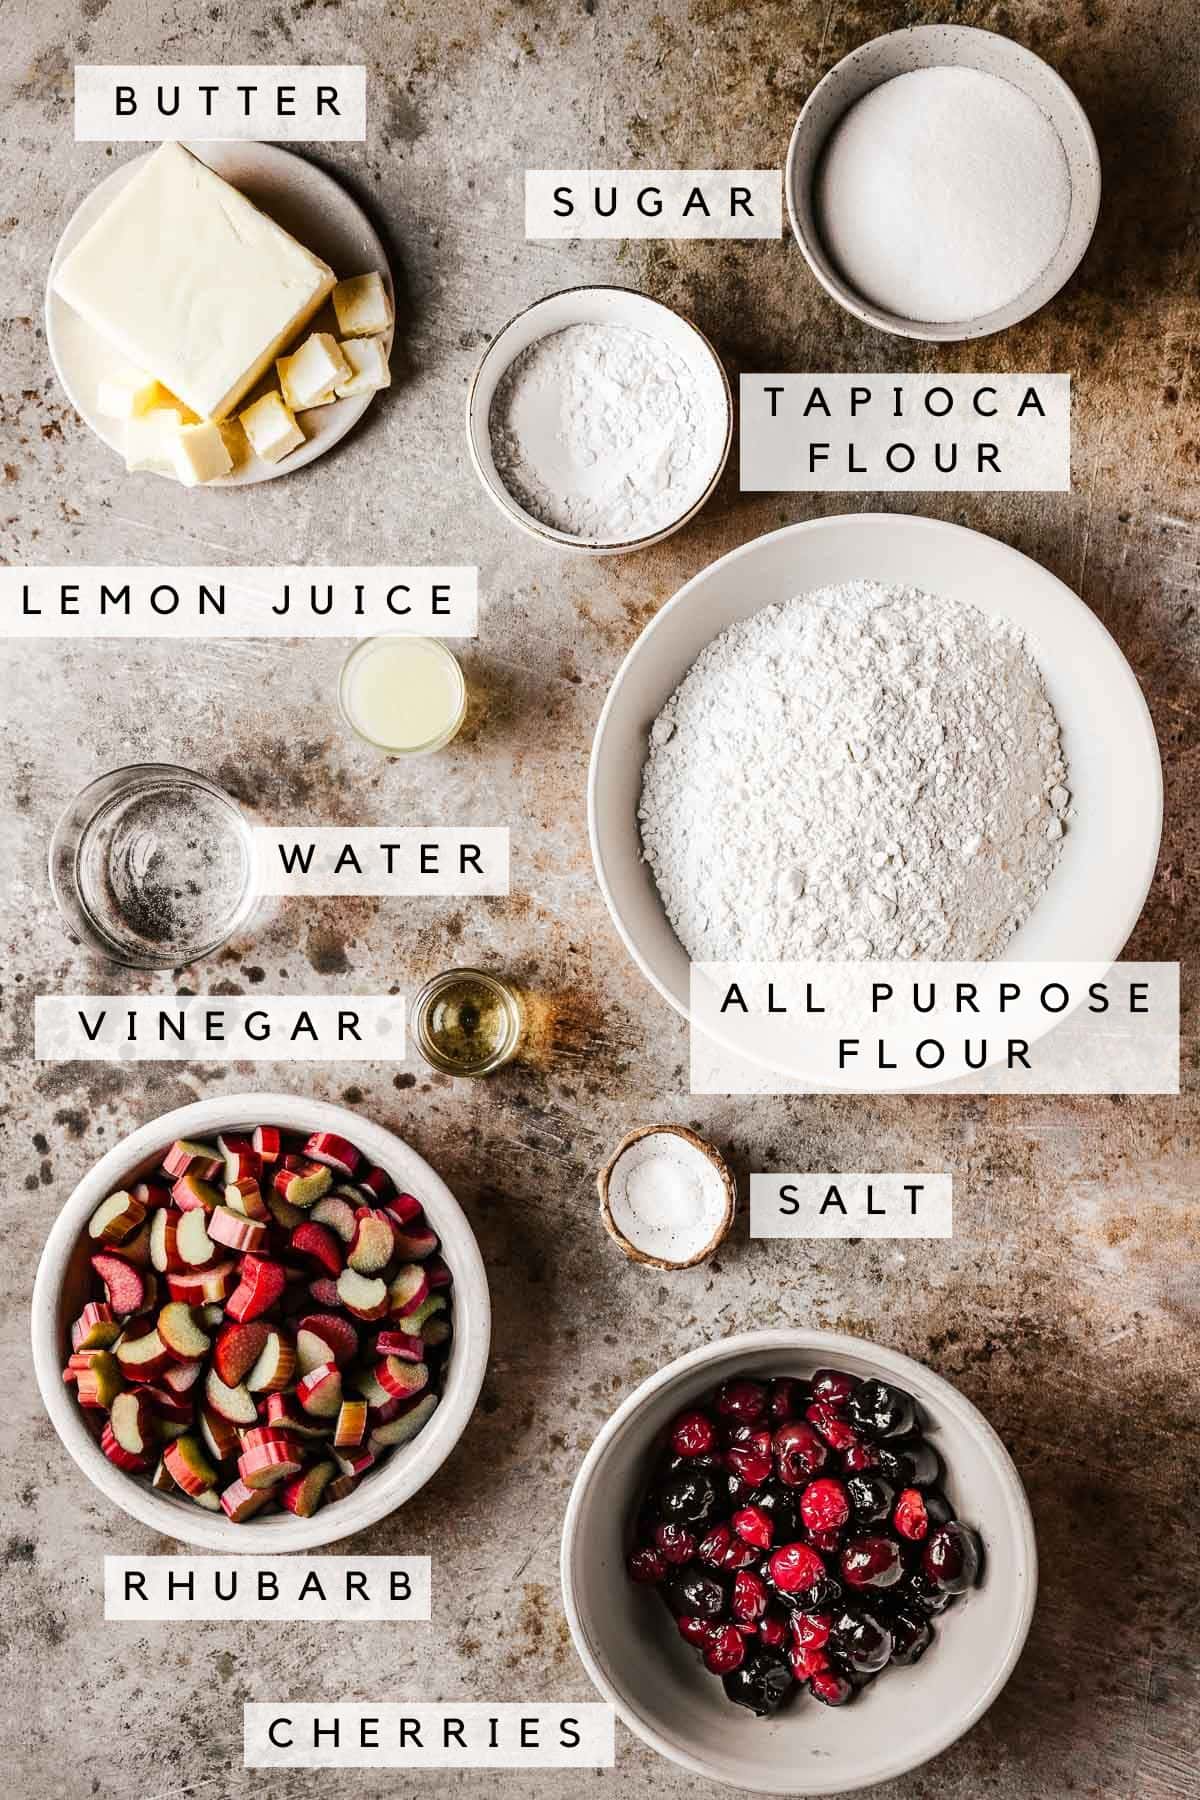
These notes will help you select and prepare the ingredients for this old-fashioned cherry rhubarb pie recipe.
See the recipe card below for the full list of ingredients and quantities.
Unsalted butter - Butter should be cubed into ½ inch (1.25 cm) pieces and well chilled before using. Choosing unsalted butter allows you to control the total salt in the recipe, since salt content varies between brands of salted butter.
Turbinado sugar - Before baking, the unbaked pie is brushed with egg wash and sprinkled with golden turbinado sugar (raw sugar). This adds a delightful crispy texture and a touch of sweetness to the crust.
Cherries - This recipe works well with sour cherries, sweet cherries, or a mix of both. If your cherries are very sweet, reduce the sugar in the filling to 150 grams (¾ cup). Use fresh or frozen fruit. For frozen cherries, defrost and drain any excess juice before using.
Rhubarb - You can use fresh or frozen rhubarb, diced into roughly ¼ inch pieces. If using frozen rhubarb, defrost and drain any excess liquid to prevent a watery filling.
Tapioca flour - Using tapioca flour (tapioca starch) as the thickener gives the filling a luscious, jammy consistency without any cloudiness or floury aftertaste.
Tapioca flour is made from the cassava root, native to South America. When shopping, check labels carefully to ensure your tapioca flour is sourced from cassava, not sago (from the sago palm), which can produce less desirable results.
Substitution: You can substitute tapioca flour with cornstarch (about 20 grams or just under 3 Tablespoons). Keep in mind that cornstarch may cause the filling to become cloudy when it thickens.
Instructions
Learn how to make this sour cherry and rhubarb pie! These photos provide visual cues. Find the detailed instructions in the recipe card.
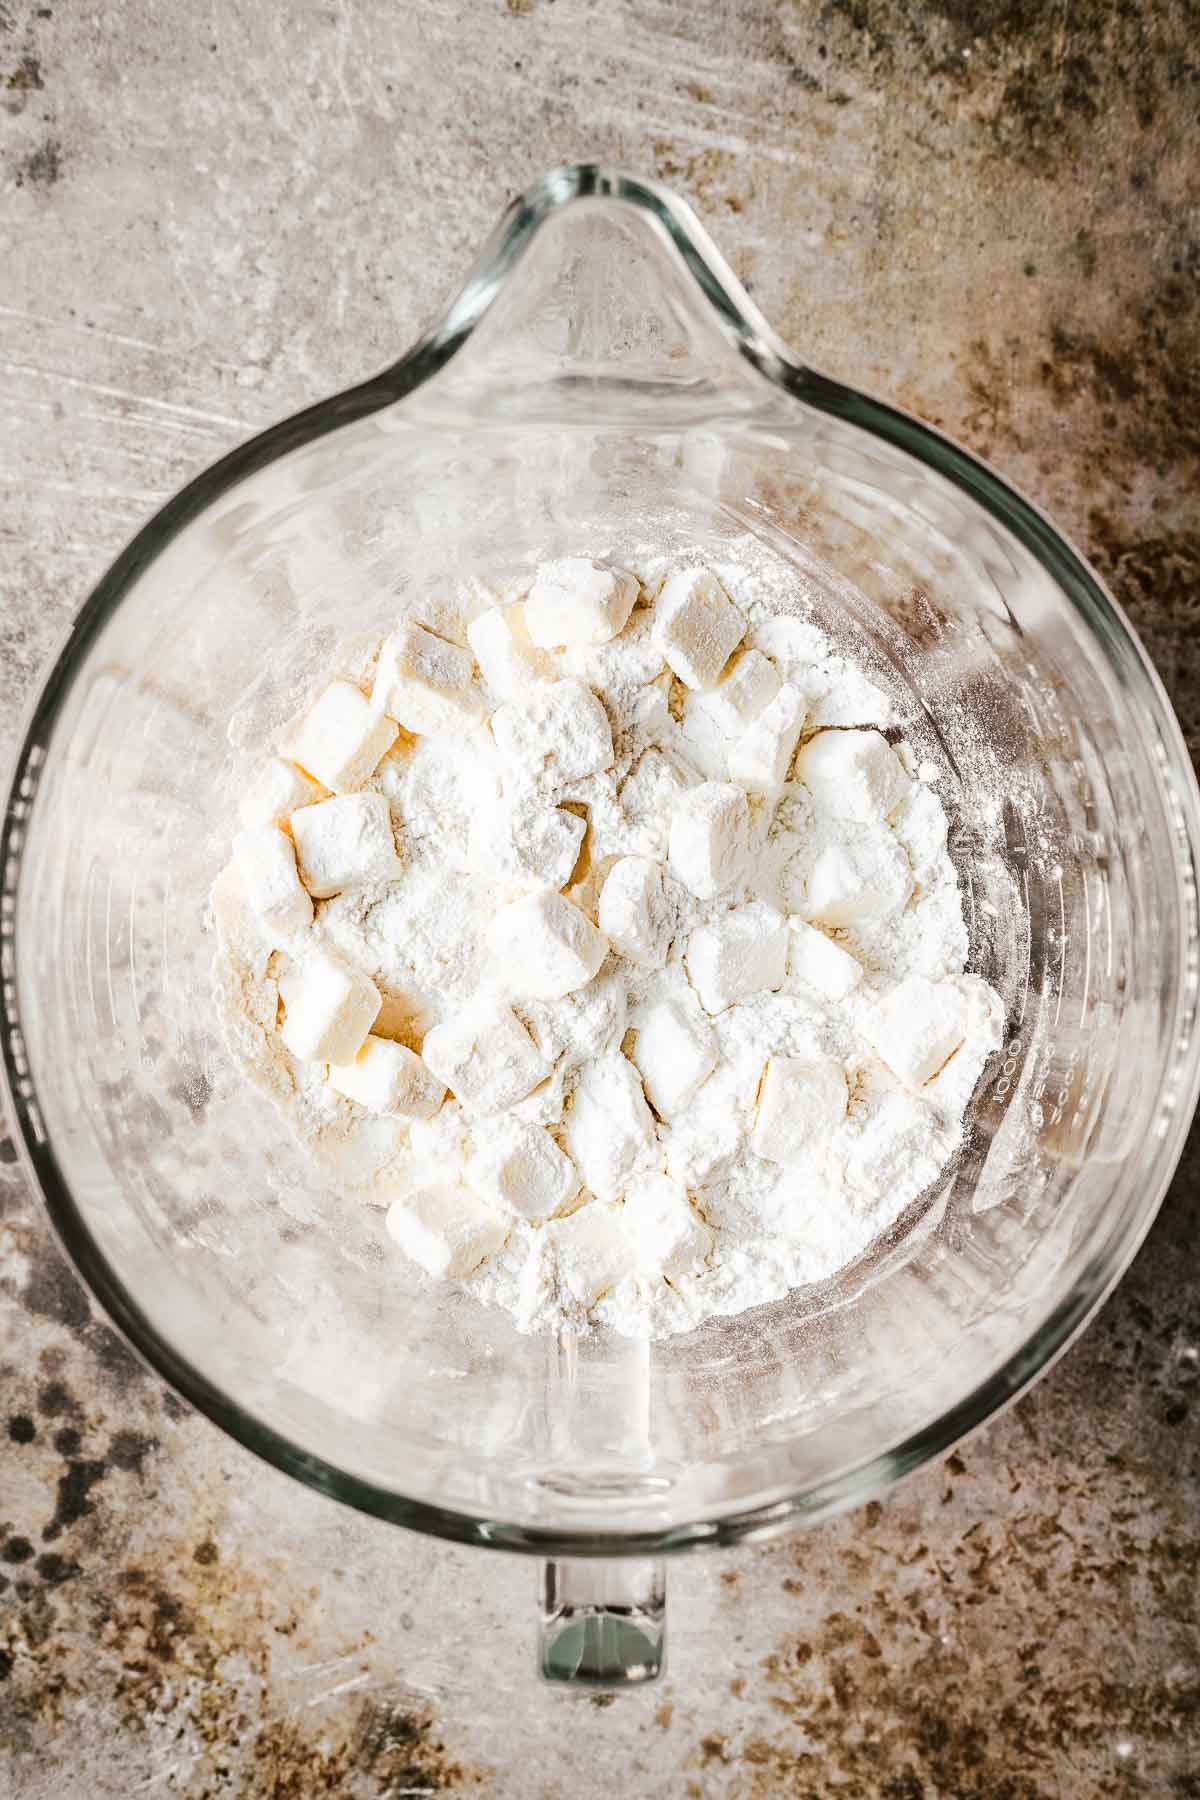
Add the flour and salt to a large mixing bowl. Add the chilled butter cubes and toss to coat them with the flour.
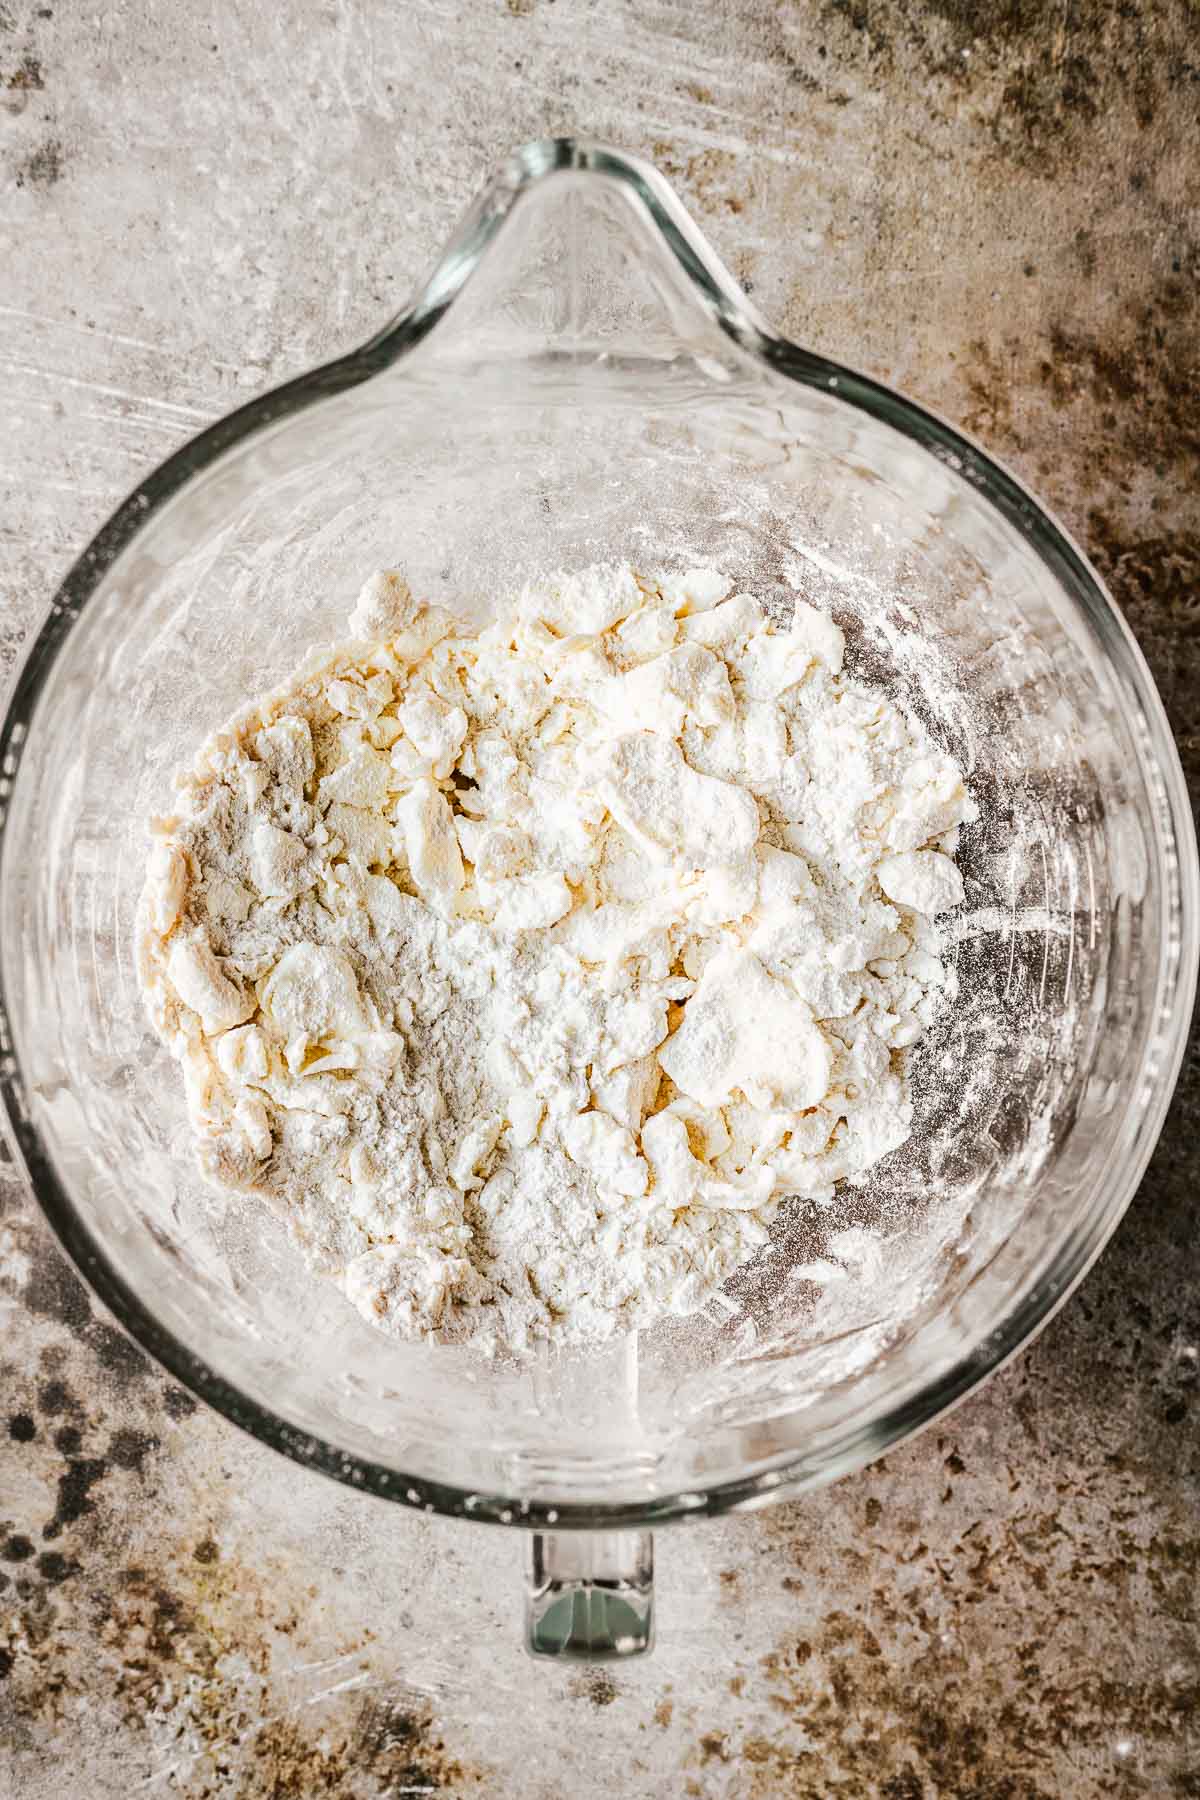
Using your fingers, gently squeeze each cube of butter to flatten it. Continue tossing the butter with the four mixture to ensure each piece is well coated.
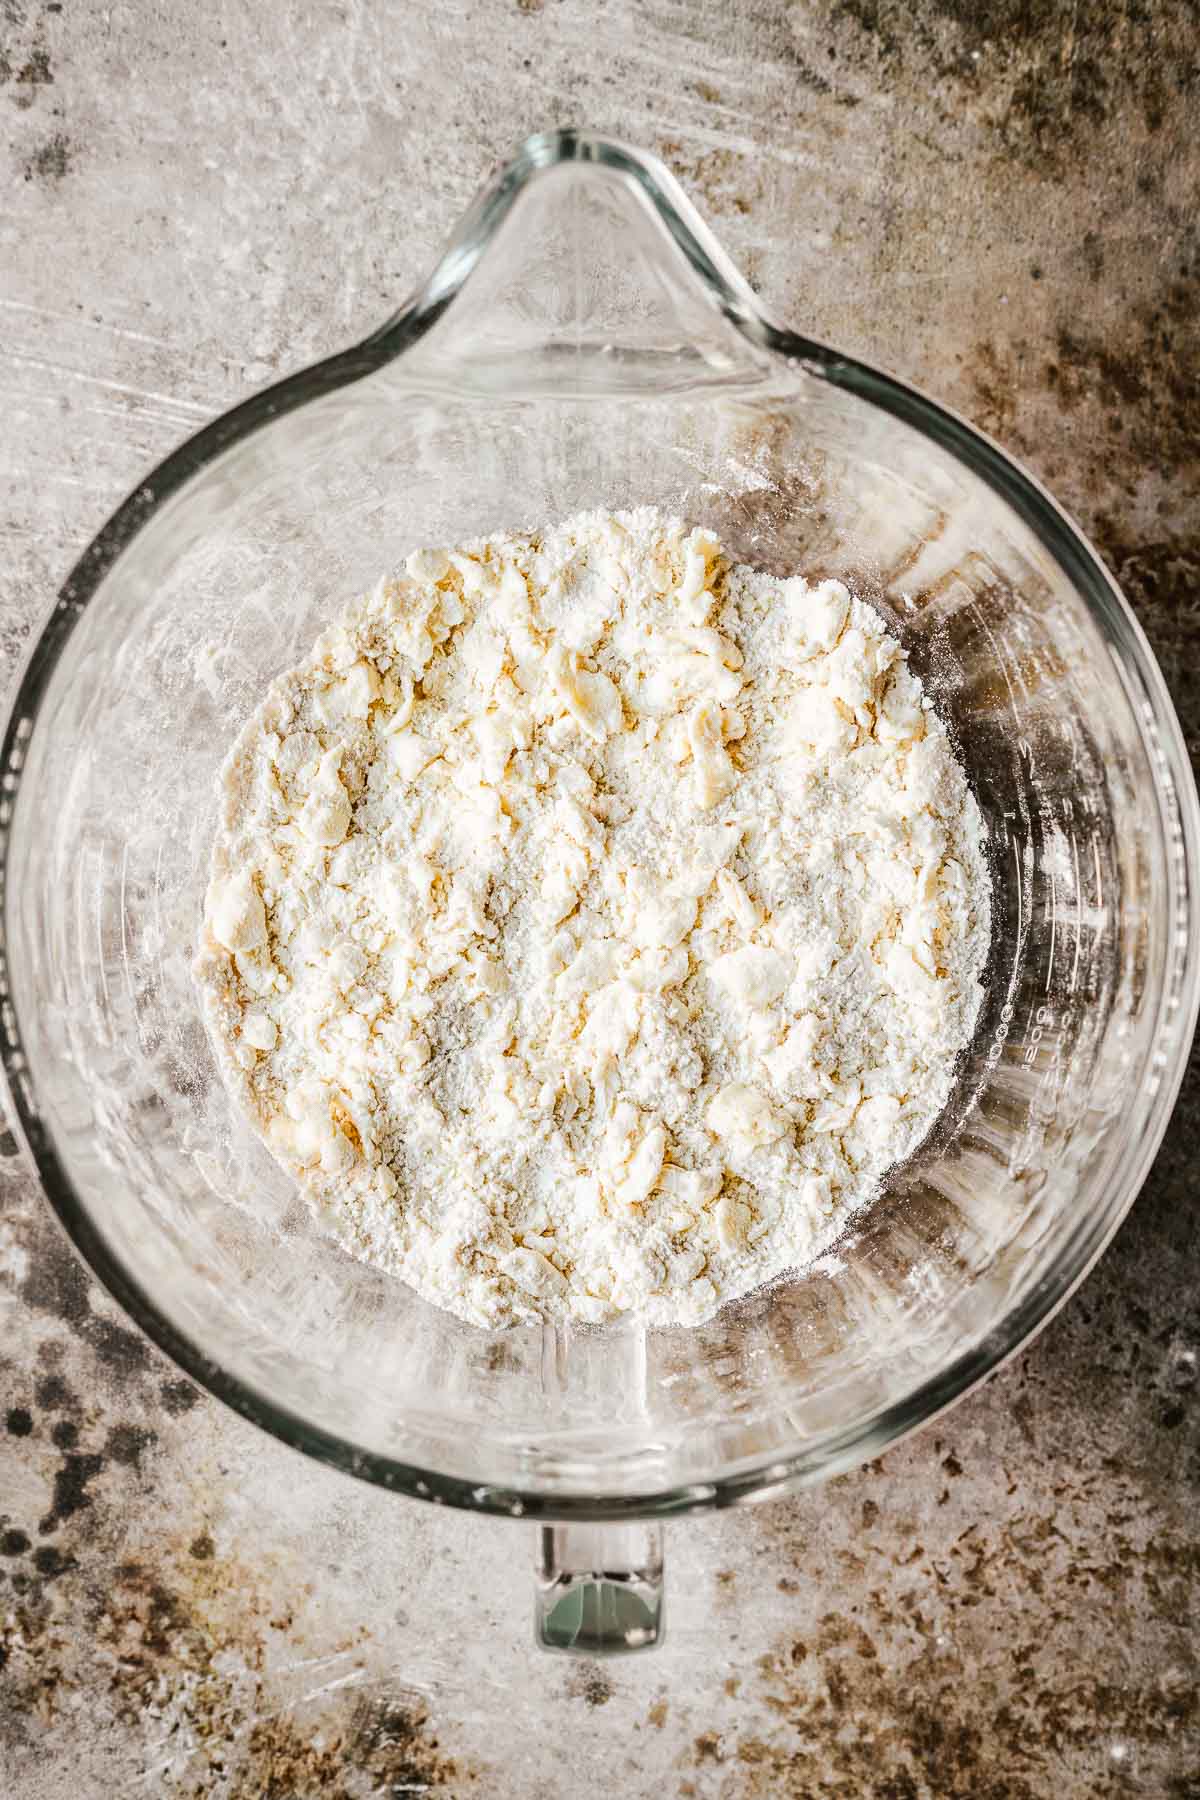
Cut the butter into the flour mixture, using your hands or a pastry blender, until the butter pieces are flattish and about the size of pecans.
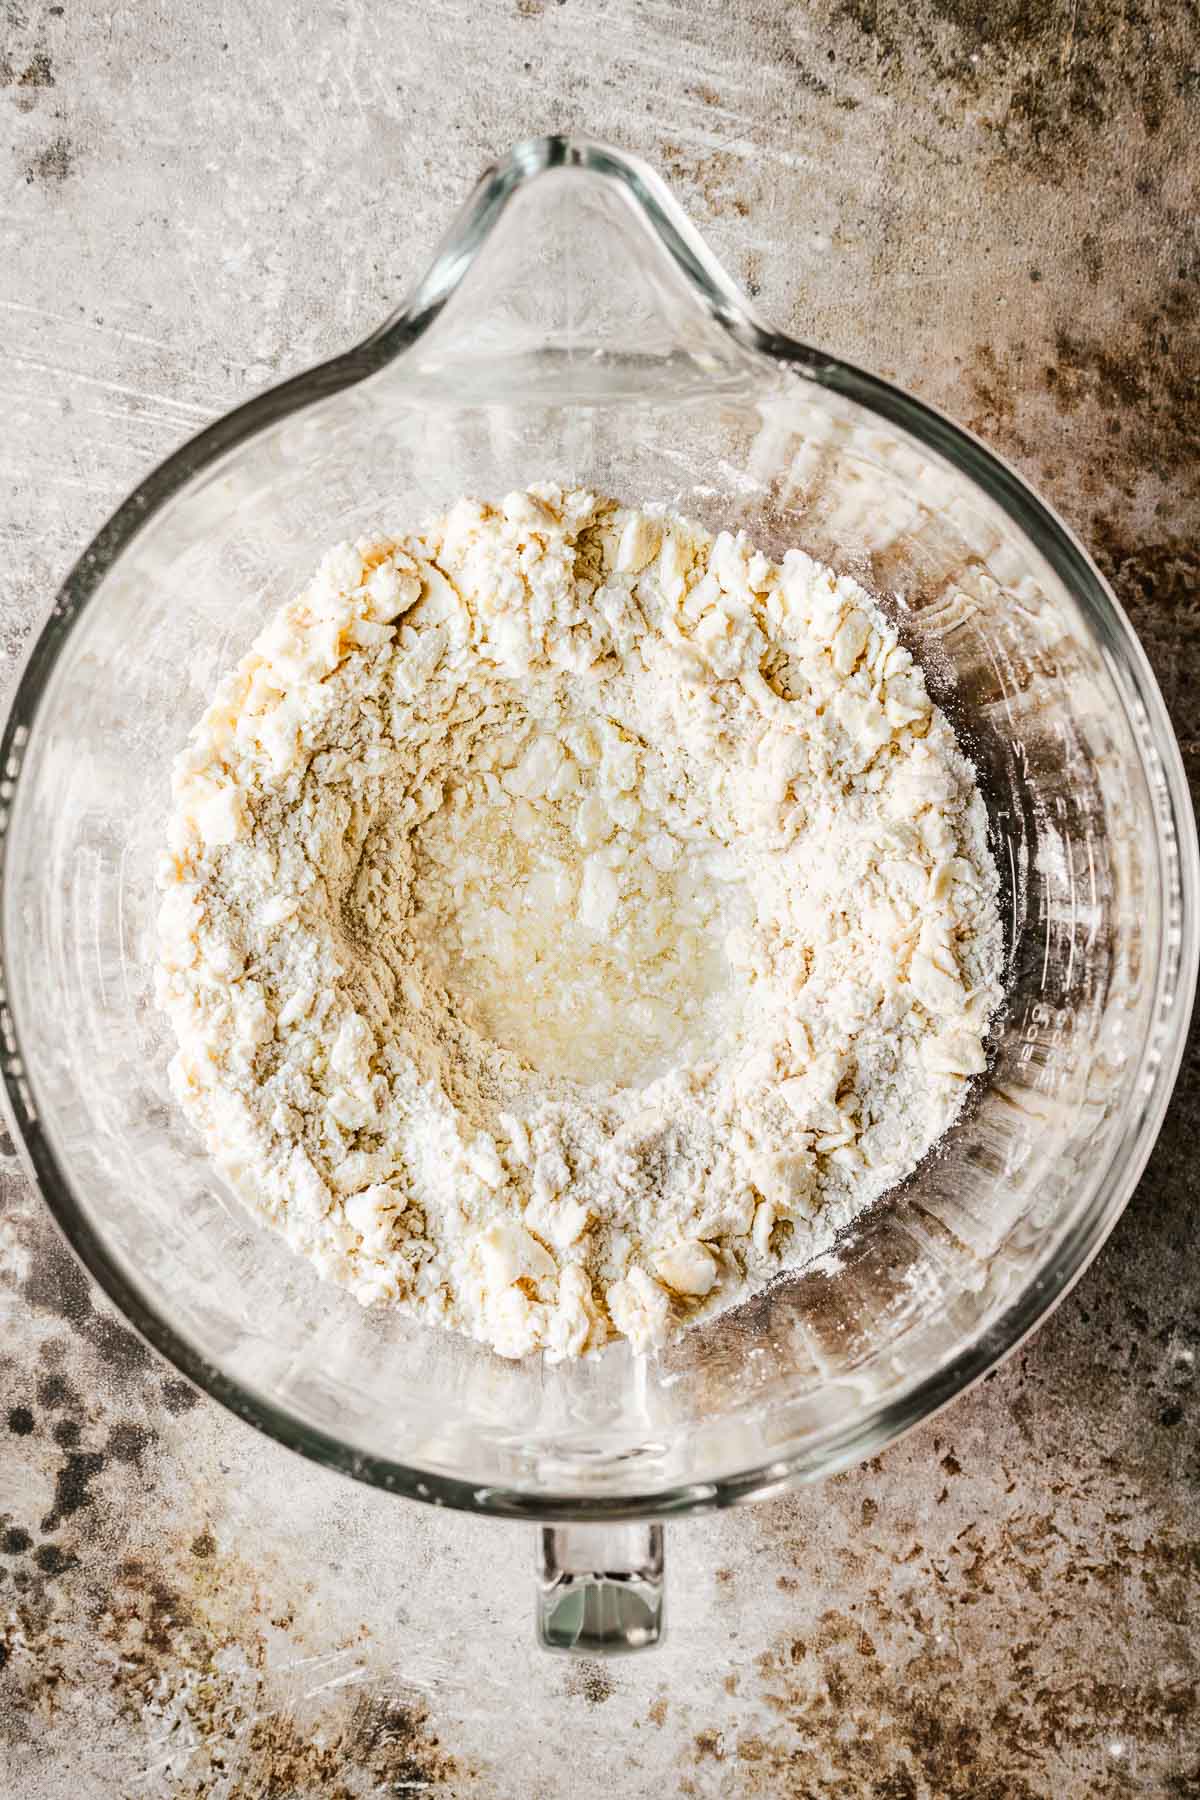
Form a well in the center of the dry mixture. Pour in the chilled water and vinegar. Mix the liquid into the dough with a spoon.
Using your hands, lift the edges of the rough dough mass, fold them inward, and press firmly down. Repeat this process, turning the bowl as you go, until you can gather the dough into a rough ball and there are no loose pieces at the bottom of the bowl.
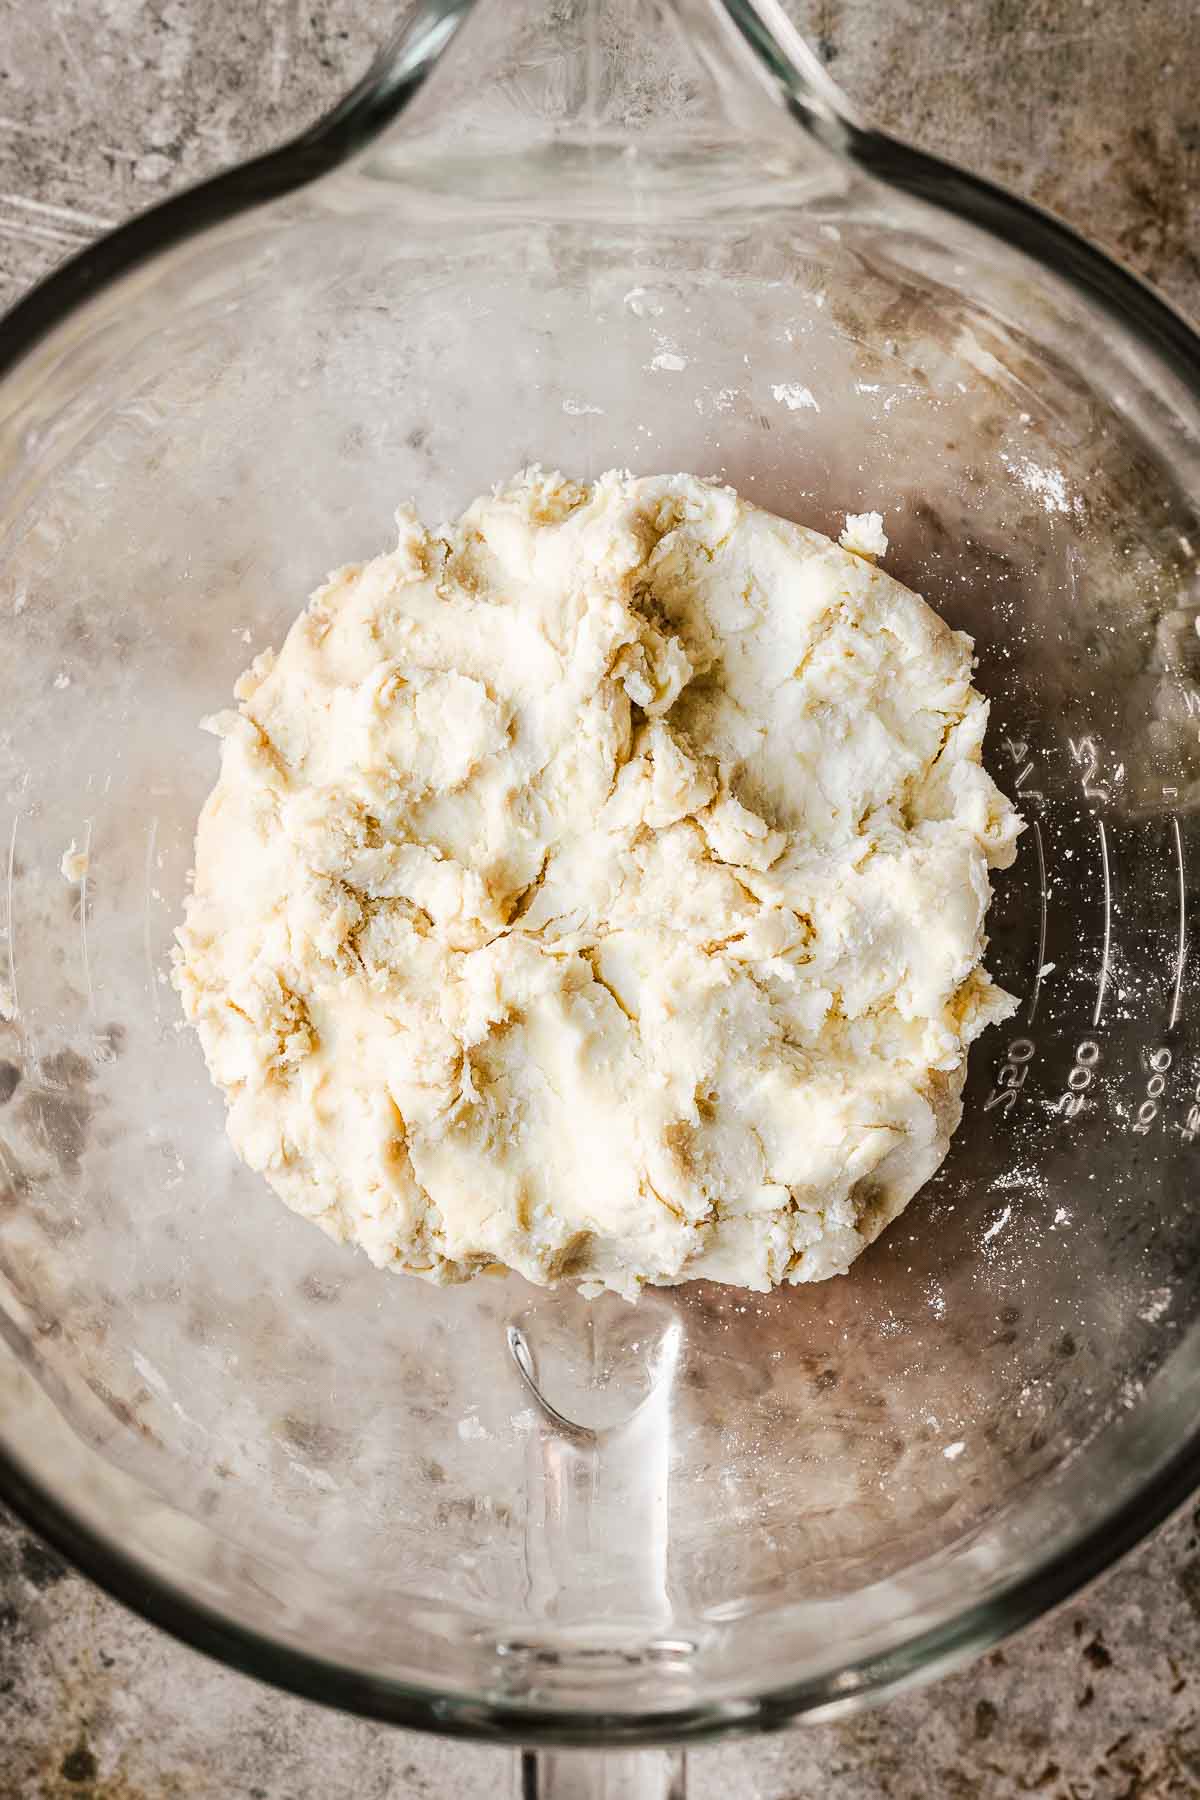
Gather the dough into a ball. Divide it into two equal pieces and flatten each into a disc. Wrap the discs tightly with plastic wrap and chill in the refrigerator for at least 30 minutes.
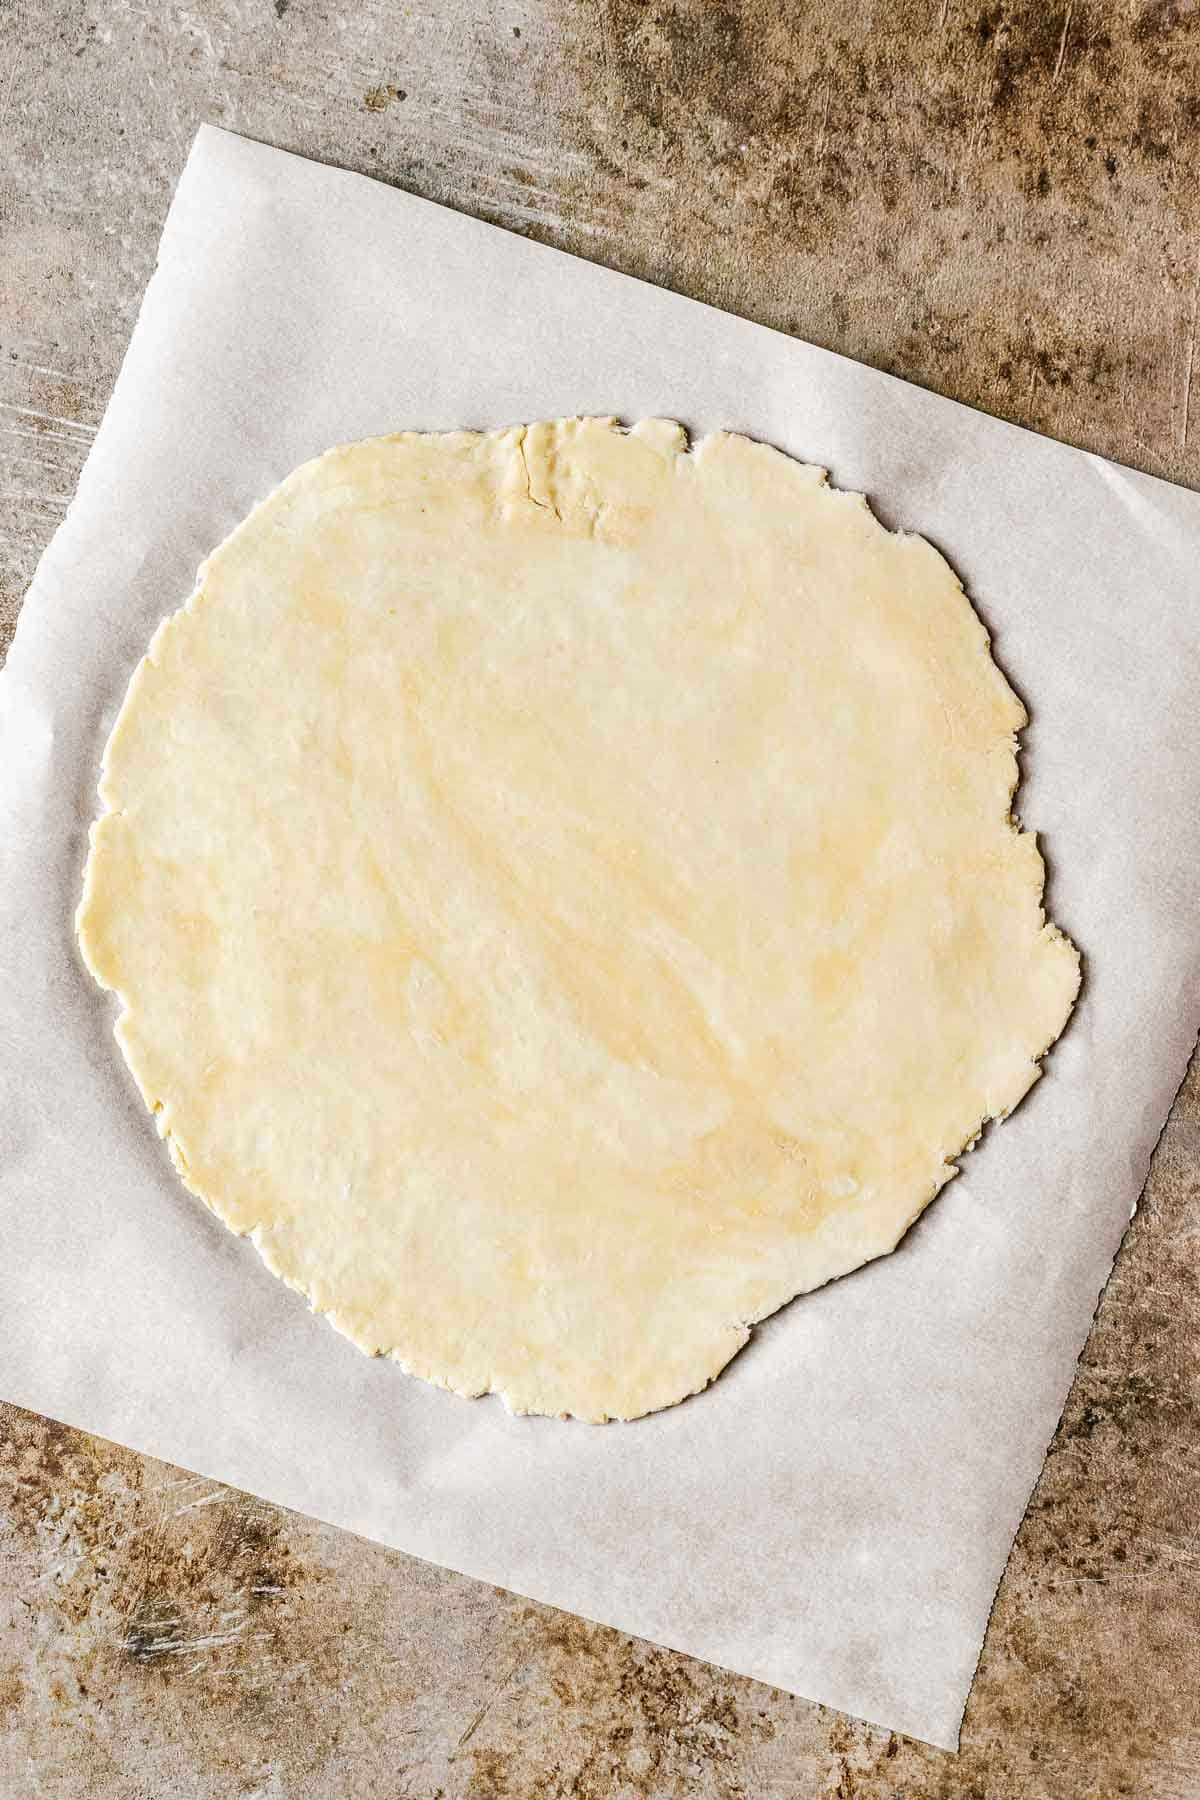
Remove both discs of dough from the fridge and let them rest for about 15 minutes. Roll one disc into a 10-inch diameter circle on lightly floured parchment paper. Use a bit of flour as needed to keep the rolling pin from sticking.
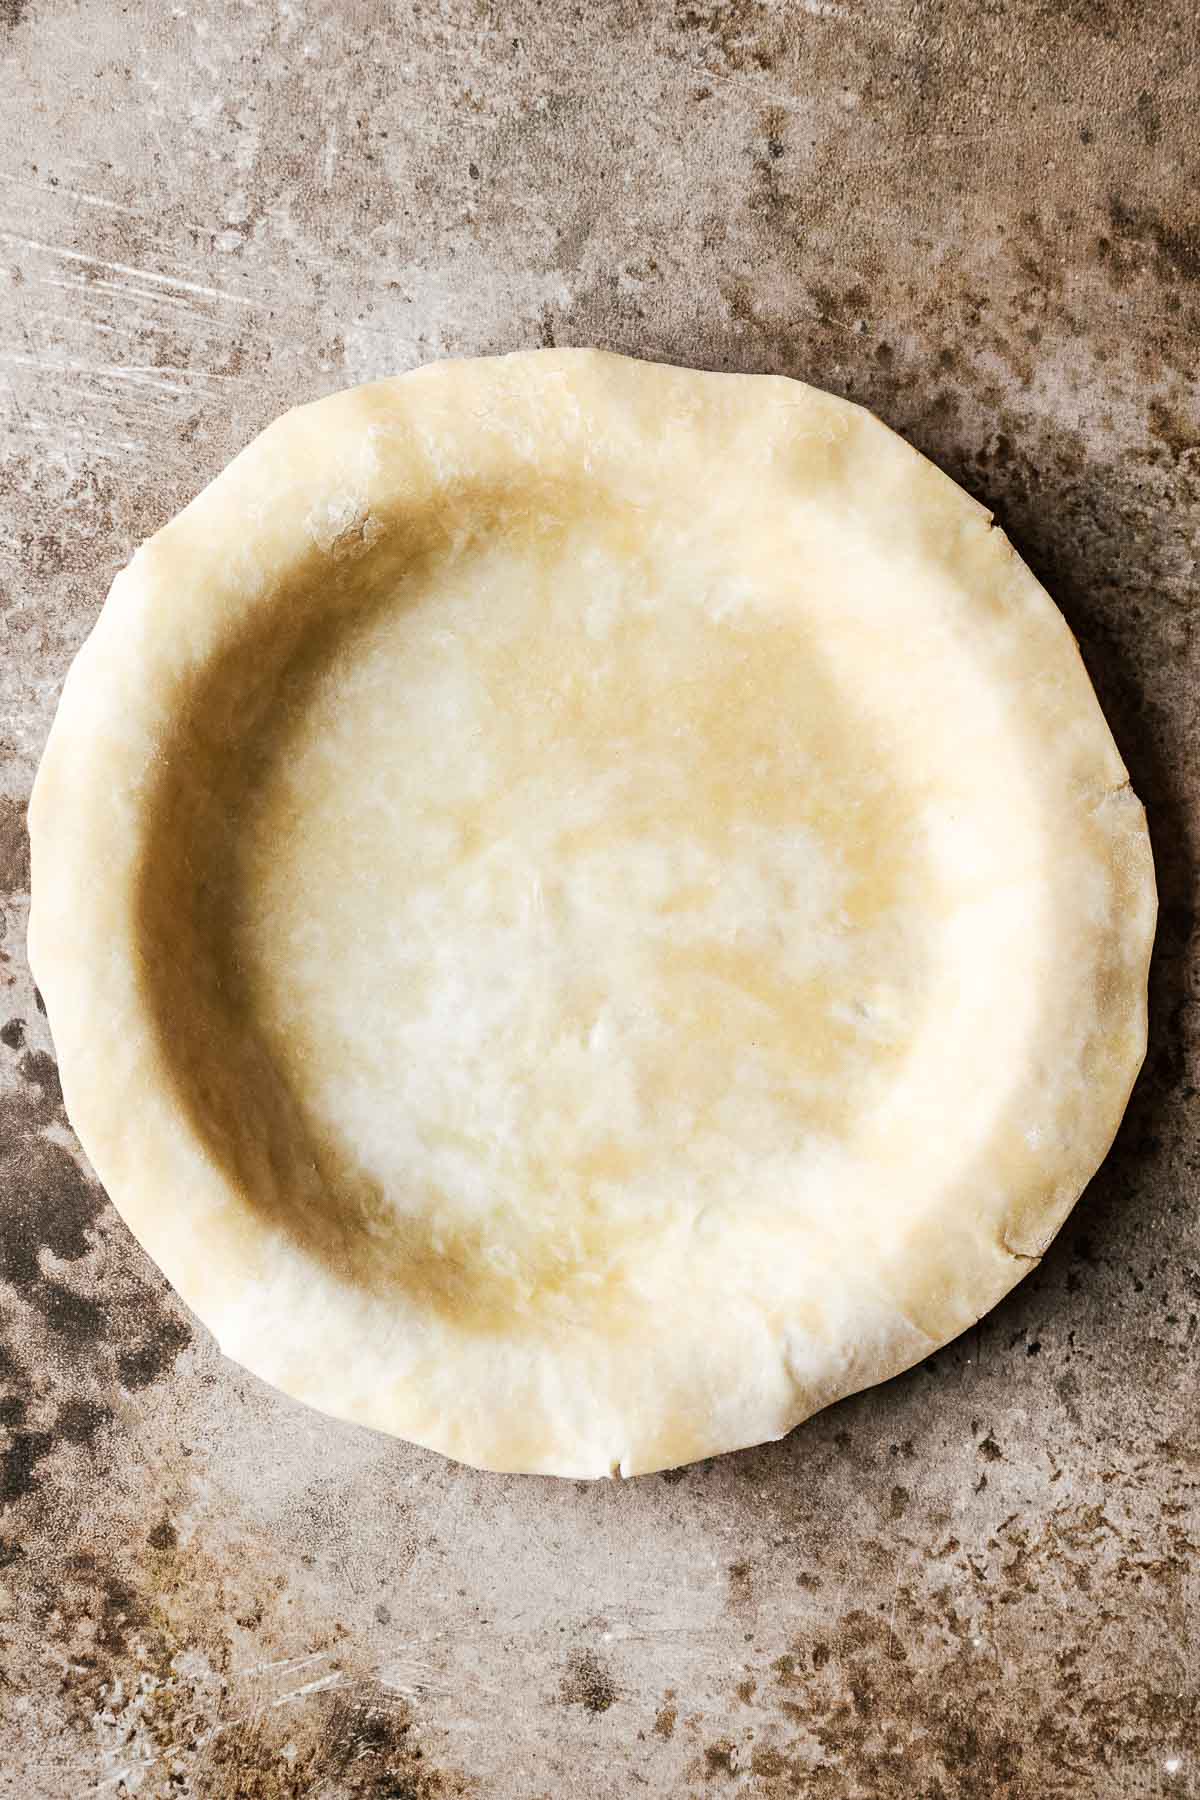
Transfer dough to pie pan and press into base. Trim edges so there is a ½ inch overhang. Cover with plastic wrap and place in refrigerator to chill.
Meanwhile, in a large bowl, mix the filling ingredients together. Let the mixture sit for 15 minutes to thicken slightly.
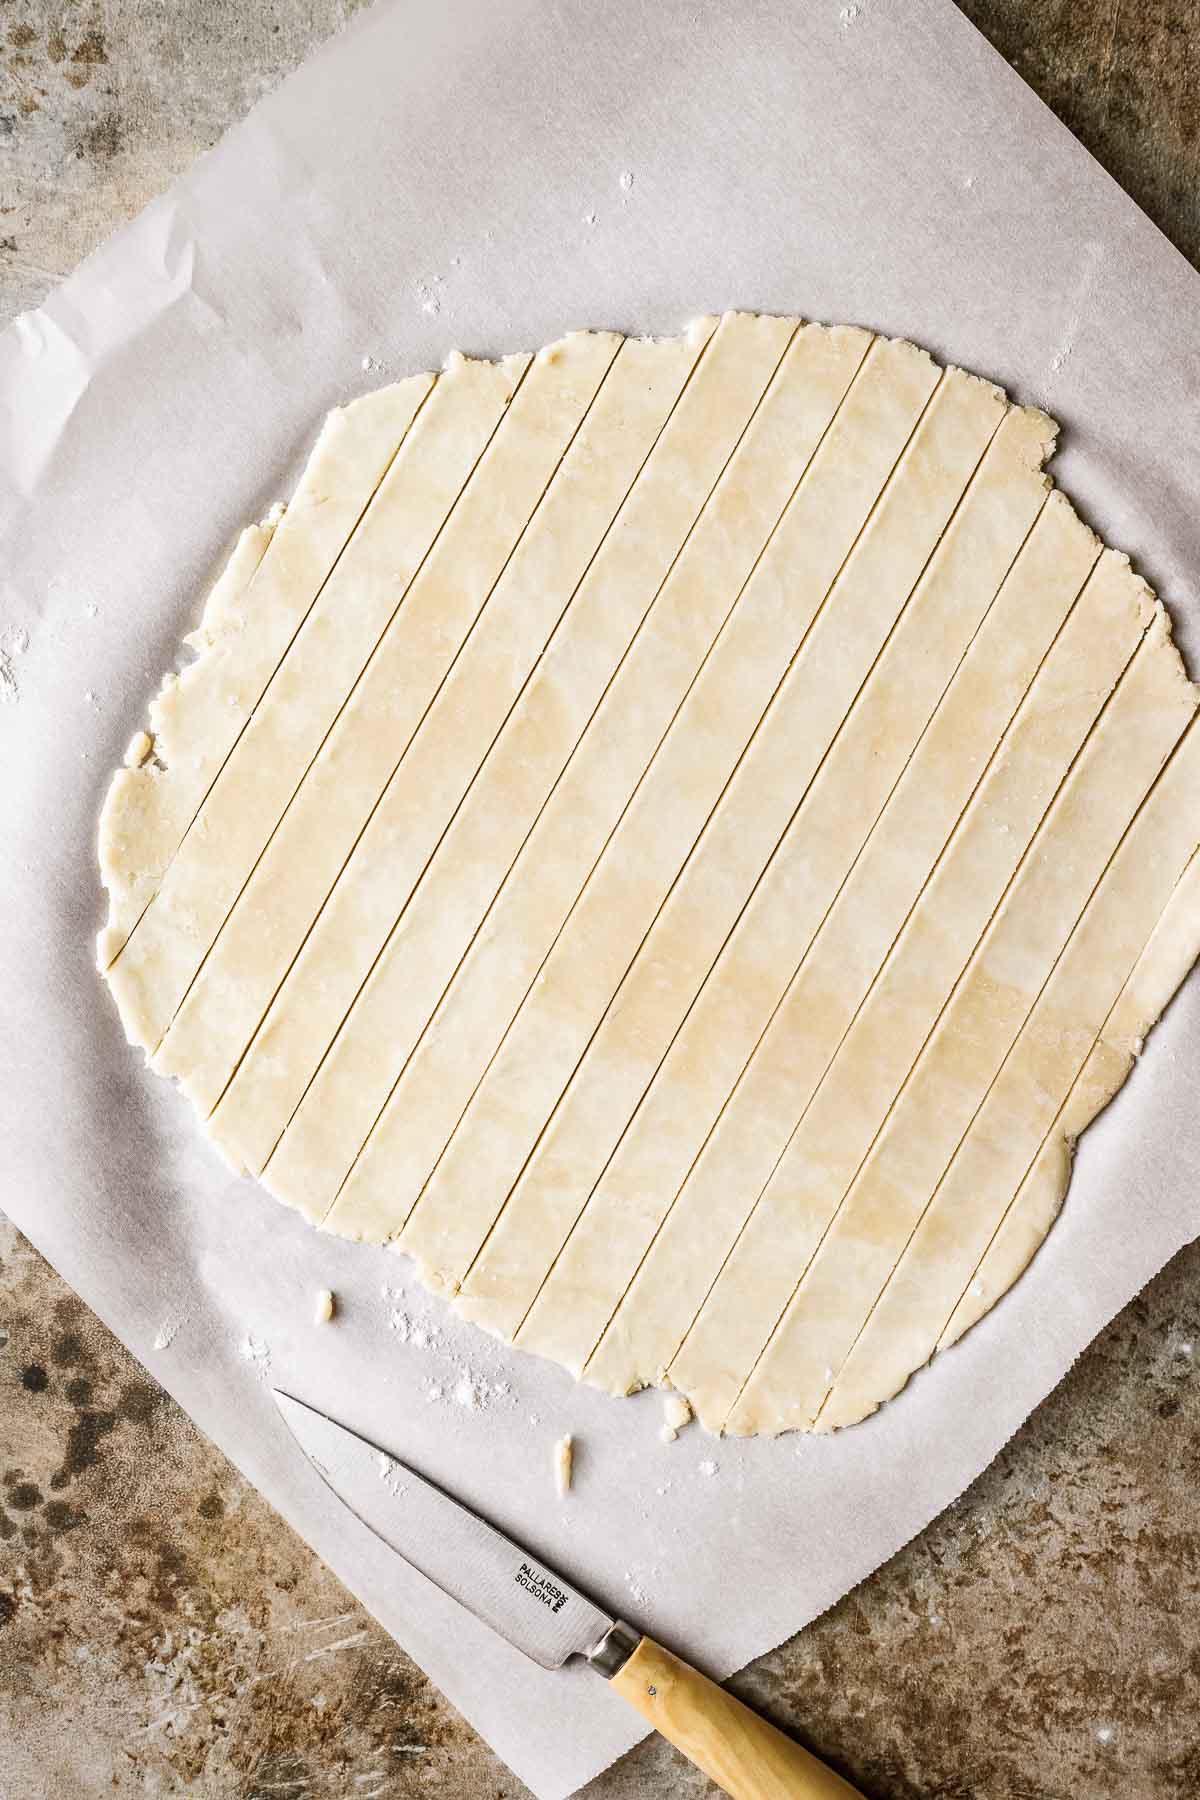
Roll out the second disc of dough to a 10-inch diameter circle. Using a sharp knife and a ruler, cut lattice strips about ¾ inch wide.

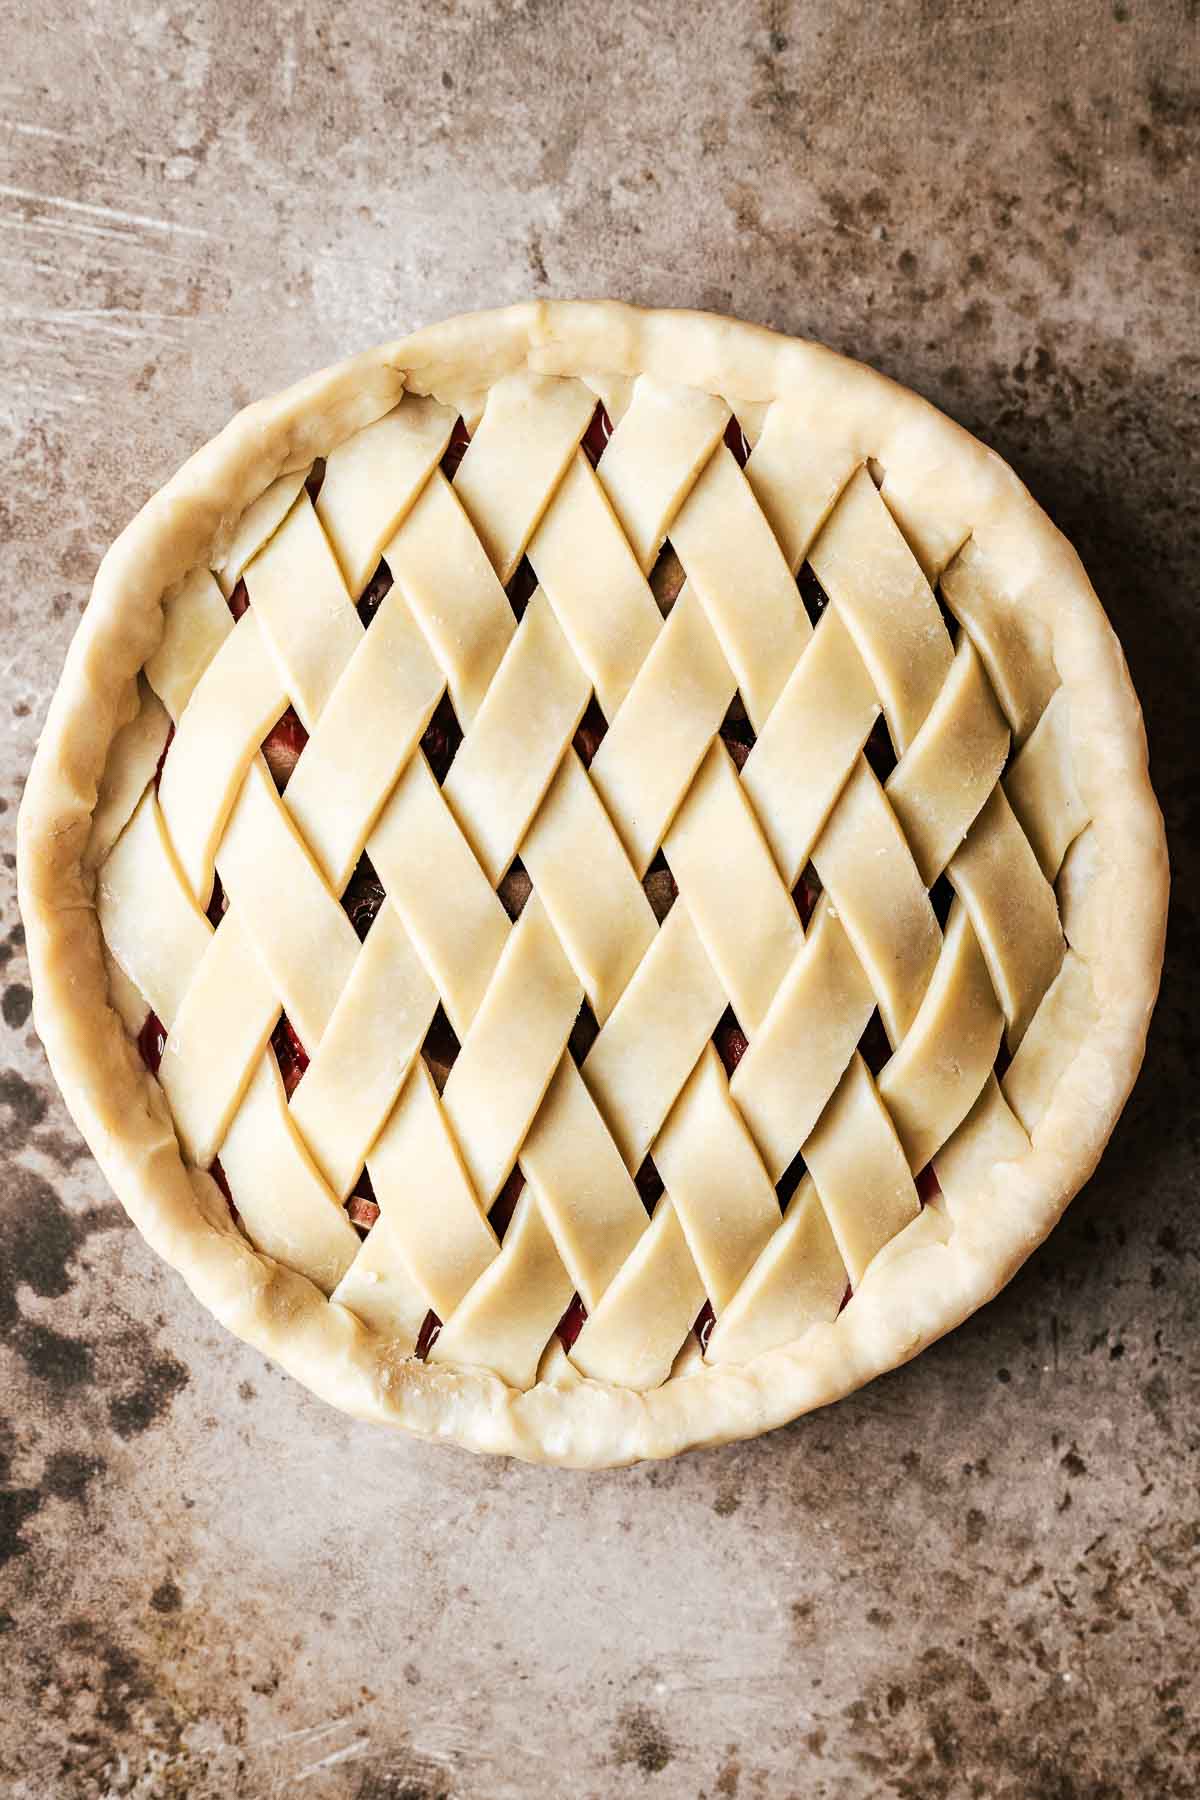
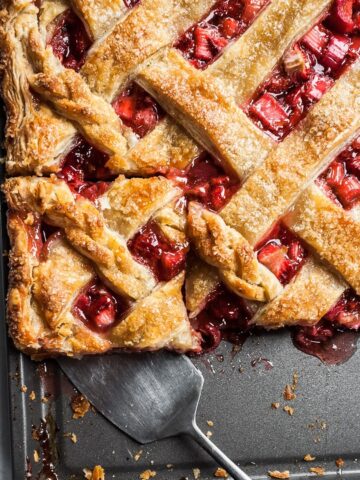
Drain off any excess liquid from the filling and pour filling into bottom crust of pie. Arrange lattice strips on top of the pie in a diamond weave pattern: place half the strips in one direction, then weave in the remaining strips at a right angle to create an X shape. The spaces between the lattice strips should form a diamond pattern. Trim the lattice strips at the edge of the bottom crust.
Fold the bottom edge of the crust inwards over itself to create a double layer along the edge of the pie pan.
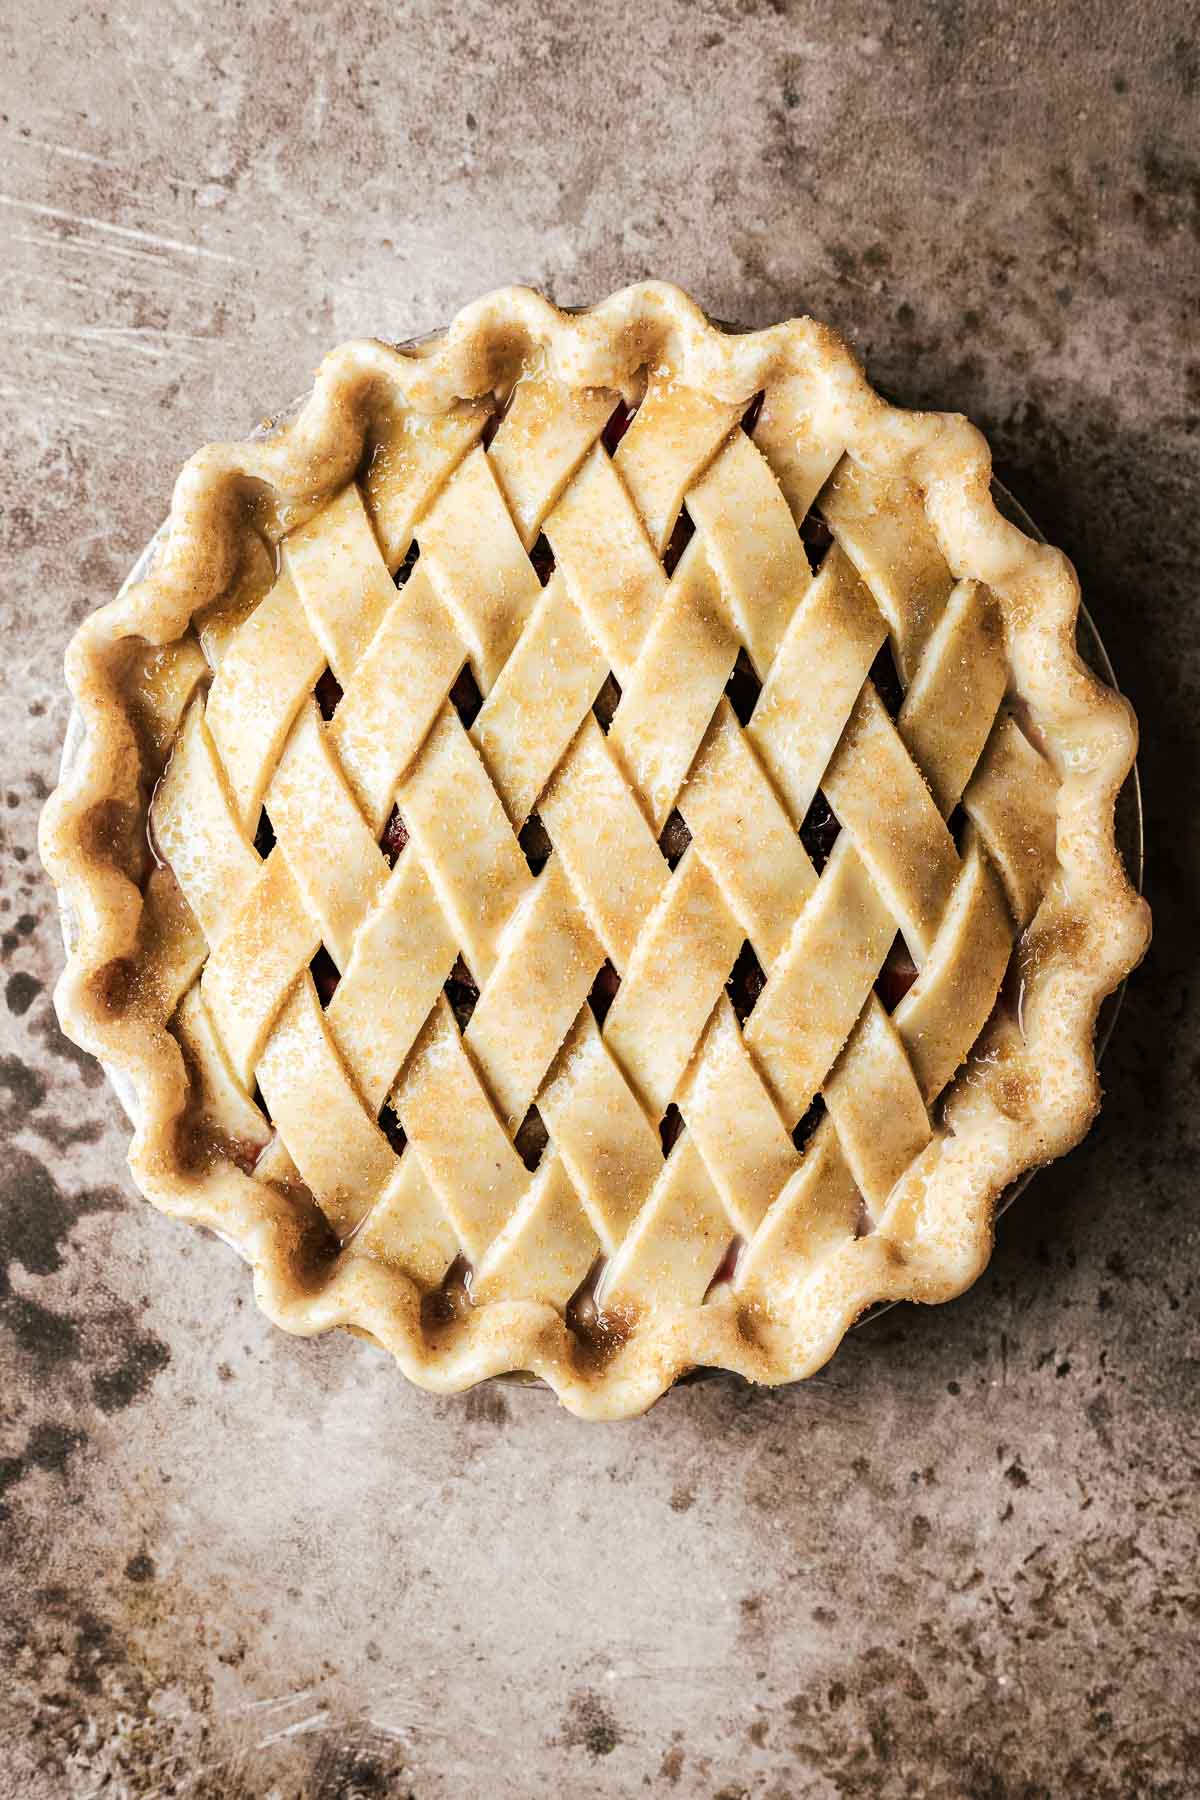
Crimp the pie crust edges to seal. Brush the lattice and crust with egg wash and sprinkle with turbinado sugar.
Chill the assembled pie in the refrigerator for 30 minutes. This step helps keep the butter in the crust cold, which will ensure a flaky, crispy crust that holds its shape during baking.
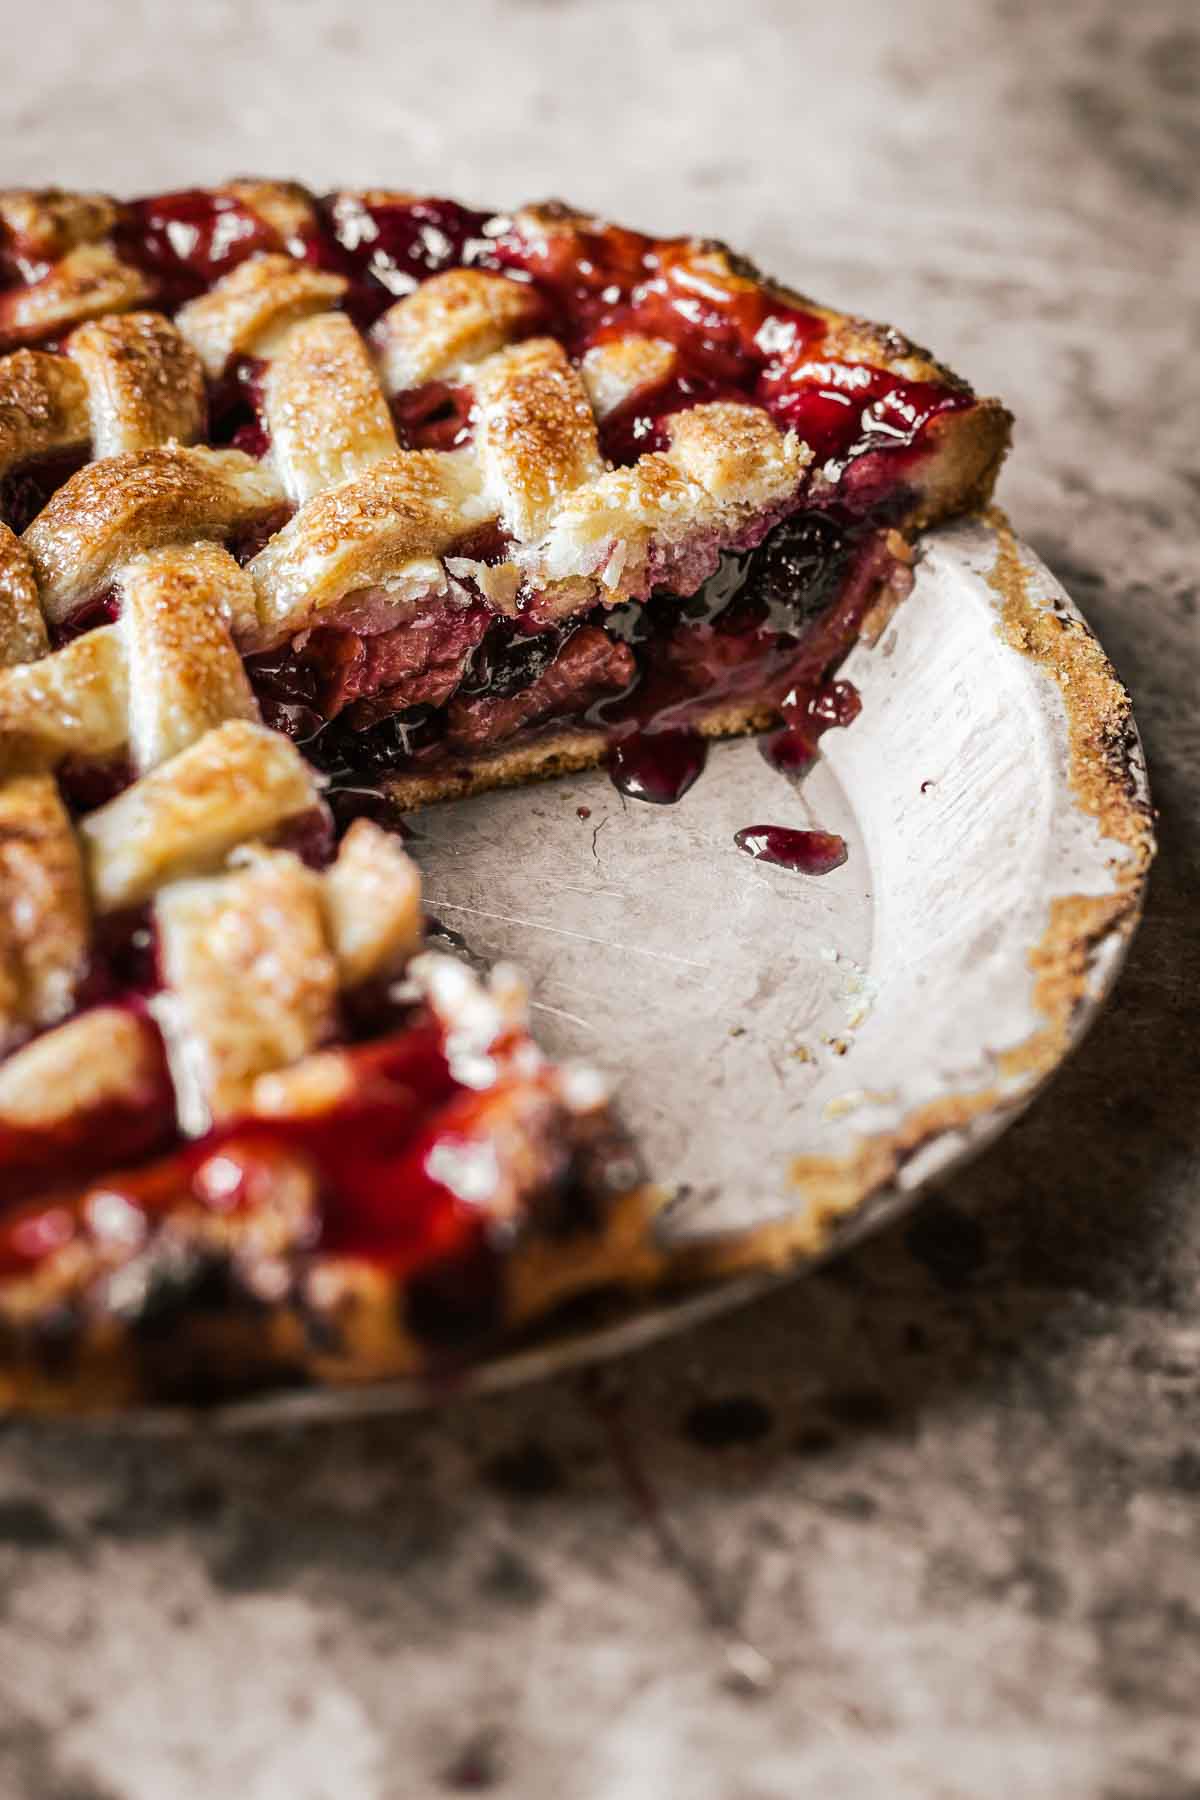
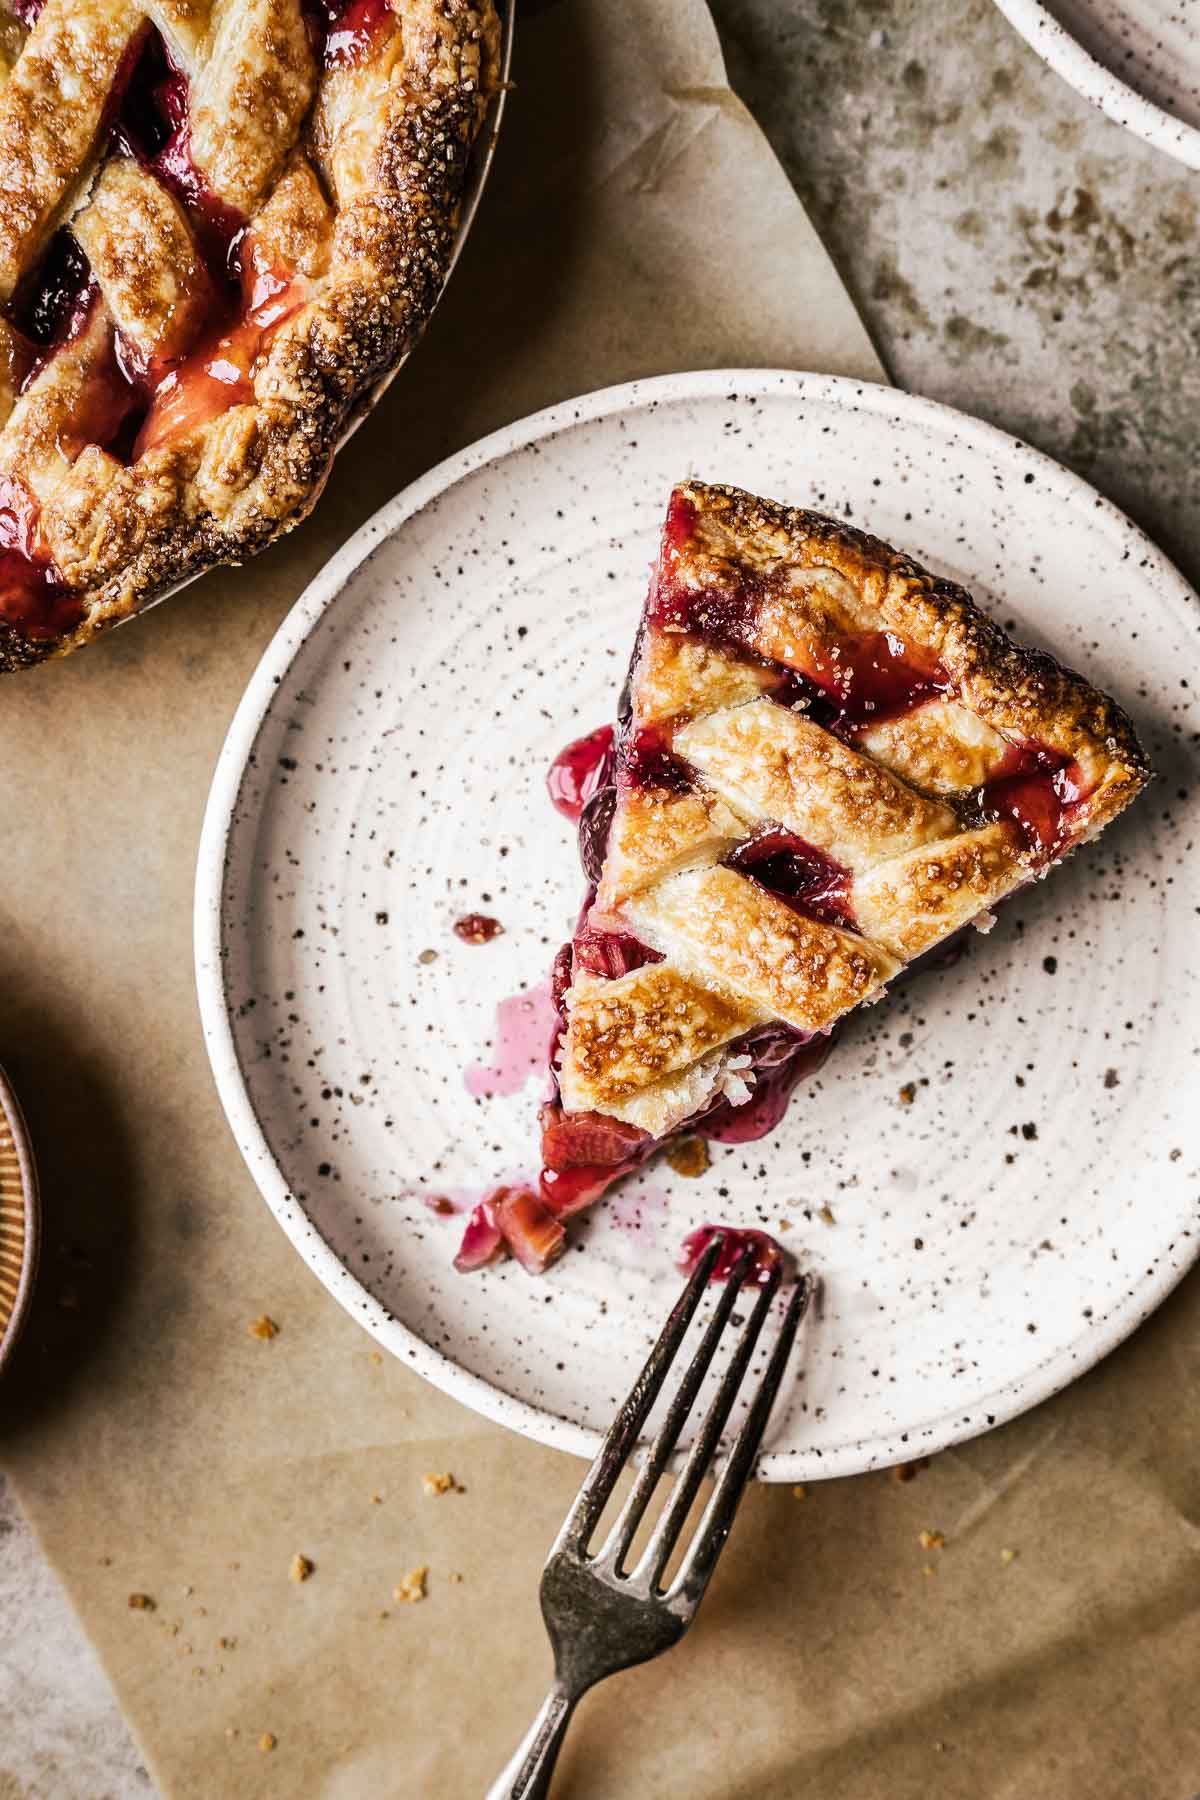
Bake the pie for 50-60 minutes, until the crust is golden brown and the cherry rhubarb filling is bubbling in the center (not just at the edges). Allow the pie to cool completely before slicing so the filling sets.

Storage and make ahead tips
Store: After baking, let the pie cool completely. Wrap tightly in plastic wrap and store at room temperature (if not in a hot climate) for up to 2 days, or refrigerate for up to 5 days.
Freeze: To freeze a baked pie, wrap it tightly in plastic wrap and foil. Freeze for up to 3 months. Defrost overnight in the refrigerator before serving.
Reheat: Warm the pie in a preheated oven at 350°F (177°C, Gas Mark 4) for 15-20 minutes, loosely covered with foil, until heated through.
Make ahead: You can prepare the pie dough 1-2 days in advance and keep it wrapped in the refrigerator, or freeze it for up to 3 months. Thaw frozen dough overnight in the refrigerator, then let sit at room temperature 15-30 minutes before rolling.
Frequently asked questions
Use cold butter and cold liquids to keep the butter from melting into the flour. This creates layers that steam during baking, making the crust flaky. Don't overwork the dough-mix just until it comes together to avoid developing too much gluten, which can make the crust tough. Chill the dough before rolling and again after assembling the pie. Chilling relaxes the gluten and helps prevent shrinking during baking.
Measure your thickener carefully-this recipe uses tapioca starch, which works best when measured accurately. After mixing the filling, let it rest for 15 minutes so the starch can start thickening. Drain any extra juices before filling the crust to avoid excess liquid. Bake the pie on a foil-lined rimmed baking sheet to catch any drips and make cleanup easier. Bake until the filling bubbles in the center to ensure it's fully cooked. Let the pie cool completely so the filling sets properly before slicing.
Have more questions or want to share your own tips? Please leave a comment below-I love hearing from you and am happy to help!
More recipes

Love this recipe? Please leave a comment and star rating. ★★★★★ Your feedback, suggestions, and adaptations are very helpful to other bakers!
📖 Recipe
Cherry Rhubarb Pie
INGREDIENTS
All Butter Pie Dough
- 15 mL vinegar, chilled
- 60 mL water, chilled
- 300 grams all purpose flour
- 1 teaspoon kosher salt, Diamond Crystal
- 226 grams unsalted butter, in ½ inch cubes, chilled
- 1 large egg, for egg wash
- 5 mL water, for egg wash
- 24 grams Turbinado sugar, to sprinkle on crust before baking
Cherry Rhubarb Pie Filling
- 450 grams cherries, pitted
- 244 grams rhubarb, cut in ¼ inch pieces
- 30 mL lemon juice
- 40 grams tapioca flour, also called tapioca starch
- 200 grams granulated sugar, reduce to 150g (¾ cup) if using sweet cherries
INSTRUCTIONS
ALL BUTTER PIE DOUGH
- Place vinegar and water into a small cup in the freezer to chill.15 mL vinegar, 60 mL water
- In a large bowl, combine flour and salt with a whisk. Add cubed butter to the flour mixture and toss to coat butter pieces.300 grams all purpose flour, 1 teaspoon kosher salt, 226 grams unsalted butter
- Using your fingers, squeeze each cube of butter to flatten it into a wide, thin layer. Continue to toss flour mixture with butter to make sure it's coated.
- Continue cutting butter into flour mixture (with your hands or a pastry blender) until the butter is in flattish, pecan-sized pieces.
- Form a well in the center of the dry mixture. Pour in chilled water and vinegar. Using a bench scraper or a heavy spatula or wooden spoon, push the mixture back and forth until the liquid has been absorbed into the dry ingredients. Using your hands, lift the edges of the rough dough mass, turn them inwards and press them firmly down. Repeat this, turning the bowl, until you can gather the dough into a rough ball, and there are no loose pieces at the bottom of the bowl.
- On a work surface, divide dough into two equal pieces and flatten each into a disc. Wrap tightly with plastic wrap and chill in the refrigerator for at least 30 minutes.
- Remove both discs of dough from the fridge and let rest for about 15 minutes. On a piece of lightly floured parchment paper, roll one disc into an 11 inch diameter circle. (Roll the dough out by placing the rolling pin in the center of the circle and firmly pressing down while moving the pin towards the outer edge of the dough. Turn the dough clockwise 90 degrees and continue this process of rolling and turning until the dough forms a circle approximately 10 inches in diameter. Use a bit of flour as needed to keep the rolling pin from sticking.)
- Lift dough onto your 9 inch pie pan. Center it carefully, pressing down into the base and corners to be sure there are no air pockets trapped underneath. Trim the outer edge so that it uniformly overlaps the edge of the tin by ½ inch. Wrap in plastic wrap and place into the refrigerator to chill.
- On a piece of parchment paper, roll the second disc of dough into a circle 10 inches in diameter. Using a knife and a ruler, cut lattice strips in ¾ inch widths. Transfer the strips on the parchment to a baking sheet, cover with plastic wrap and place in the fridge to chill.
CHERRY RHUBARB PIE FILLING
- In a large bowl, combine sour cherries and diced rhubarb. Add lemon juice, sugar and tapioca flour. Fold ingredients together gently until completely blended. Let sit for 15 minutes to thicken slightly.450 grams cherries, 244 grams rhubarb, 40 grams tapioca flour, 200 grams granulated sugar, 30 mL lemon juice
PIE ASSEMBLY AND BAKING
- Scoop pie filling into dough-lined pie pan, leaving extra liquid in the bowl.
- For diamond lattice, evenly space half of lattice strips along the top of the filled pie. Fold back every other strip. Place a strip in the center of the pie at a 45 degree angle to the first strips, forming an X shape. Unfold the folded strips, covering the most recently placed strip. The holes between lattice should form a diamond pattern.
- Repeat this under/over weaving procedure on either side with the remaining strips of dough until you have a fully woven lattice crust. If this seems complex, refer to my detailed post on how to make lattice crusts for additional instruction.
- Trim the edges of the lattice so that they just meet the inner edge of the pie tin. Fold edge of bottom piecrust down under itself to create a double layer at edge of pie pan.
- Crimp the pie crust. In a small bowl, beat egg with water and brush the lattice and crust with egg wash. Sprinkle with turbinado sugar. Place in the refrigerator to chill for 30 minutes.1 large egg, 5 mL water, 24 grams Turbinado sugar
- Preheat the oven to 400 degrees and position a rack in the lower third of the oven. Line a rimmed baking sheet in aluminum foil (to catch any spills) and place on the lower rack to preheat.
- Place the pie on the hot baking sheet and bake for 50-60 minutes, or until top crust is golden brown and juices at center of pie are bubbling (not just at the edges). At about the 30 minute mark, gently tent pie with aluminum foil to keep top crust from browning too much. Remove from oven and place on a metal rack to cool completely. Pie should be fully cool before slicing to ensure fruit filling has gelled.
- Serve individual slices with sweetened whipped cream or a scoop of vanilla ice cream.
EQUIPMENT
NOTES
- Fruit choice: Feel free to use either fresh or frozen fruit for this recipe. If using frozen, be sure to fully defrost and drain any excess juices before mixing the filling to avoid a watery pie.
- Cherries: If you can't find sour cherries, regular sweet cherries make a good substitute. You can keep the sugar amount the same or reduce it to 150 grams (¾ cup) if you prefer a less sweet filling.
- Tapioca flour: Tapioca flour is recommended for thickening the filling because it creates a clear, glossy gel. If you can't find tapioca, substitute with half as much cornstarch (about 20 grams or just under 3 tablespoons). Note that cornstarch will cause the filling to look cloudy when it thickens.
- Butter temperature: Use cold butter when making the pie dough. Cold butter creates flaky layers by staying in small pieces throughout the dough, which steam during baking. Avoid letting the butter warm up or melt.
- Handling the dough: Mix the dough just until it comes together-overworking it develops gluten and can make the crust tough.
- Chilling the dough: Chill the dough before rolling it out and again after assembling the pie. This relaxes the gluten and helps prevent shrinking or misshaping during baking.
- Resting the filling: After mixing the fruit and thickener, let the filling rest for about 15 minutes. This gives the tapioca starch time to start thickening the juices before baking.
- Draining excess juices: Especially when using frozen fruit, drain any extra liquid from the filling before adding it to the crust to prevent a runny pie.
- Baking setup: Bake your pie on a foil-lined rimmed baking sheet. This catches any drips and makes cleanup easier.
- Baking doneness: Bake until the filling bubbles in the center, which indicates it's fully cooked and thickened.
- Cooling time: Let the pie cool completely before slicing. Cooling allows the filling to set properly and prevents it from running out when cut.
- Store: After baking, let the pie cool completely. Wrap tightly in plastic wrap and store at room temperature (if not in a hot climate) for up to 2 days, or refrigerate for up to 5 days.
- Freeze: To freeze a baked pie, wrap it tightly in plastic wrap and foil. Freeze for up to 2-3 months. Defrost overnight in the refrigerator before serving.
SJ says
I have an elderly neighbor that lets my kids pick small, sour cherries from her trees every year and every year she tells me to make pie and EVERY YEAR I’m like “who’s pitting these cherries?” And then I lie and tell her I made the pie.
Anyway my conscience caught up with me and this recipe was my saving grace. Specifically, the filling ratios were fantastic — and I made a couple necessity-based modifications:
- gluten free crust because GF eaters, used my go-to Aran Goyoaga recipe
- was about 100mg short on cherries and filled it out with a handful of strawberries diced to similar size
- had rhubarb in the freezer and let it thaw on the counter, unplanned perk was all the liquid that was left behind in the thaw
Huge hit. Sent my son with a slice to give the neighbor and she sent back another quart of the effing cherries OH WELL guess I’ll make another pie. This is the sort of no-fuss mathematical magic of a good pie recipe, so thanks!
Kathleen Culver says
SJ,
Thank you SO much for taking the time to bake my recipe, and for the five star review!
Your story made me laugh out loud. Maybe you can rope the kids into pitting the cherries for you!?
Kathleen
Sharon says
Terrible experience, a runny sloppy pie that boiled over. Will not make this recipe again.
Kathleen Culver says
Hi Sharon,
I'm so sorry that this was your experience!
I'd love to troubleshoot with you to see if we can figure out what went wrong.
Did you follow the recipe as written (ie, using the listed amount of tapioca starch, etc.)
I have a specific section in the post with tips dedicated to help ensure your pie isn't runny.
If you have more detailed feedback, please let me know.
Thank you!
Kathleen
Cheryn says
Super recipe. Used 2 cups cherries ( from Aldis in a jar, morellos)
reduced sugar to 3/4 cups, 3 cups rhubarb. Everyone said this is a keeper. I am a former home economics teacher. Also let tapioca
mixture set several minutes.
Kathleen Culver says
Thank you so much, Cheryn!
I'm so glad you enjoyed it.
Good idea to reduce the sugar if the morellos were packed in syrup.
I'd love for you to add a recipe rating if you have a moment.
Thank you!
Kathleen
Rachel says
Hey! I am liking the simplicity of this recipe! Is there a way you would recommend making the filling in advance and freezing? I don’t have a way to can at the moment
Kathleen Culver says
Hi Rachel,
Thank you!
You can definitely make the filling in advance, although it's quite easy to throw together from fresh (or frozen) fruit.
If you're trying to store extra fruit from a generous harvest, you can simply freeze rhubarb and cherries and combine them later per the recipe.
If it's more of a time saving thing, I'd recommend making the whole recipe and freezing the pie before baking.
Then you'll have a whole pie ready whenever you feel like baking it!
Make sure it's well chilled in the fridge first, then wrap in several layers of plastic wrap, and a final layer of foil for good measure.
When you're ready to bake, unwrap and cover with a fresh layer of plastic wrap to defrost in the fridge (to avoid ice crystals melting on the crust).
When defrosted, bake per instructions, until middle is bubbly. It might take a bit longer - keep an eye on the crust and tent with foil if needed.
Hope this helps!
Kathleen
Olivia says
Hi, Kathleen!
Will jarred sour cherries work?
Thank you!
Olivia
Kathleen Culver says
Hi Olivia,
I haven't tried jarred sour cherries myself, but they should work just fine!
Let me know if you give the recipe a try.
Thanks!
Kathleen
How much sugar did you cut back on if you used sweet cherries as opposed to the pie cherries. Ed kayser says
How much sugar did you cut back on if you used sweet cherries as opposed to the pie cherries
The Floured Table says
Hi Ed,
Sorry for the delay in responding!
The pie will have more sweetness if you use regular cherries, but the rhubarb will help balance it out; you shouldn’t need to adjust the quantity of sugar. Sometimes I do reduce the sugar amount in recipes. I tend to start with a 25% reduction - in this case that would leave you with 3/4 cup sugar.
Thanks so much for coming by.
Kathleen