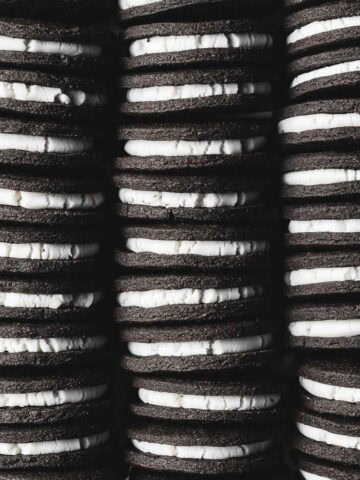
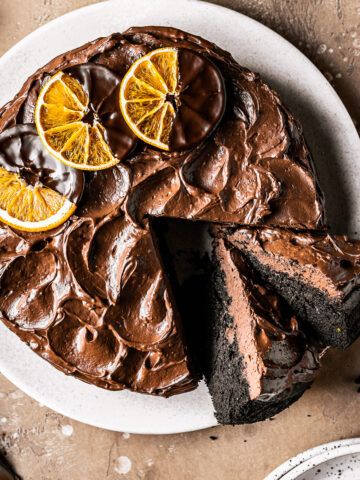
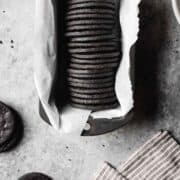
These homemade chocolate wafer cookies are simple to make, deeply flavorful, and a perfect substitute for the discontinued Nabisco Famous Chocolate Wafer Cookies. Thin and crispy, they're perfectly balanced with cocoa and sweetness. They're excellent on their own, and also great in desserts calling for wafer cookies, like icebox cake.
These wafers also make an excellent base for no-bake pies and cheesecakes. Plus, with my shortcut for baking them in a slab, you'll skip the time-consuming cookie cutting and still get the perfect crumbs for a chocolate wafer crust.
Have you ever needed chocolate wafer cookies for a dessert, only to realize they're nowhere to be found? Since Nabisco discontinued their Famous Chocolate Wafers, it's been tough to track down a good store-bought option. If you're looking for an easy homemade version with pantry-friendly ingredients, you're in the right place.
The first wafers I made were an adaptation of the chocolate tart dough from several of my tart recipes. They were delicious-but I wanted them to be darker, crispier, and closer in flavor to the original Nabisco cookies.
So I went back to the kitchen. I removed the egg yolk to create more snap, studied the Nabisco ingredient list, and tested multiple versions. One was with oil (perfectly flat, less flavor), one with butter (delicious, but bubbly), and finally, a combination of butter and oil that delivered the best of both-flat, crisp wafers with rich, dark chocolate flavor.
I also swapped out the all-Dutch cocoa for a blend of Dutch process and black cocoa (just like my homemade Oreo cookies). That touch of black cocoa is key to getting the color and flavor just right. While you can replace it with more Dutch cocoa, it IS the critical ingredient needed to recreate a copycat Nabisco chocolate wafer cookie. They won't be the same without it.
Planning to use these chocolate wafer cookies for a crumb crust? I've created a big time-saver in this version. Instead of cutting out individual cookies only to grind them up, you'll bake the dough in a single, thinly rolled slab.
This slab method is faster, easier, and gives you the same crisp, chocolatey crumbs-no cookie cutters needed. I only wish I'd thought of this sooner!
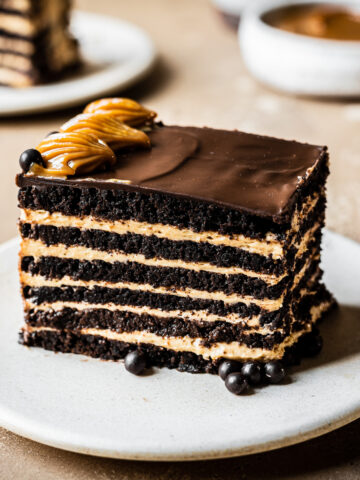
These cookies are perfect for layered desserts, chocolate crumb crusts for cheesecakes and no-bake pies, and icebox cakes like my Argentine chocotorta with dulce de leche and cream cheese. Or just snack on them straight-they're that good!
Jump to:
Yield
One batch of this recipe yields:
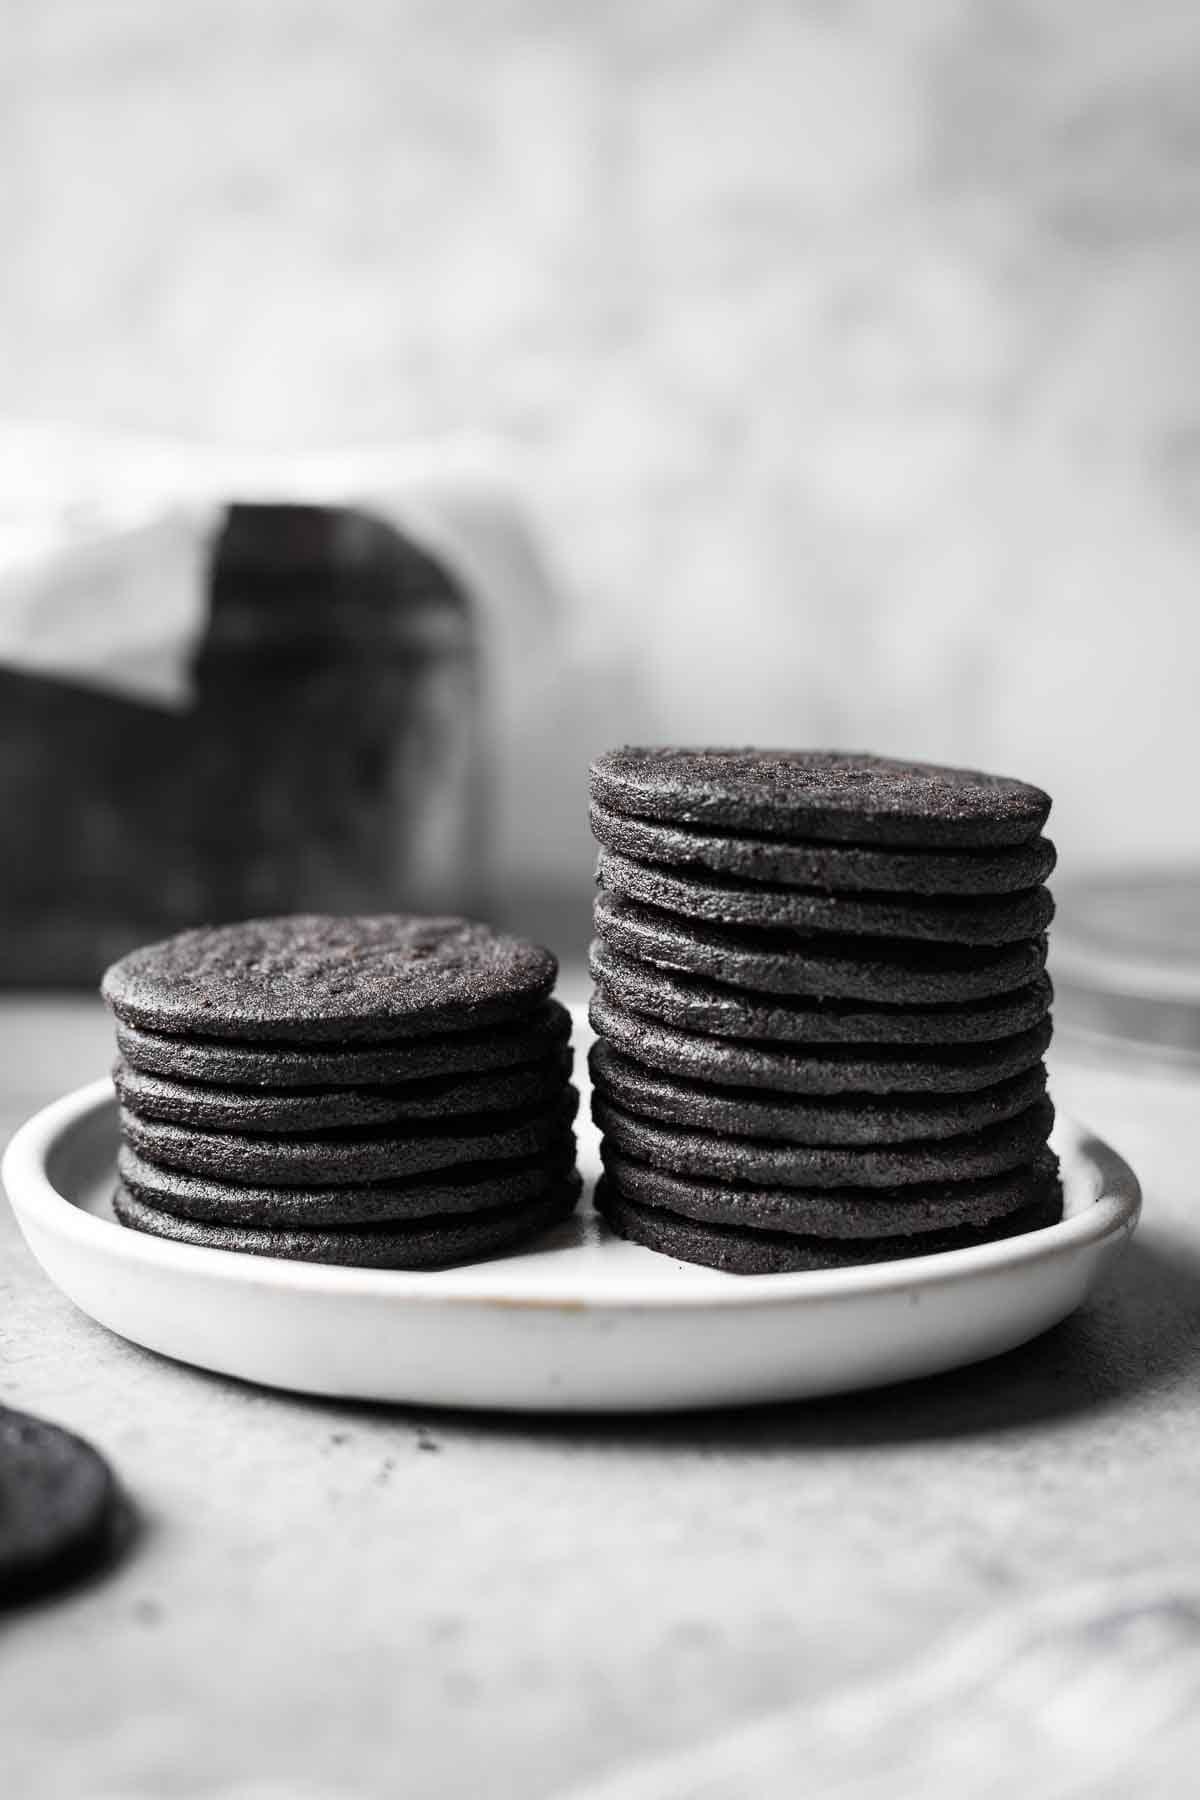
- 34 round cookies, each 2 inches (5 cm) in diameter
- 225 grams (8 ounces), or about 2 cups of finely ground chocolate cookie crumbs
- Enough crumbs for one 9-inch chocolate crumb crust (click for recipe)
Ingredients
See recipe card for detailed list of ingredients and quantities.
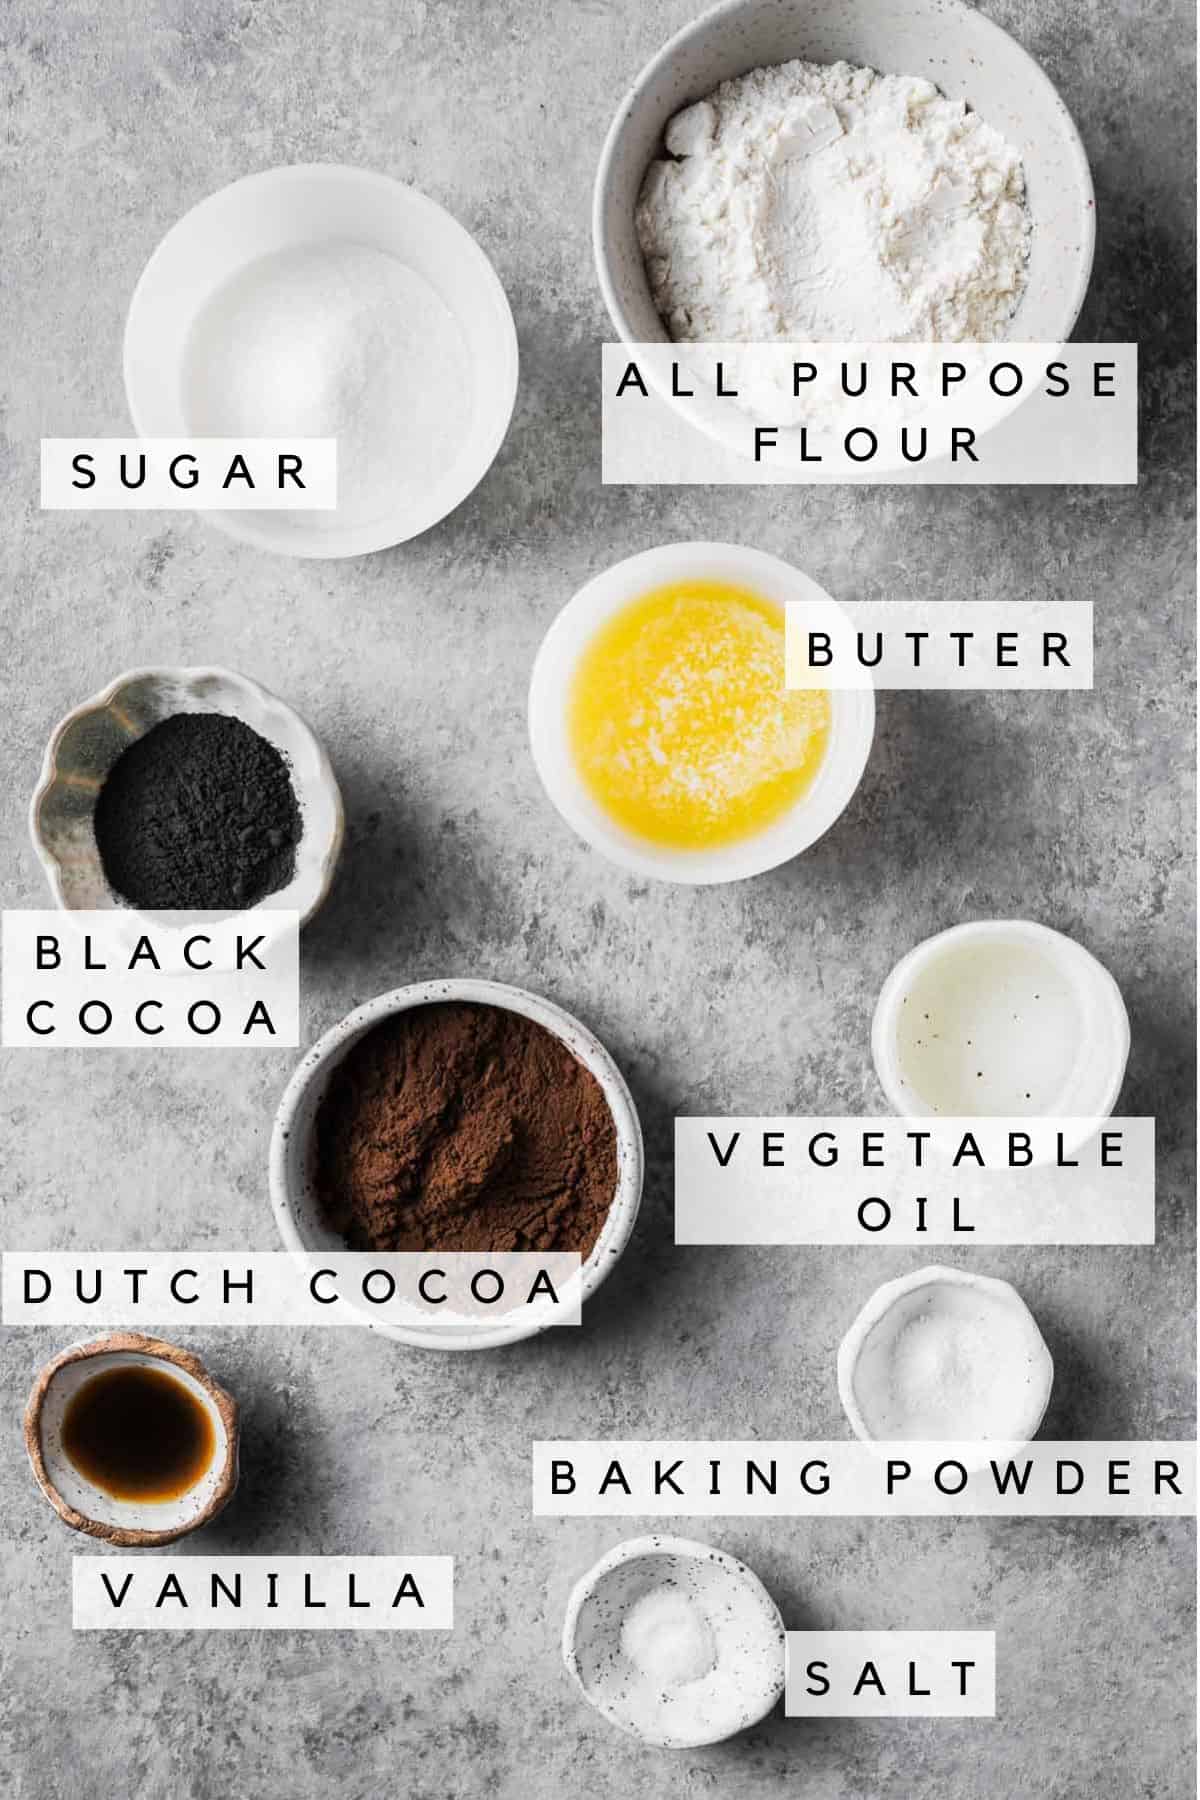
All-purpose flour - I recommend using a digital scale to measure all your ingredients, especially flour. If you don't have a scale, fluff your flour, scoop it into your measuring cup, and level it off using something like the back of a butter knife to avoid packing the flour.
Dutch-process cocoa powder - This recipe uses unsweetened Dutch-process cocoa powder. Dutch cocoa, or alkalized cocoa, is darker in color and has a smoother, more robust chocolate flavor because the alkalizing process removes much of its acidity.
While you can substitute natural cocoa in a pinch, it will result in lighter cookies with less intense chocolate flavor. To learn more, see King Arthur Baking's guide to cocoa powder.
Black cocoa powder - Black cocoa powder is a highly alkalized form of Dutch cocoa, making it very dark. It has less chocolate flavor than Dutch cocoa, so I've used just enough to achieve the signature dark color and taste of chocolate wafers, while still letting the richness of the Dutch cocoa shine through.
Black cocoa is an ingredient you'll likely have to purchase online, but it's worth it and will last you a long while! For excellent results, I use and recommend King Arthur's Black Cocoa. If you prefer other brands, The Cocoa Trader and Modern Mountain also make great options.
Baking soda - A small amount of baking soda ensures your cookies turn out crisp and light.
Kosher salt - I use Diamond Crystal kosher salt, which has lighter, flakier crystals and less sodium per teaspoon than Morton salt. If using Morton's kosher salt, reduce the amount to ⅛ teaspoon plus a pinch. If using table salt, reduce to ⅛ teaspoon.
Granulated sugar - Standard granulated sugar works best. If using organic sugar with larger granules, pulse it in a food processor first to break it down, ensuring your wafers aren't grainy.
Unsalted butter - Unsalted butter lets you control the salt content. It's melted in this recipe to avoid incorporating excess air.
Vegetable oil - A bit of neutral-flavored oil helps maintain fat content and reduces the water content (butter is about 20% water). Using all butter creates more air bubbles, while oil helps achieve a flatter cookie.
Vanilla extract - Pure vanilla extract adds additional flavor. For best results, use pure extract rather than imitation vanilla.
Instructions
These photos provide basic visual cues. Find detailed instructions in the recipe card.
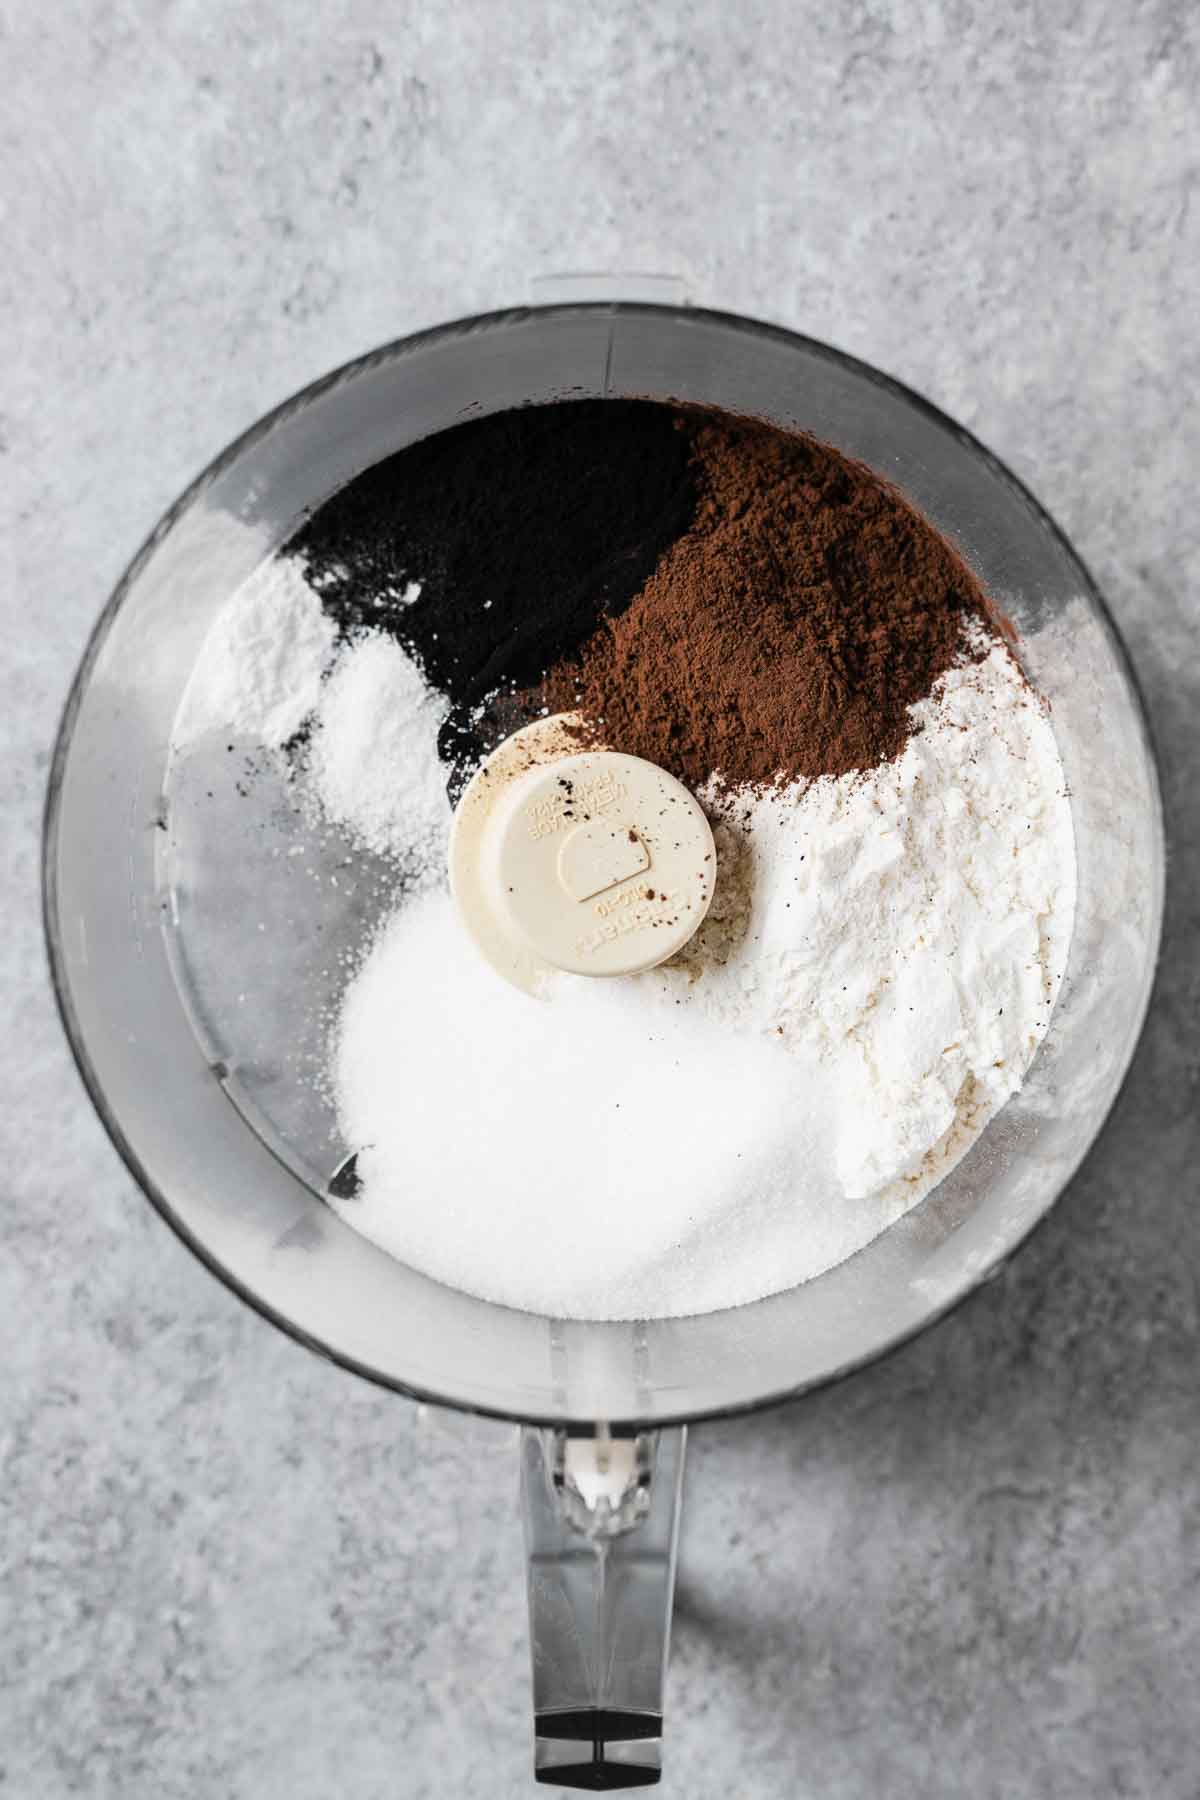
Add flour, cocoa powders, sugar, salt and baking soda to the bowl of a food processor.
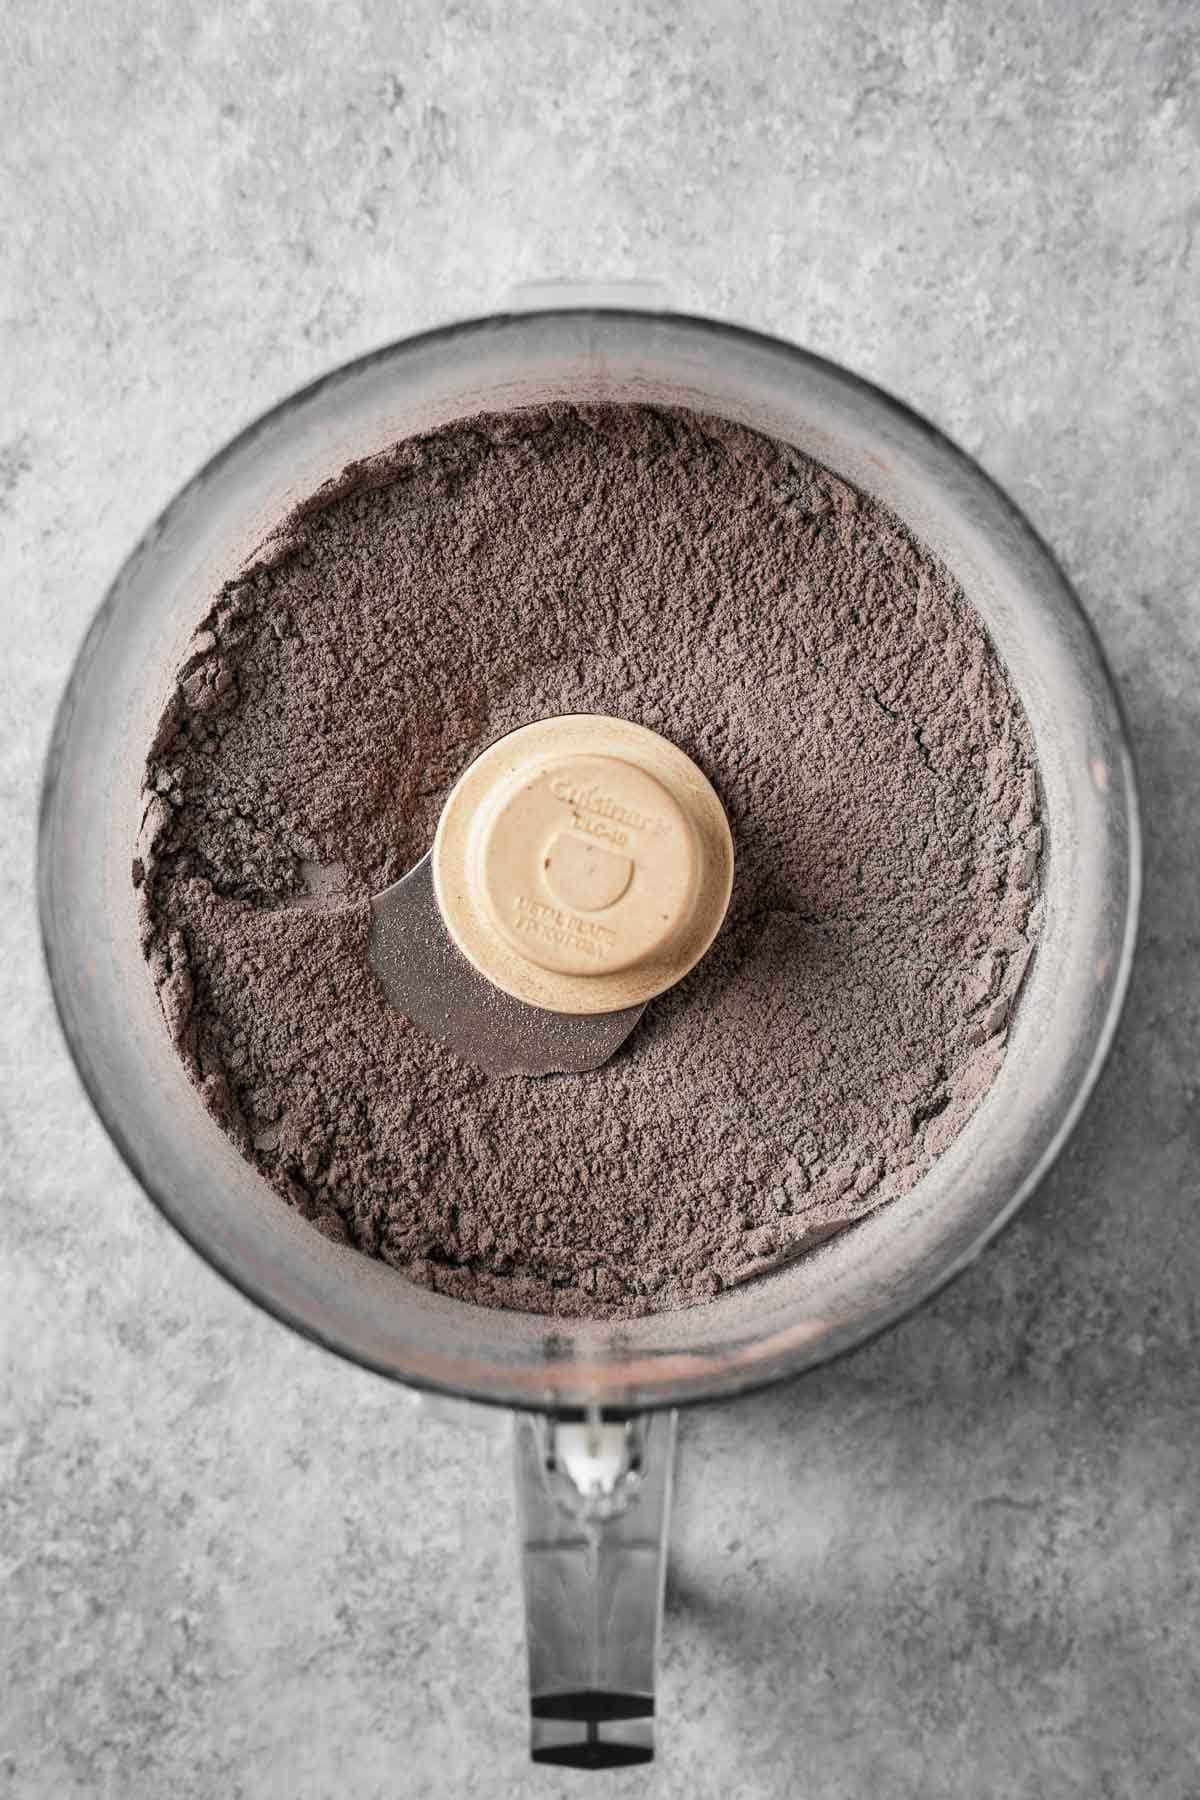
Pulse until fully combined.
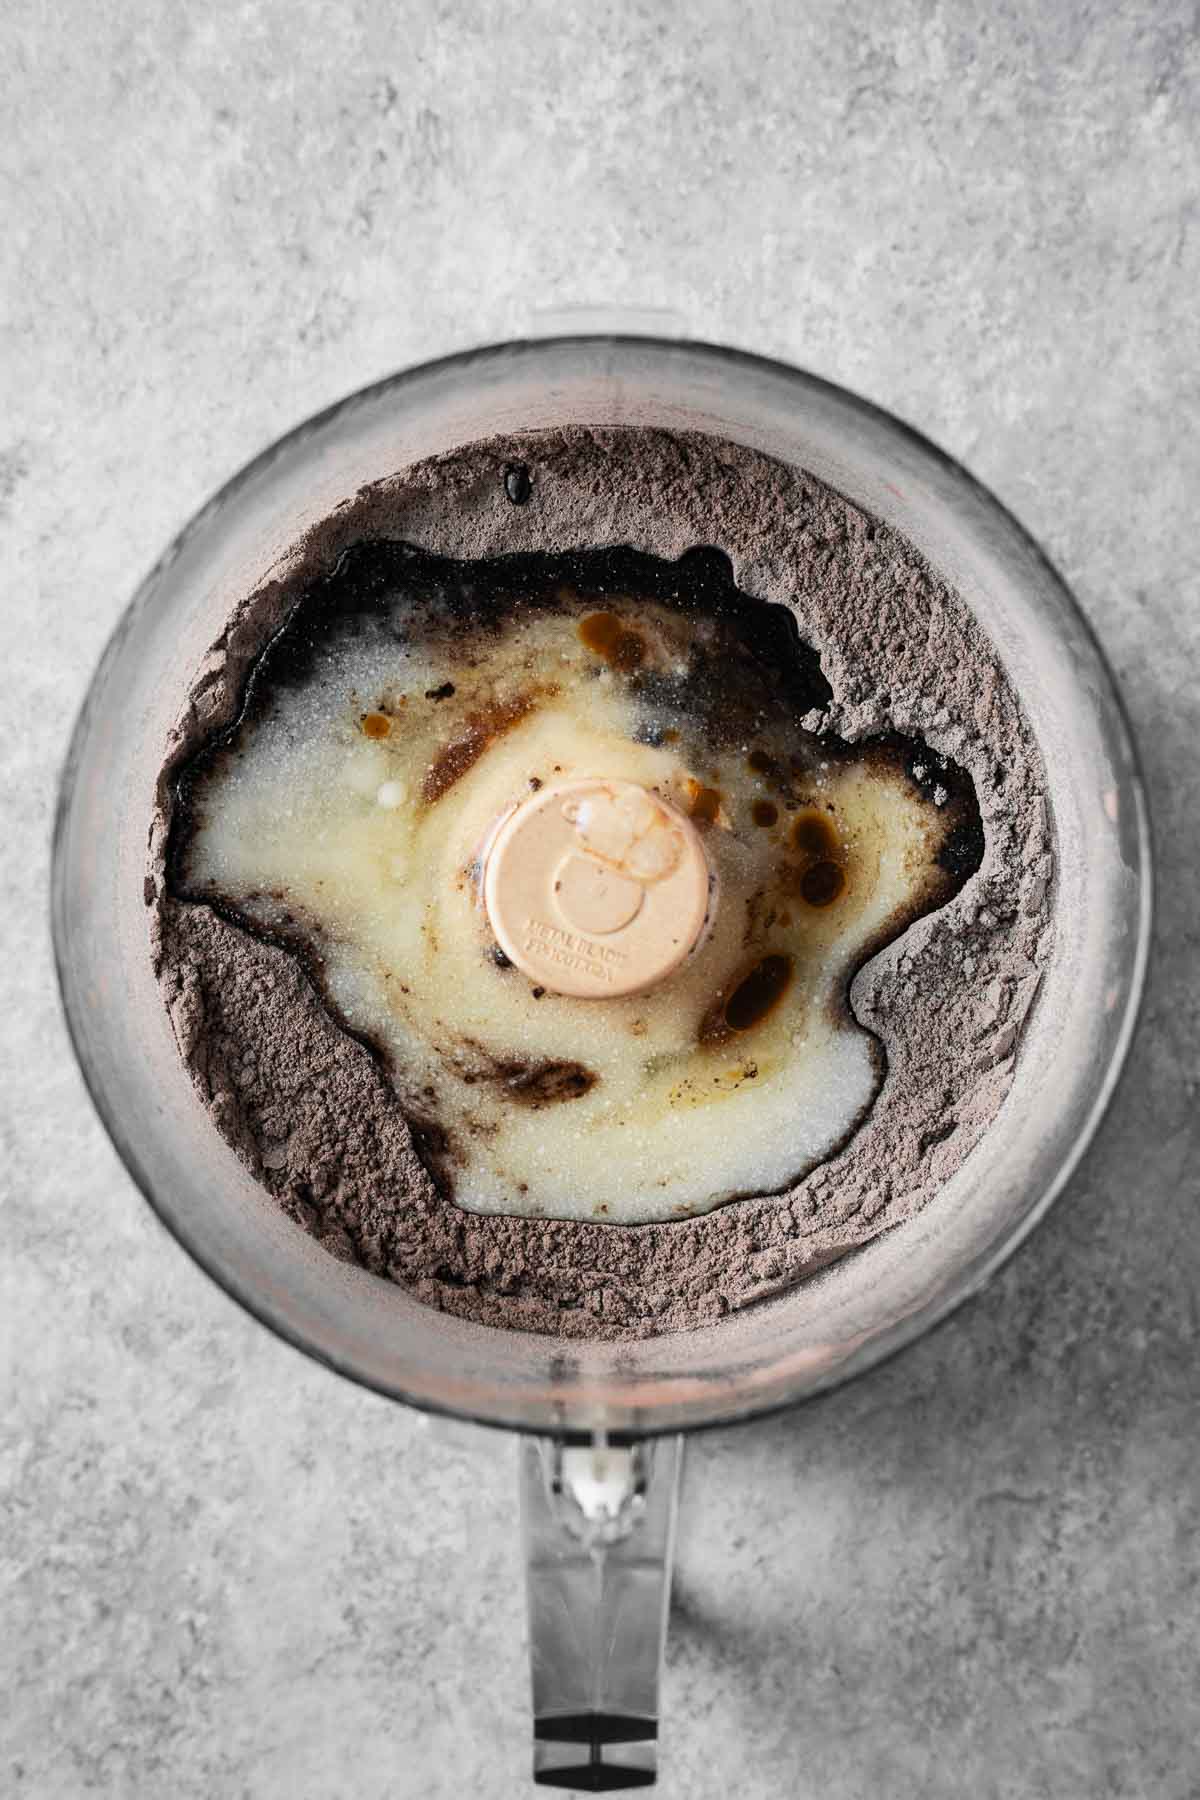
Add melted butter, oil and vanilla.

Pulse until wet ingredients are fully incorporated. Scrape bottom of food processor well to mix in all butter.
See notes in recipe card for a crucial step on checking the dough's texture before proceeding.
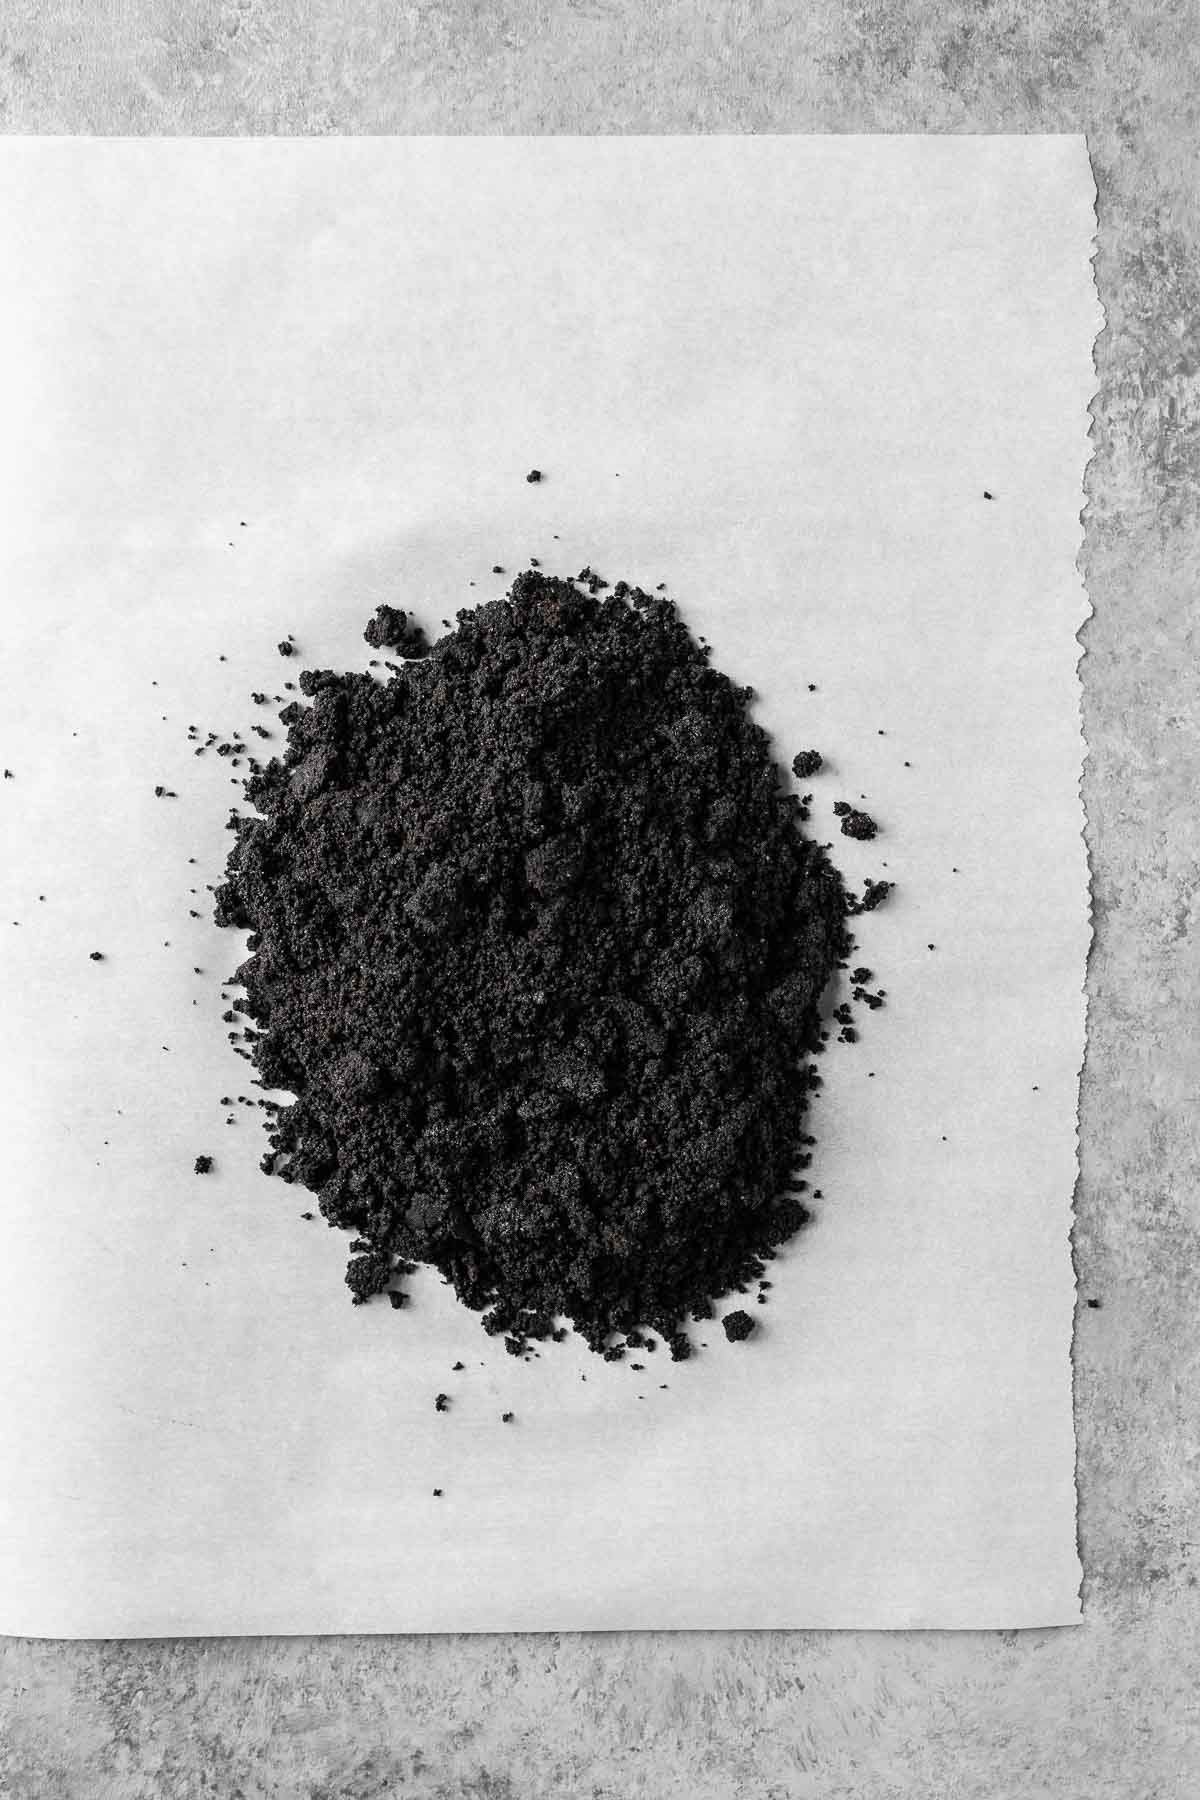
Turn mixture out onto a large piece of parchment paper.
Fold the edges of the parchment paper in to press the crumbs into a flat square of dough. Cover with a second piece of parchment.
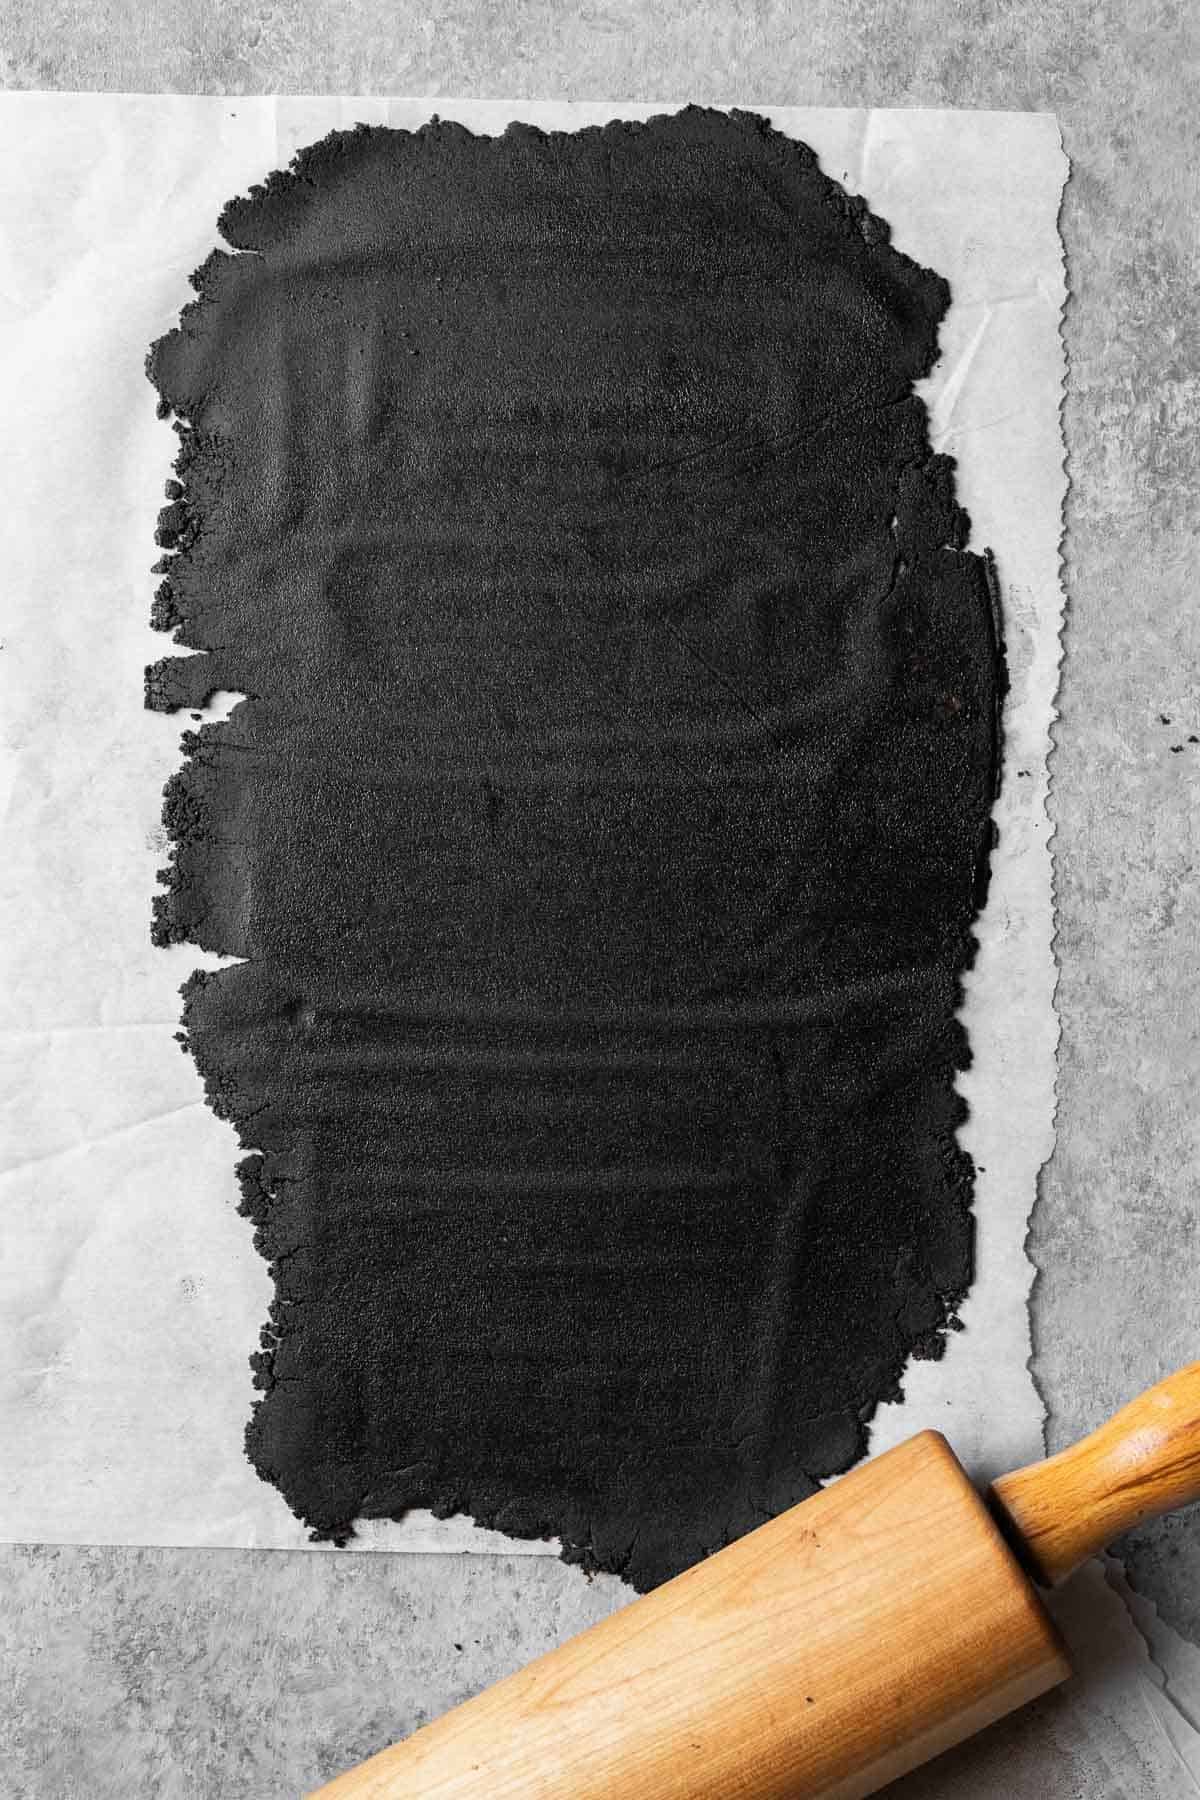
Roll the dough to ⅛ inch (3 mm) thickness. I use pastry guides to ensure precise thickness. Chill in freezer 5 minutes before cutting.
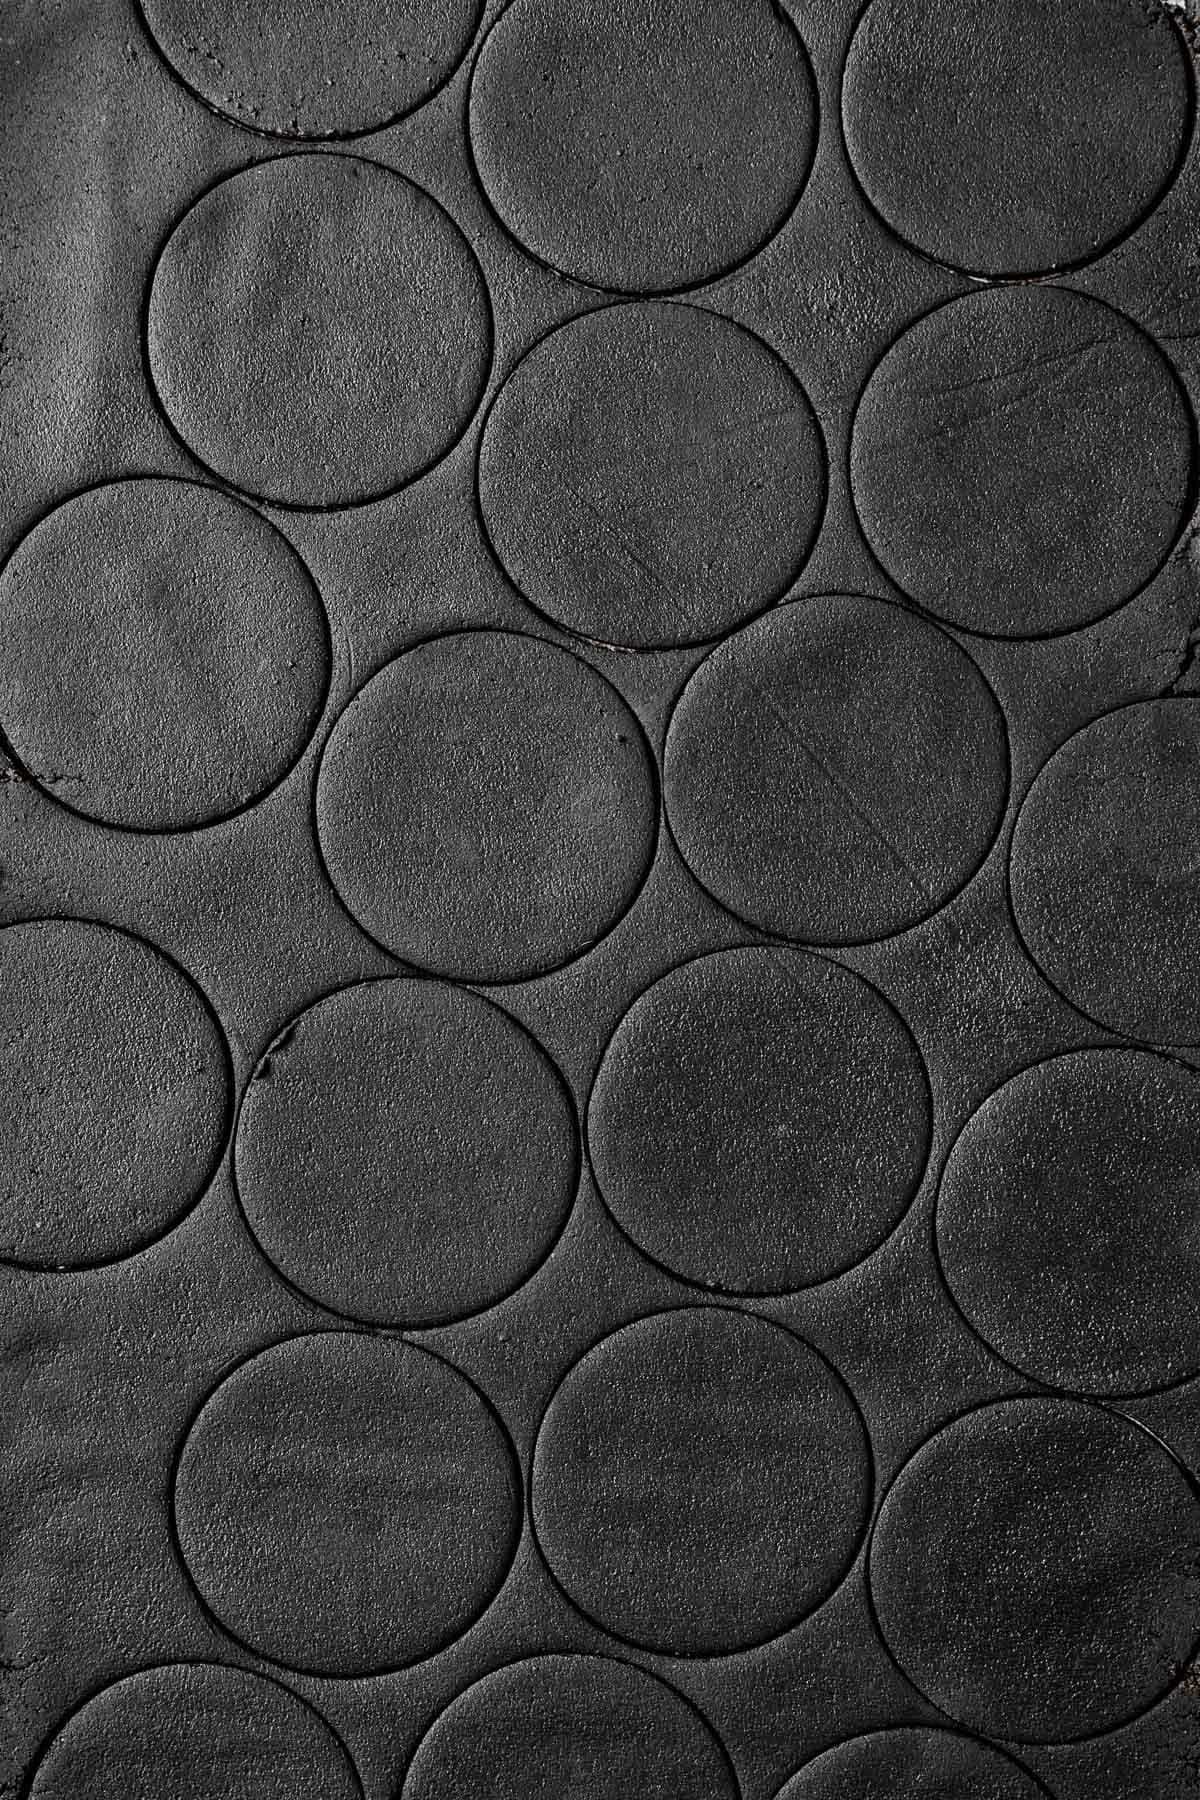
Peel parchment loose from both sides, but leave cookies resting on parchment. Cut cookies into your preferred shapes.
If your dough becomes soft while cutting shapes, slide parchment onto a baking sheet and chill it in the fridge or freezer for 5-10 minutes. The cookies will be much easier to move when cold and firm.
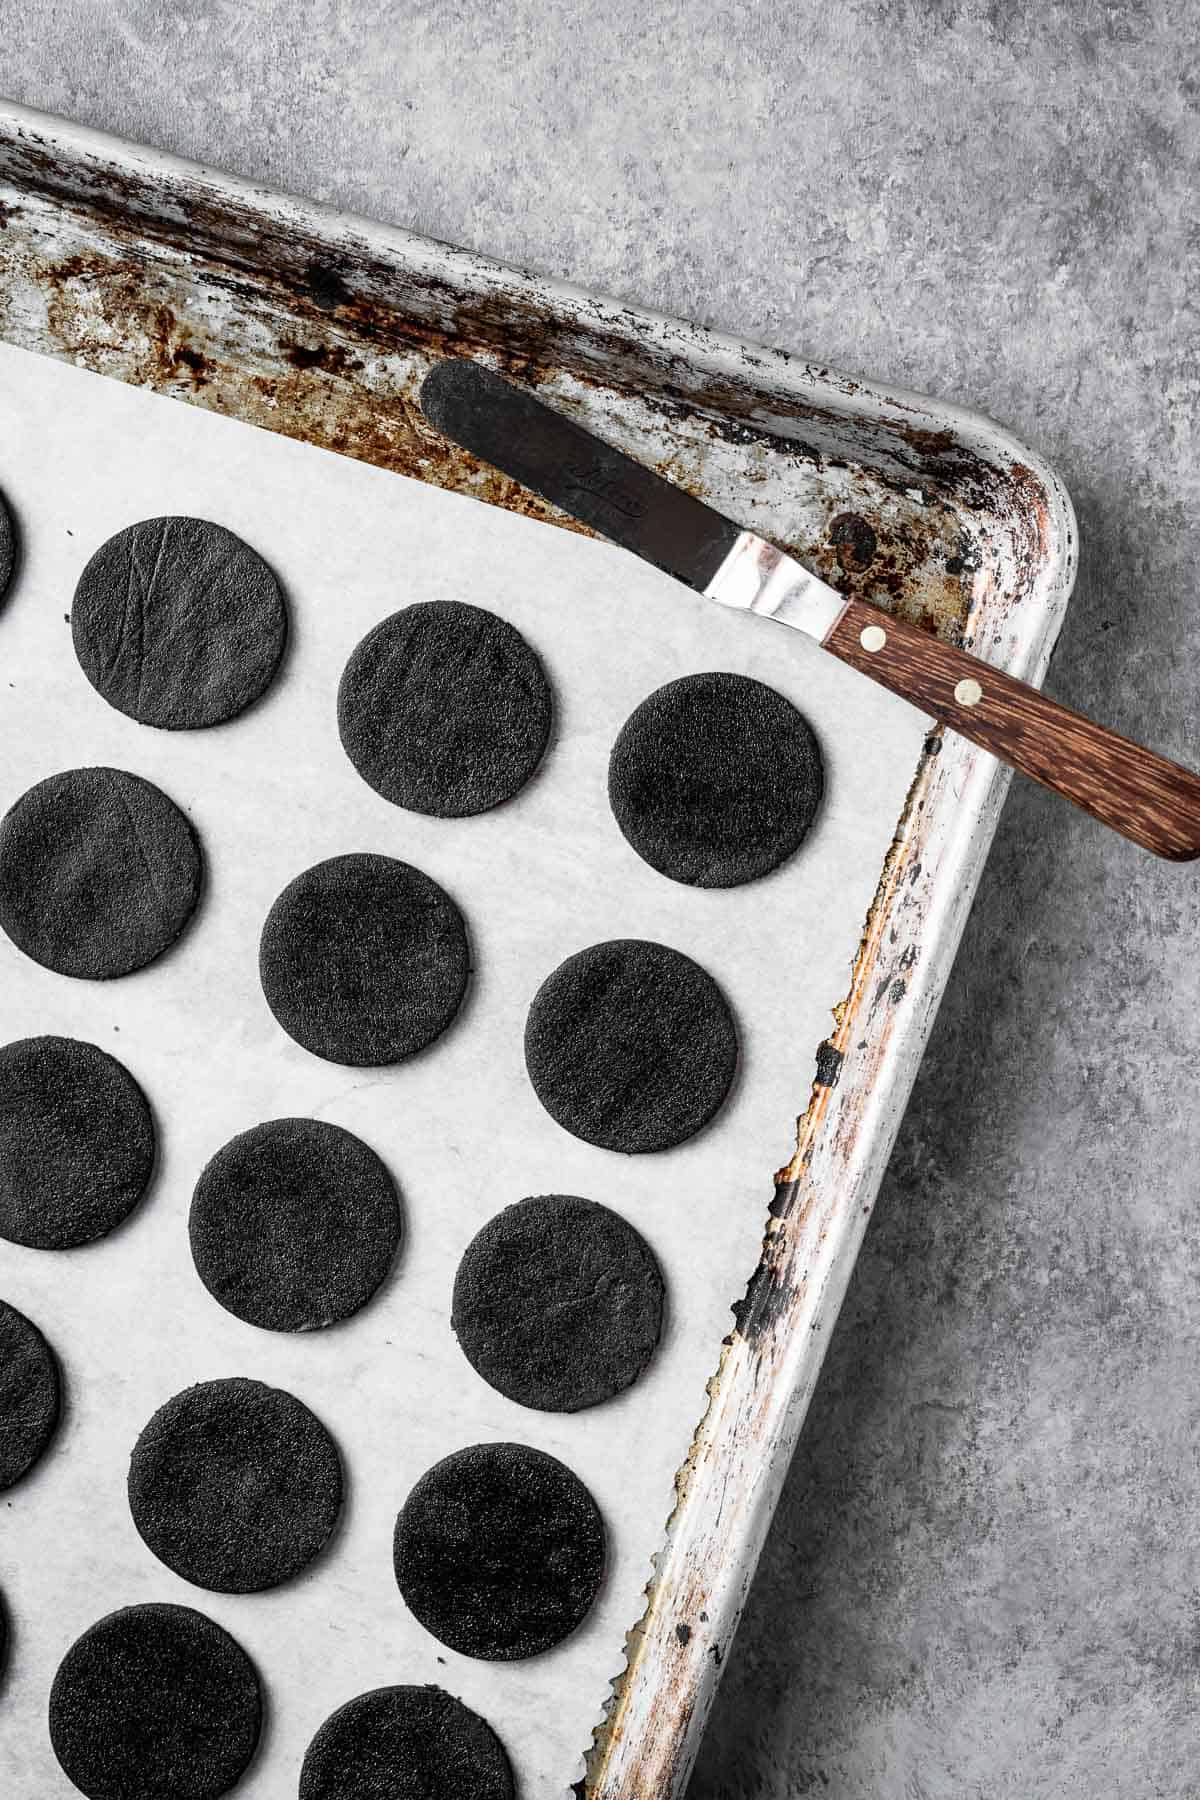
Transfer cutouts to parchment lined baking sheet. Return to freezer 10 minutes before baking.
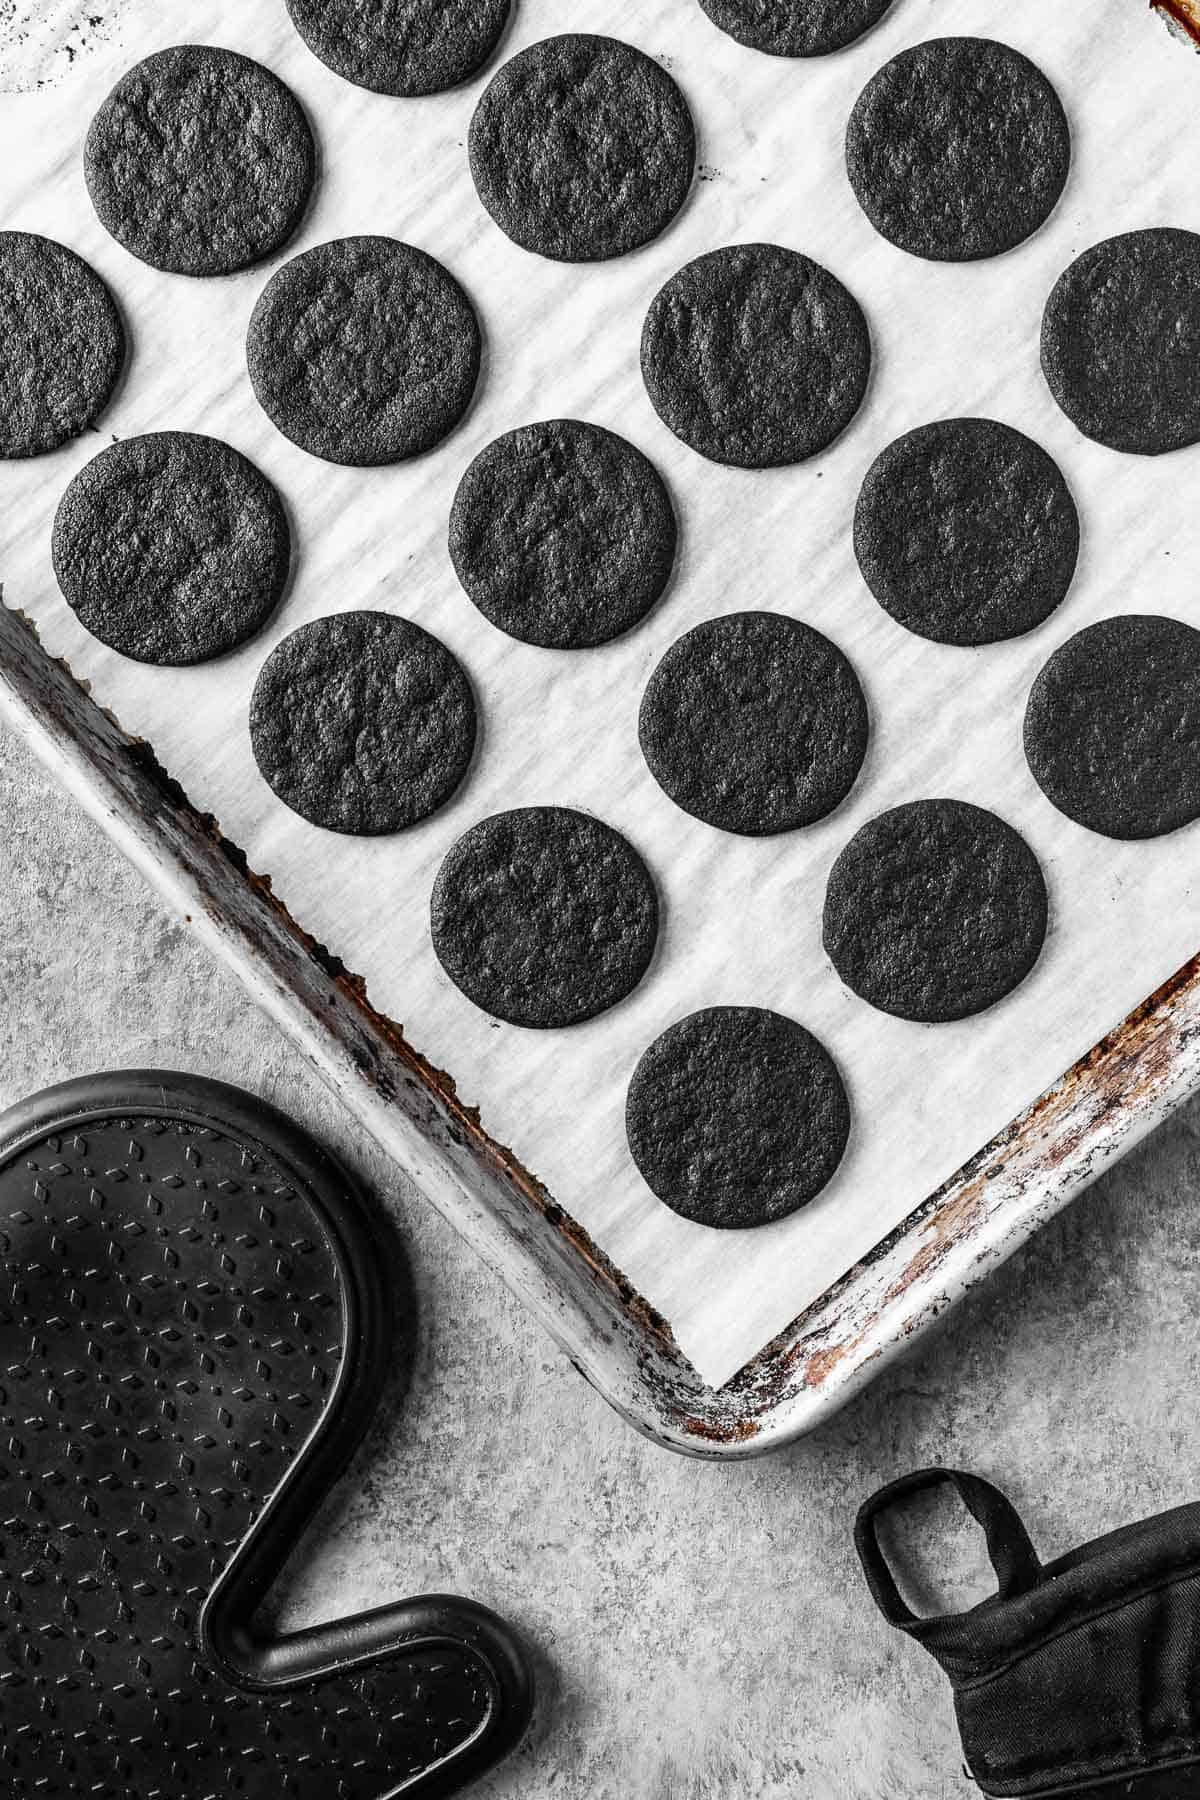
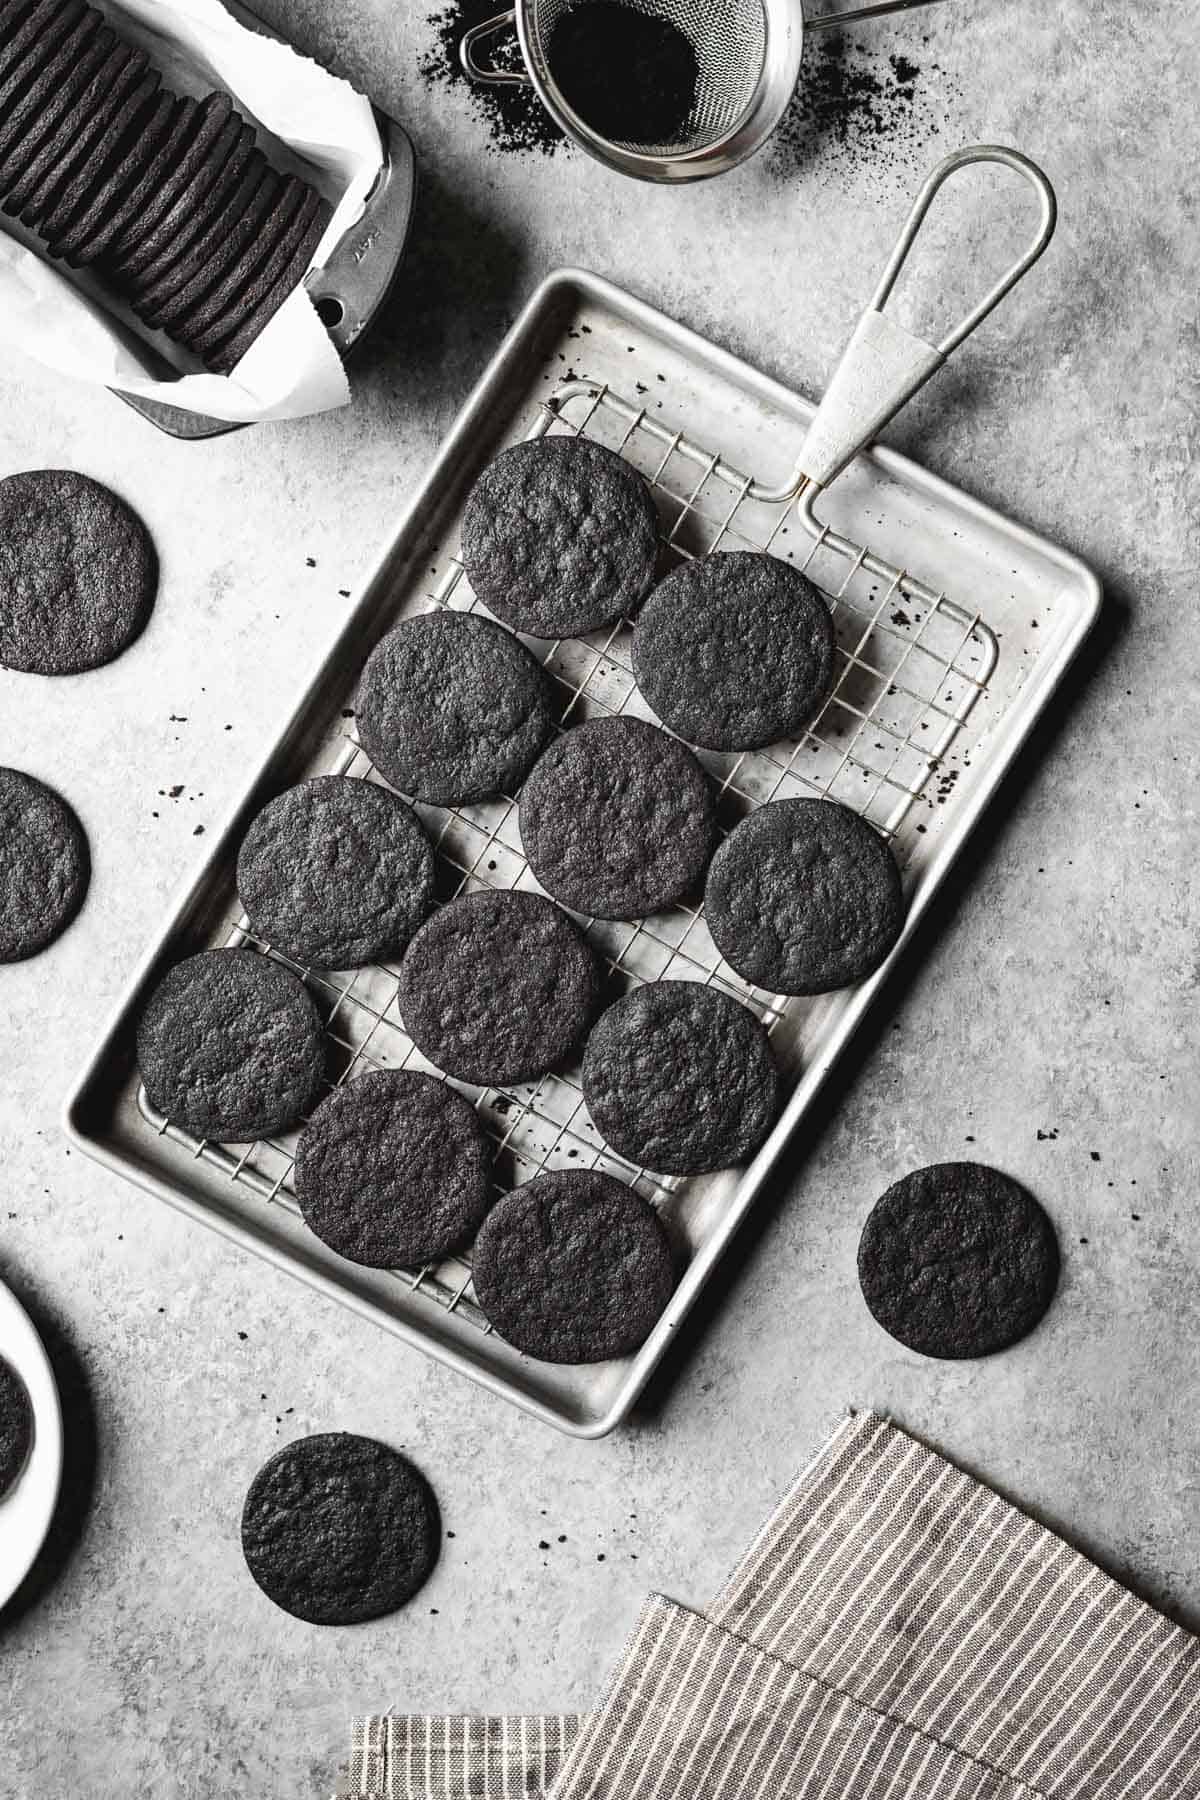
Bake at 350° Fahrenheit (177° Celsius, Gas mark 4) for 11-13 minutes. Cool on baking sheet.
Shaping the dough
One of the best things about this recipe is its flexibility and efficiency. Shape the dough based on how you plan to use the cookies!
Round, square or rectangular wafer cookies - Perfect for icebox cakes, ice cream sandwiches, and sandwich cookies. I often use a square or rectangular cutter for straight-sided pans-cookies with straight sides fit together more neatly with less wasted space.
No square or rectangle cutter? No problem. Roll the dough into a large slab and use a ruler and knife to cut straight lines horizontally and vertically. Gather and re-roll the scraps as needed. After baking and cooling, carefully snap or cut the cookies apart.
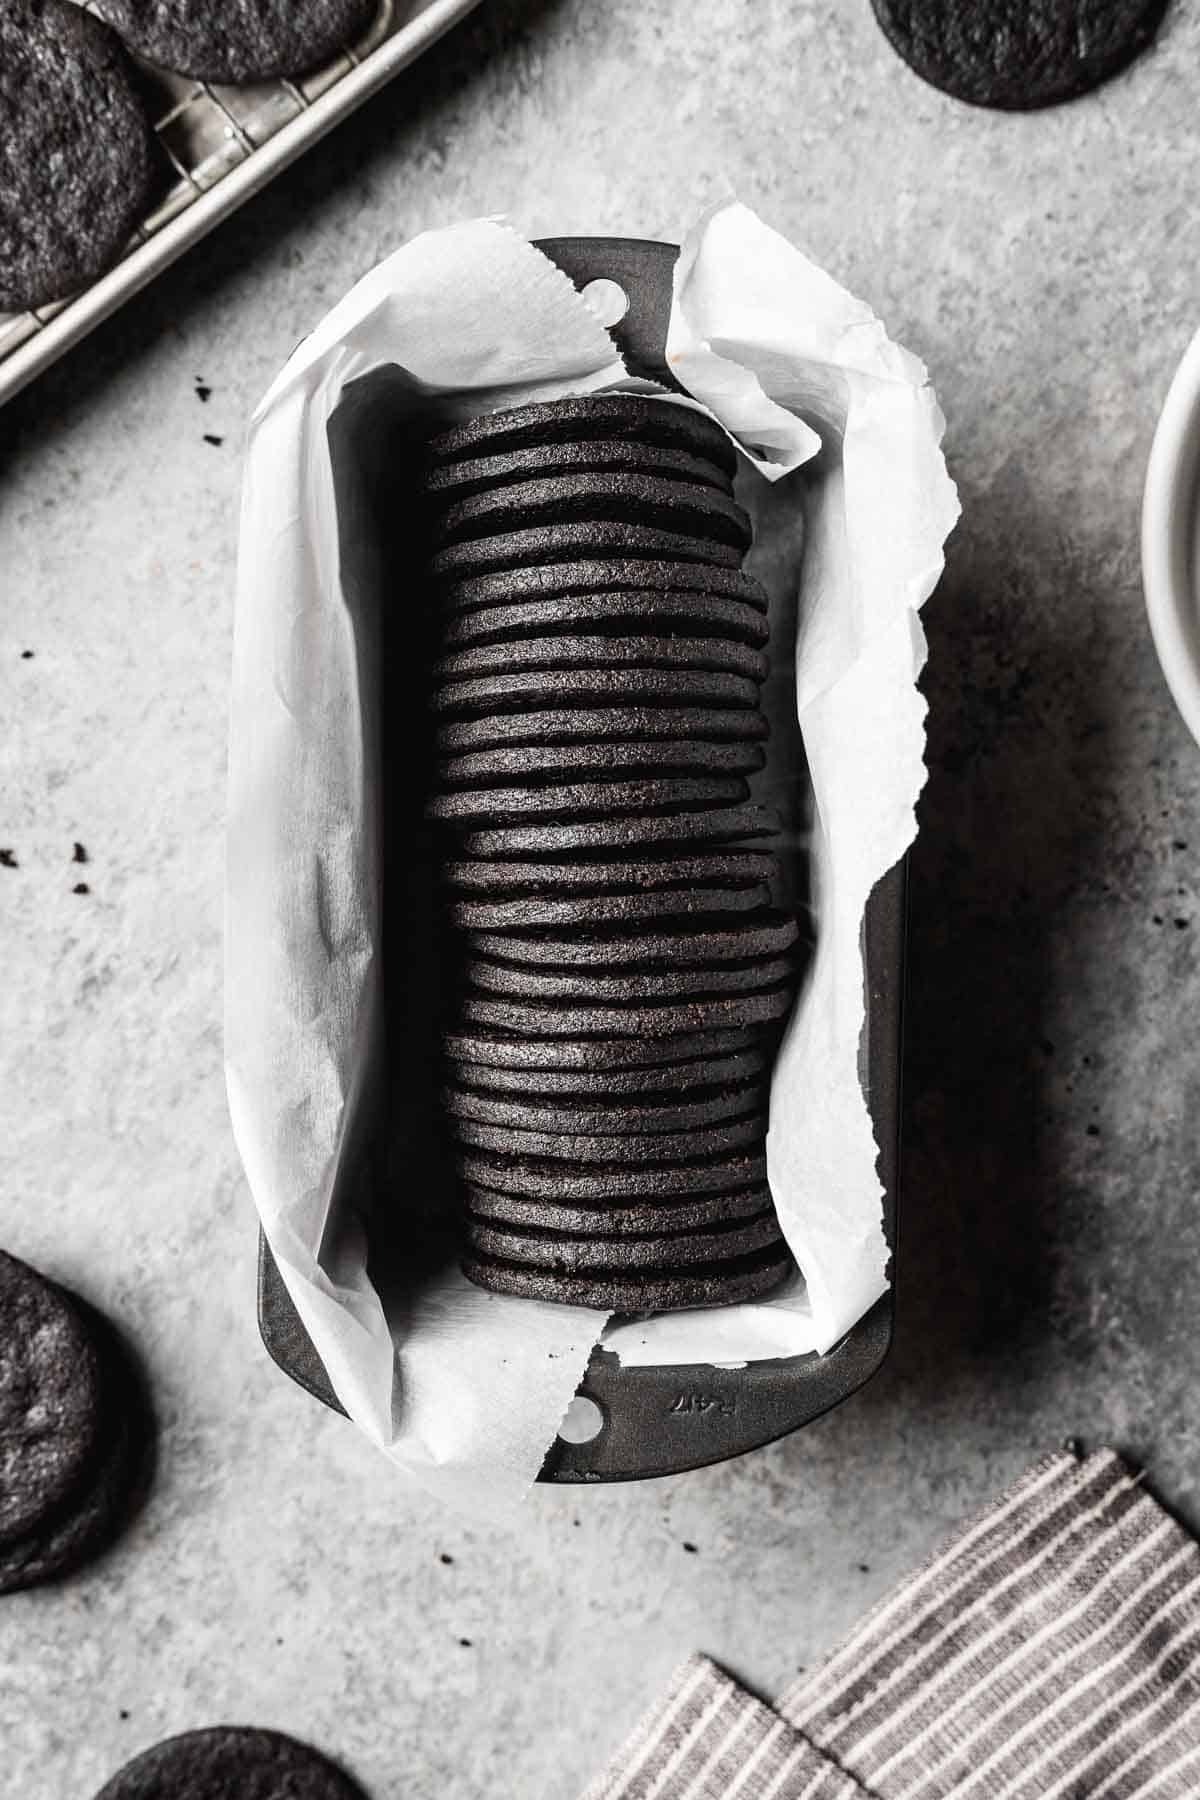
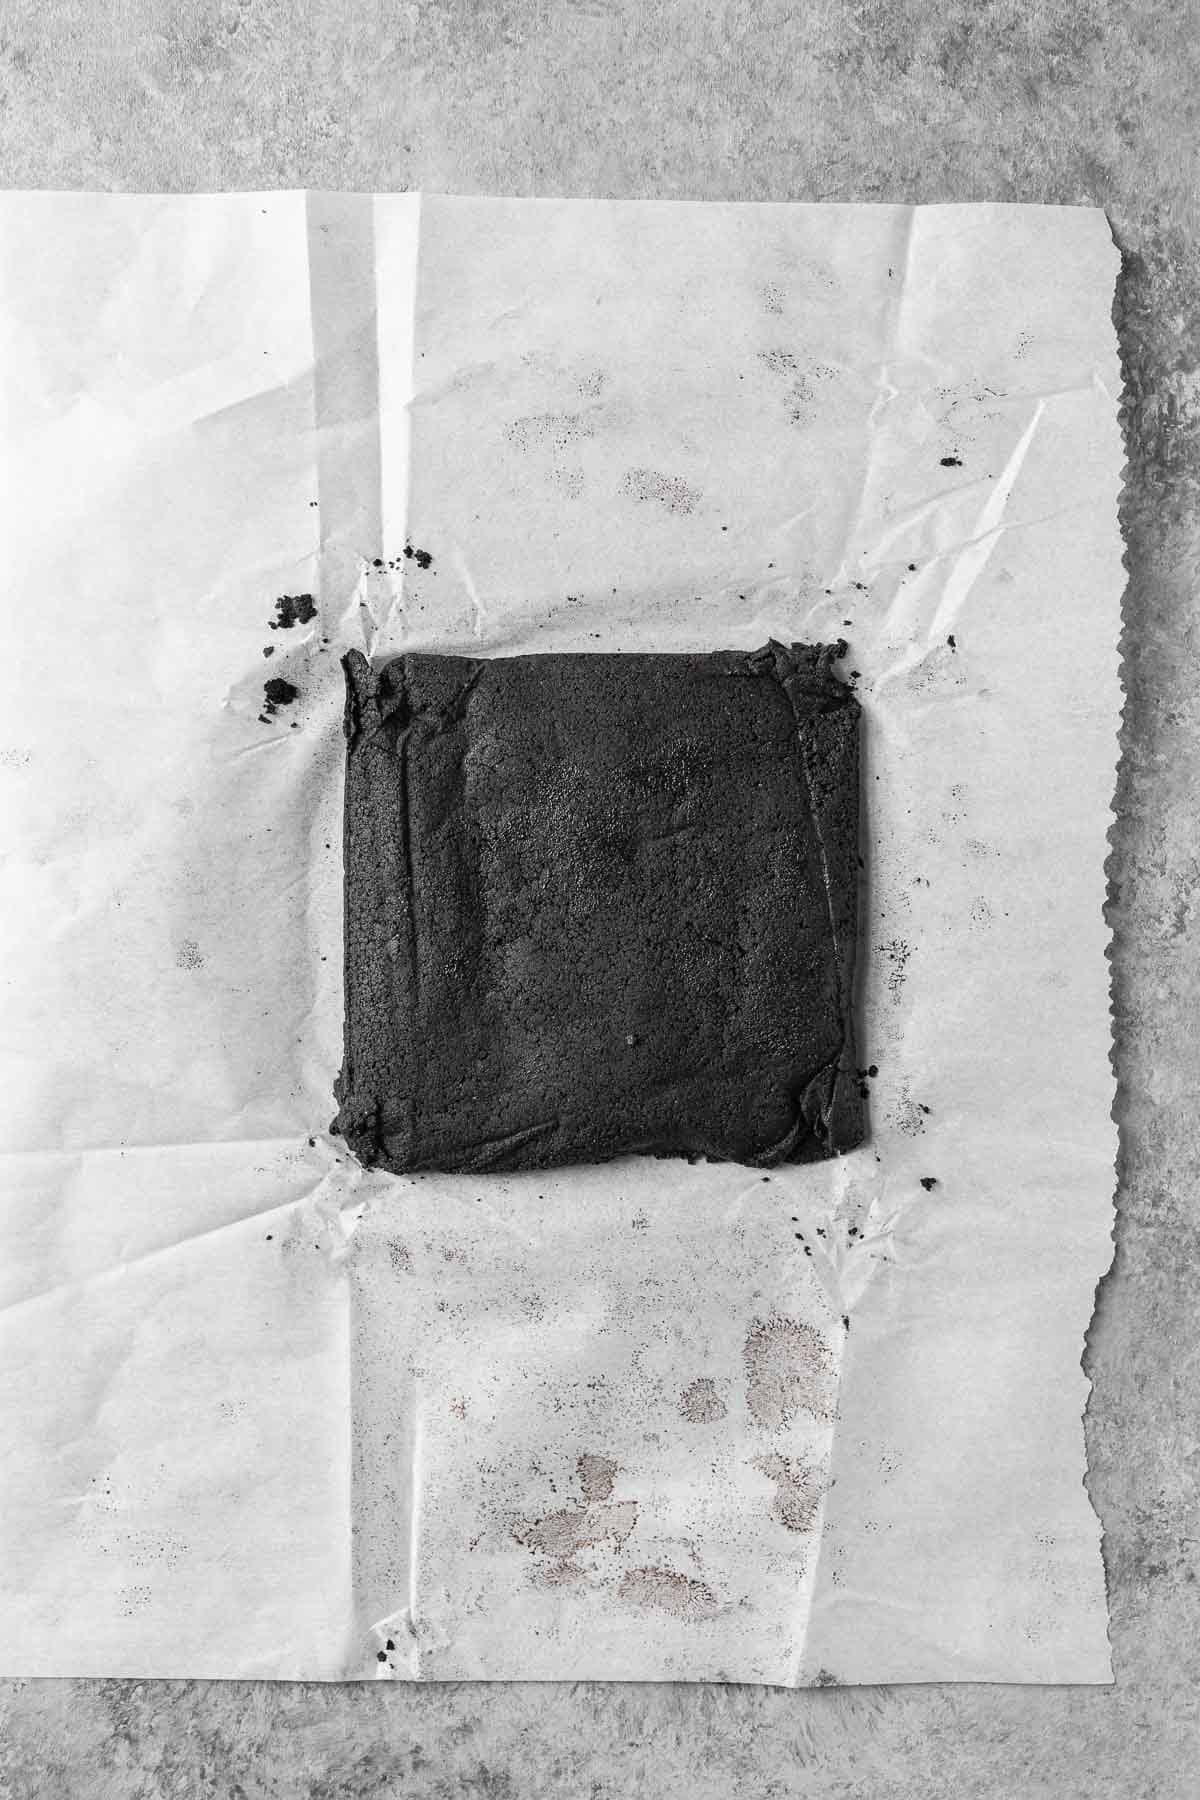
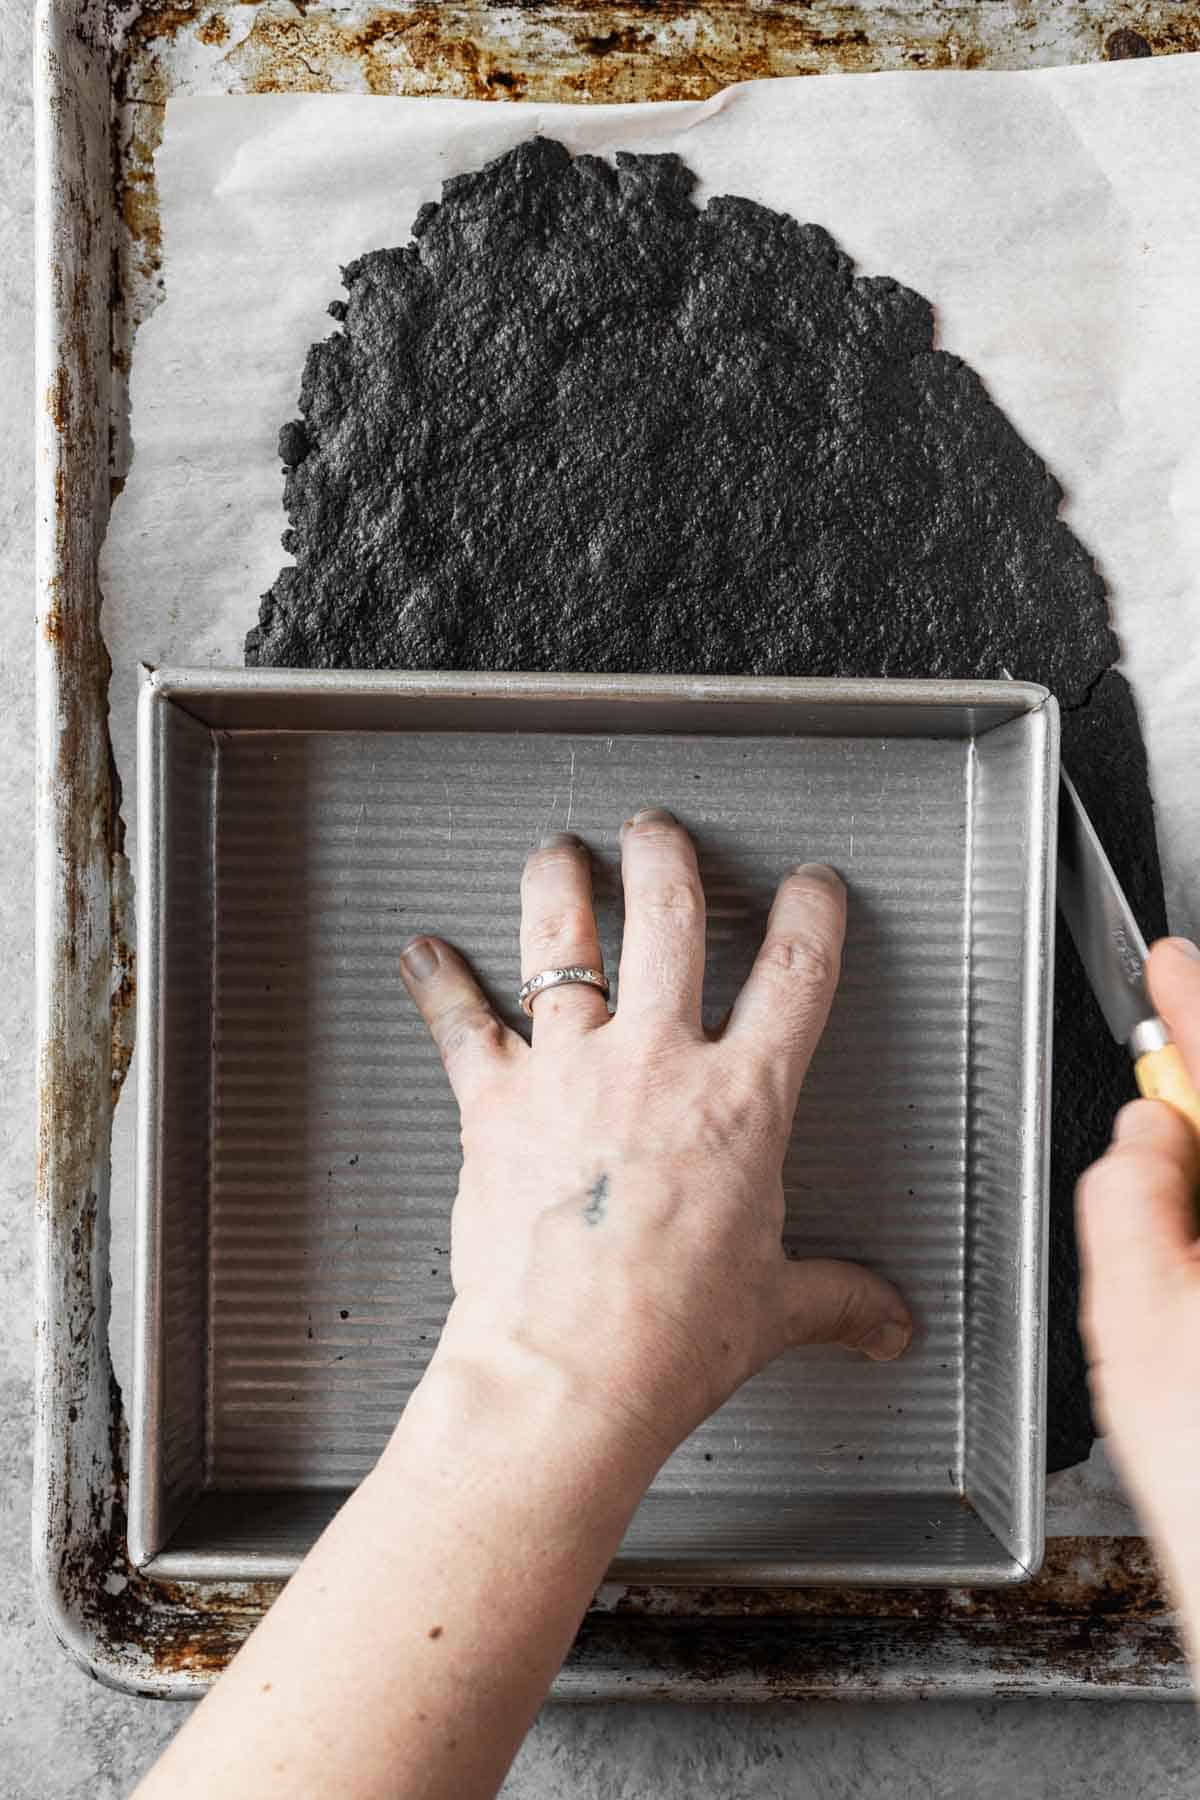
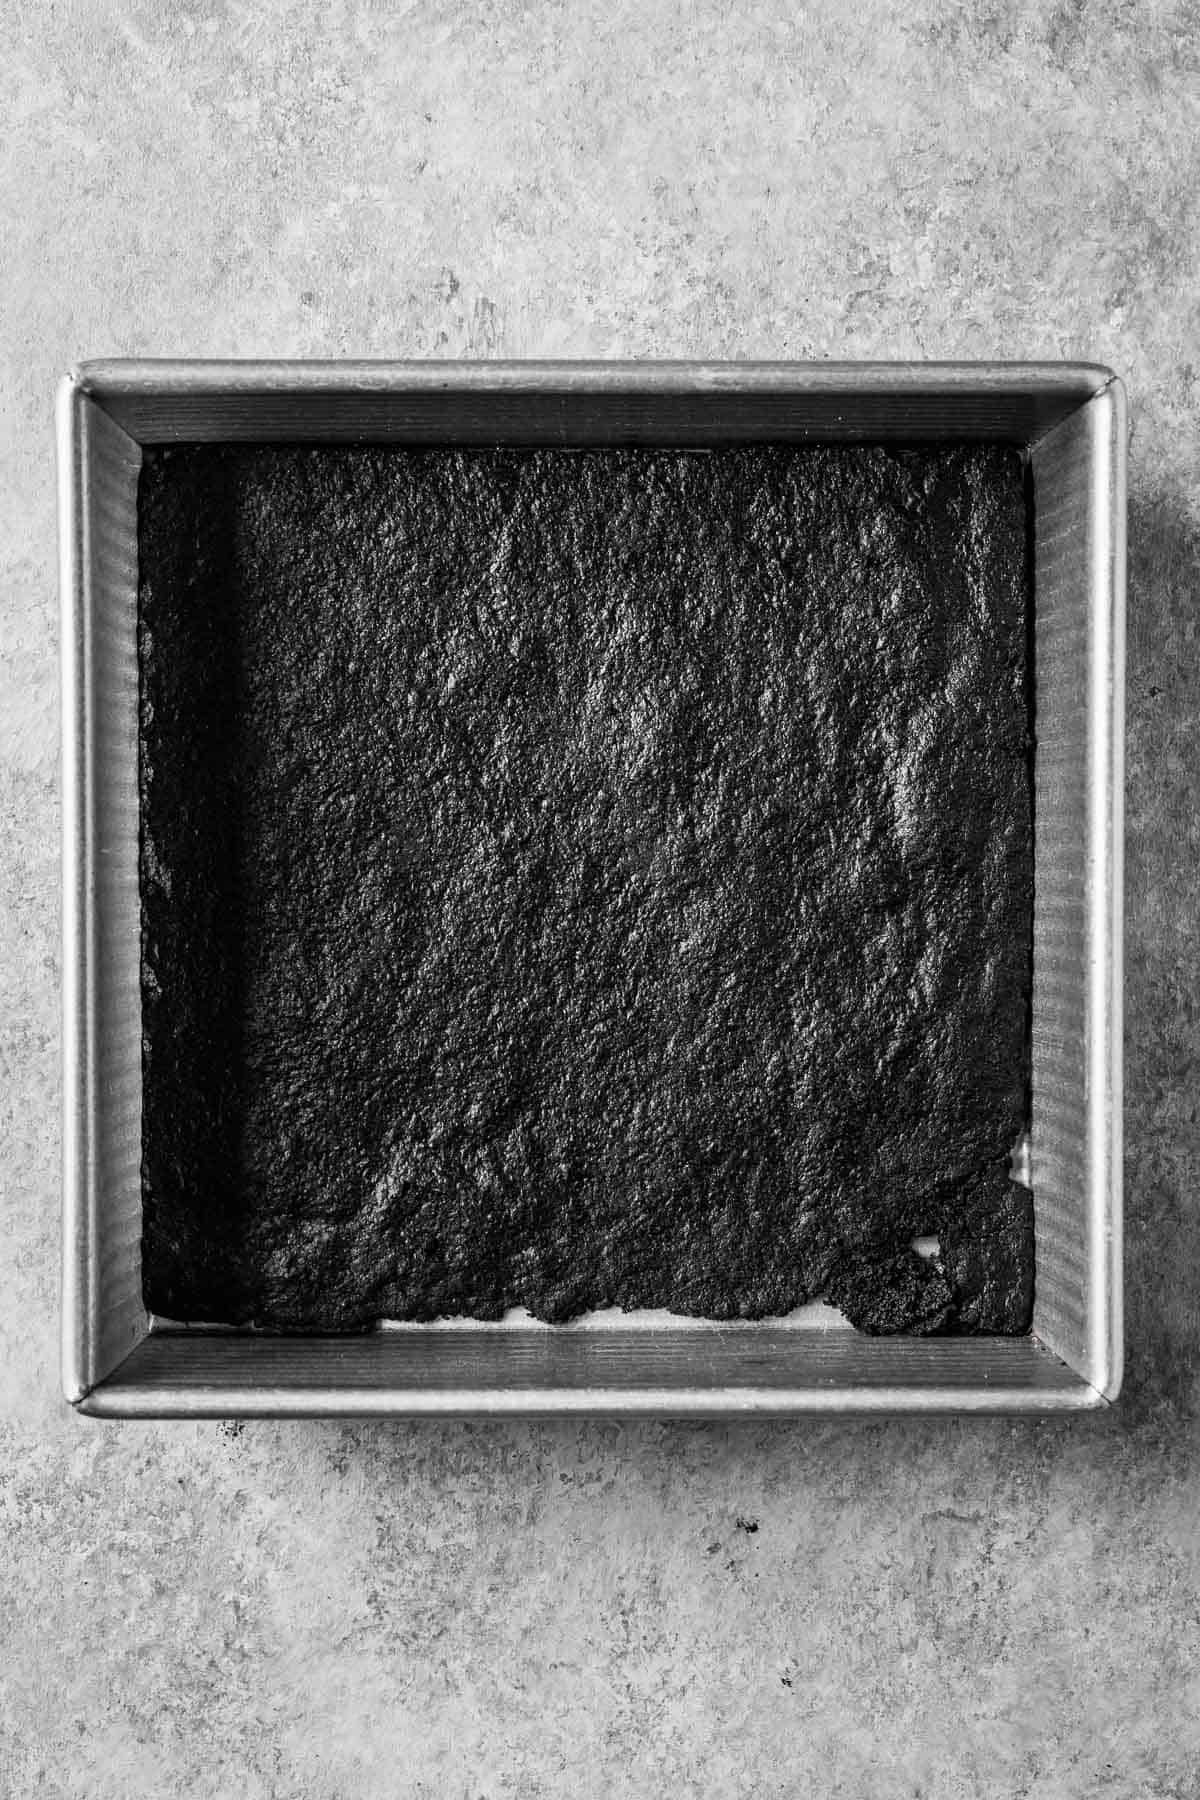
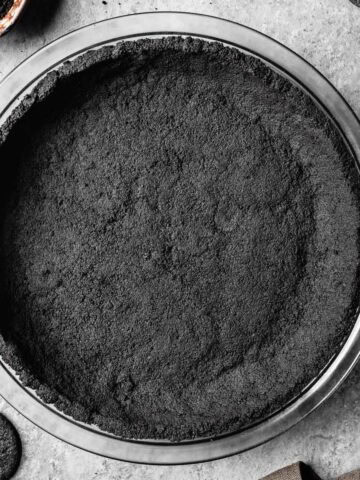
One large slab for crumb crusts - Why cut out dozens of cookies if you're just going to crush them? I tested this dough several times as a single, large rolled-out slab, and it bakes beautifully. Once cooled, break it into chunks and pulse in a food processor or place in a zippered freezer bag and crush with a rolling pin.
Use the crumbs for my chocolate crumb crust recipe. One batch yields just the right amount.
Cut-to-fit slabs for layered desserts - This method is great for recipes like chocotorta, where you need layers that fit your pan. It's an incredible time saver! I rolled and baked one large slab, then used my 8-inch square pan as a guide to cut the pieces.
While you can measure and cut the slabs after baking like I did in the photos, I actually recommend doing it before baking so that you can re-roll your dough scraps for more precise additional layers.

A baked slab of chocolate wafer cookie.
Measuring the base of the pan for a tight fit.

A cut sheet of chocolate wafer cookie.
A full layer of wafer cookie for layered desserts. The perfect fit!
Note: Some wafer cookie recipes suggest forming a log, chilling, and slicing the dough. I recommend rolling and cutting instead. It gives you thin, evenly shaped cookies that bake up crisp and uniform at ⅛ inch (3 mm) thick.
Frequently asked questions
Chocolate wafer cookies are intensely dark chocolate cookies that are thin and crispy. They are often ground up to use in chocolate crumb crusts for cheesecakes and pies, layered with sweetened whipped cream in icebox cakes (refrigerator cakes), and used for ice cream sandwiches.
Yes! While it's quick and easy to make in a food processor, you can also use a stand mixer or mix the dough by hand. If mixing by hand, be sure to sift the flour and baking soda first for even distribution.
If you're using a food processor, you can make up to 2x the recipe without overloading the bowl. For larger batches, use a stand mixer.
Serving ideas
Wondering how to use chocolate wafer cookies? Here are some delicious ways to enjoy them:
Crusts - Use these wafers in place of Oreos or other store-bought cookies to make homemade chocolate wafer cookie crust that's rich and flavorful. Because these cookies have a different fat content than packaged wafers, it's important to follow my tested recipe to get the right butter-to-crumb ratio.
Icebox cakes - Icebox cakes are a simple, refreshing no-bake dessert. Layer chocolate wafers with lightly sweetened whipped cream or pudding, then chill for several hours so the cookies soften and absorb the filling.
Chocotorta - I originally developed chocolate wafer biscuits to recreate the classic Argentine no-bake dessert, chocotorta. It's made with coffee-soaked wafers layered with a creamy mix of dulce de leche and cream cheese. It's magical.
Ice cream sandwiches - Sandwich softened ice cream (like this peanut butter ice cream) between two wafers. Freeze until firm, and wrap in foil or plastic if storing for more than a day.
Sandwich cookies - Pipe buttercream icing between two wafers for a decadent sandwich cookie. Try a half batch of dark chocolate buttercream, or go rich with salted caramel buttercream.

Equipment
For Uniform Thickness: The secret to professional-looking cookies is rolling the dough to an even thickness. The best way to do this is with a set of pastry guides. I use these acrylic guides from Fat Daddio's because I can still use my favorite rolling pin and they guarantee a perfectly crisp batch every time.
For Perfect Circles: A good set of round cutters is essential. I use this 11-piece round set because it gives you every size you could possibly need and the edges are sharp for a clean cut.
For Baking: Your choice of baking sheet is surprisingly important. I use and recommend these USA Pan half sheet baking pans at King Arthur Flour for their durability and consistent results.
For most cookies, a light-colored, heavy-duty aluminum pan is the best choice. It promotes even baking and prevents the bottoms from getting too dark.
For dark cookies like these, you can get away with a darker pan, but the light-colored pan is the most versatile and reliable option.
Storage
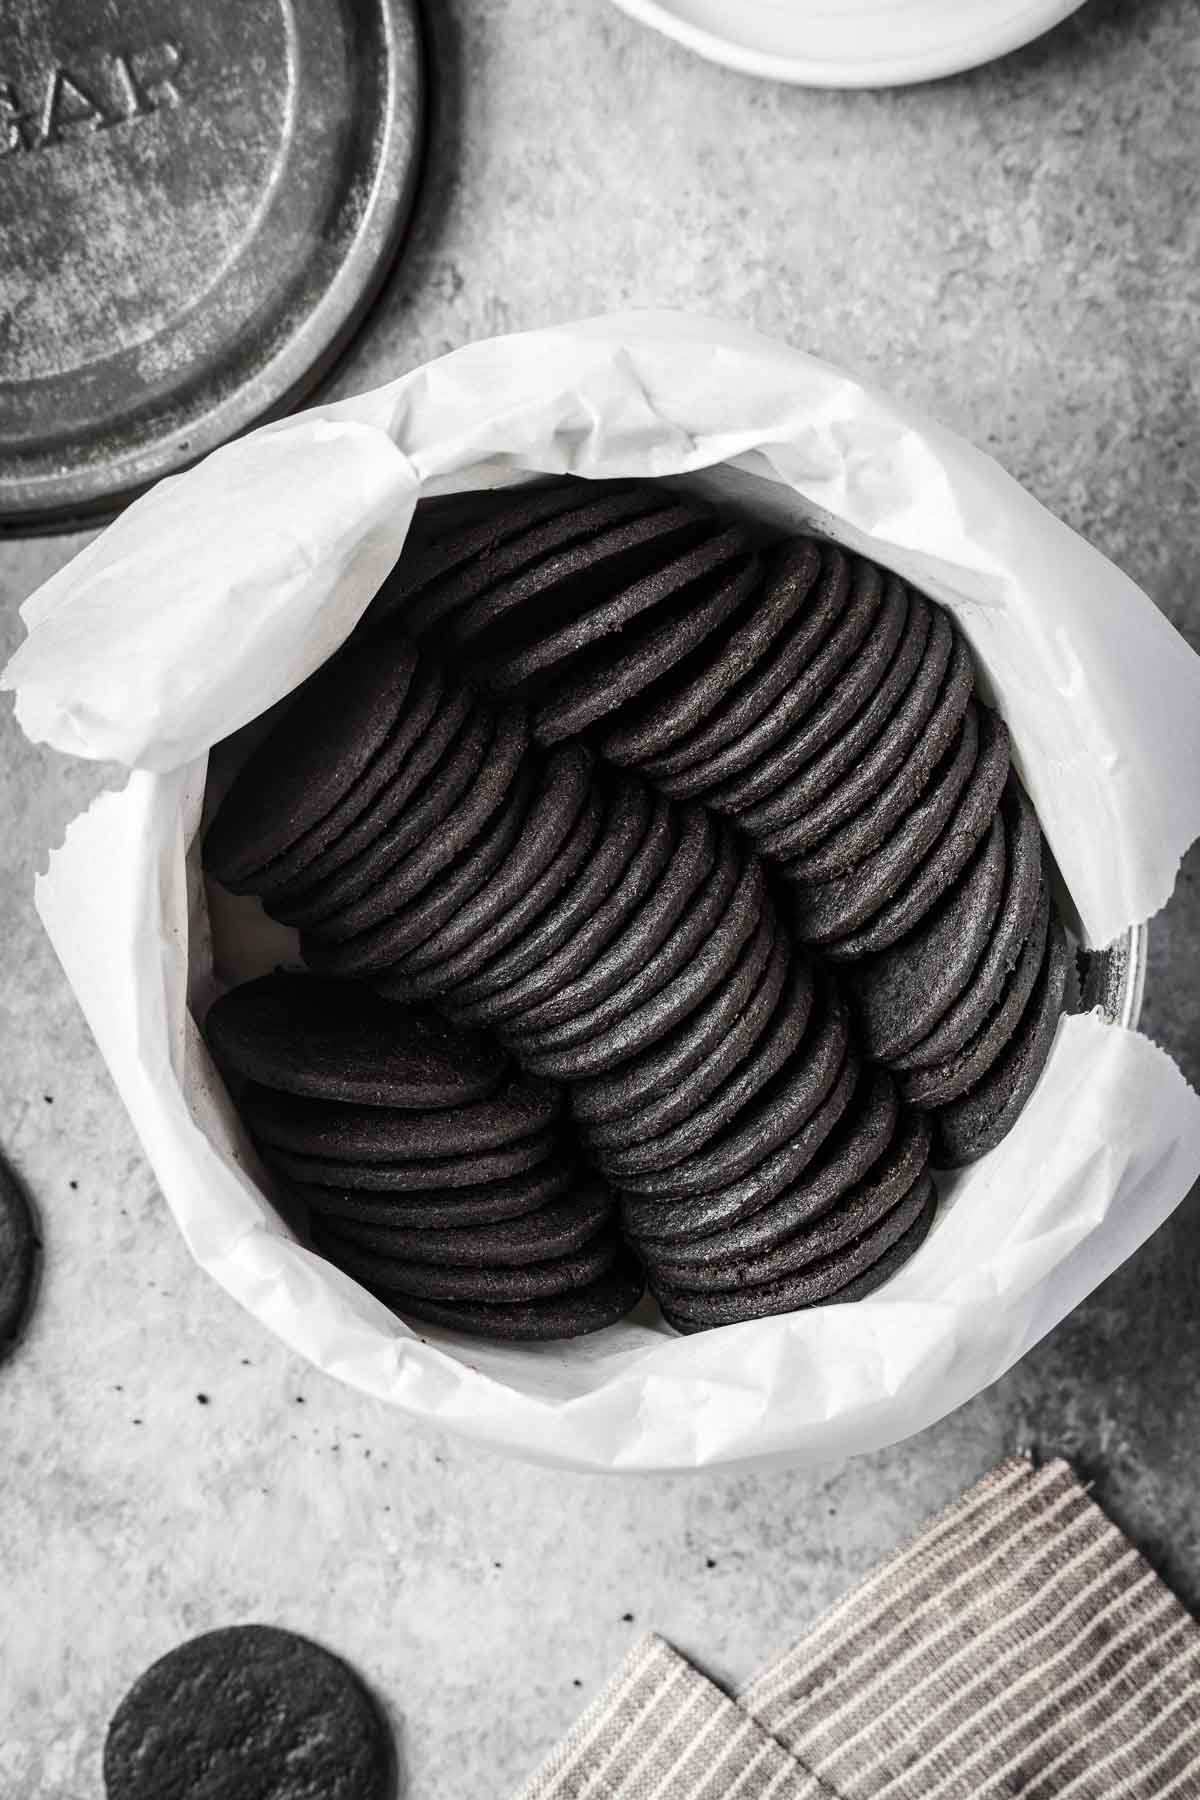
Store baked cookies in an airtight container at room temperature for up to 1 week, or freeze for up to 3 months.
The dough can also be made ahead. Wrap it well and store in an airtight container in the fridge for up to 1 week, or freeze for up to 3 months. When ready to use, defrost in the fridge, then let come to room temperature before rolling.
Consider baking a double batch and freezing the extra-it's a great way to always have chocolate wafer cookies ready for your next dessert!
Recipe Tips
Loosen the dough from both sides of the parchment before cutting your cookies. Peel off the top layer, replace it loosely, then flip the dough and remove the bottom sheet completely. This keeps the cutouts from sticking and makes transferring them easy.
Dark cookies can be hard to judge by color alone. For these, trust your nose. When your kitchen smells like rich, buttery chocolate, they're ready to come out of the oven. They should no longer be glossy, and a gentle press in the center should feel set and not leave a deep indent.
These cookies are fragile straight from the oven and will firm up as they cool. Resist the urge to move them too soon. Let them cool completely on the baking sheet first.
These cookies make an excellent crumb crust-but they don't follow the usual rules. Their higher fat content means you'll need less butter than most crust recipes call for. Use my tested chocolate cookie crust recipe to get the perfect texture and balance.
Love this recipe? Please leave a comment and star rating. ★★★★★ Your feedback, suggestions, and adaptations are very helpful to other bakers!
📖 Recipe
Chocolate Wafer Cookies
INGREDIENTS
- 100 grams all purpose flour
- 15 grams cocoa powder, Dutch process, sifted
- 10 grams black cocoa powder, sifted
- 54 grams granulated sugar
- ¼ teaspoon baking soda, sifted
- ¼ teaspoon kosher salt, Diamond Crystal
- 56 grams unsalted butter, melted (warm, not hot)
- 15 mL vegetable oil, neutral flavored
- 5 mL vanilla extract
INSTRUCTIONS
- Preheat oven to 350 degrees Fahrenheit (177° Celsius, Gas mark 4).
- Add flour, cocoa powders, sugar, baking soda and salt to the bowl of a food processor. Pulse until fully combined.100 grams all purpose flour, 15 grams cocoa powder, 10 grams black cocoa powder, ¼ teaspoon baking soda, ¼ teaspoon kosher salt, 54 grams granulated sugar
- Add melted butter, oil and vanilla.56 grams unsalted butter, 15 mL vegetable oil, 5 mL vanilla extract
- Pulse until wet ingredients are fully incorporated. Scrape bottom of food processor well to mix in all butter.See notes in recipe card for a crucial step on checking the dough's texture before proceeding.
- Turn dough out onto a large rectangular piece of parchment paper. Fold the edges of the parchment paper in to press the crumbs into a flat square of dough. Cover with a second piece of parchment.
- Roll the dough to ⅛ inch (3 mm) thickness. I use pastry guides to ensure precise thickness. Remove top layer of parchment (save it for step 8.) *If using the large slab method for cookie crumbs, skip cutting steps and proceed straight to step 9.
- Move dough on parchment base to baking sheet and place in freezer 5 minutes before cutting.
- Place reserved parchment back onto dough and flip over. Peel off the now-top layer of parchment. Cut cookies into your preferred shapes. Transfer cutouts to parchment lined baking sheet.
- Return baking sheet to freezer 10 minutes before baking.
- Bake at 350° Fahrenheit (177° Celsius, Gas mark 4) for 12-13 minutes. Cool on baking sheet.
EQUIPMENT
- Pastry guides (3 mm, ⅛ inch thick)
NOTES
- Pastry Guides: These are essential for rolling your dough to the perfect ⅛-inch thickness. I use and love Fat Daddio acrylic pastry guides. Using guides will give you a professional, uniform result. No guides? For a quick thickness check, two US pennies stacked together are also ⅛" thick.
- No Food Processor? You can use a stand mixer or mix by hand. Be sure to sift the flour, cocoa powders, and baking soda first for even distribution.
- Planning a Larger Batch? You can use a food processor for up to 2x the recipe without overloading the bowl. For up to 4x the recipe, use a stand mixer.
- Cocoa Substitution: You can substitute Dutch-process cocoa for the black cocoa, but you won't achieve the signature deep color or rich taste without it.
- Before you roll out the dough, press a small amount together with your fingers. If it feels smooth and holds together perfectly, you are all set.
- If it feels dry, crumbly, and won't stick together, your cocoa powder is exceptionally absorbent (this can happen with certain brands).
- The fix is simple: Add melted butter one teaspoon at a time, mixing for 15 seconds after each addition, until the dough comes together perfectly. Do not add more than 3 teaspoons (1 Tablespoon) of extra butter total.
- To prevent sticking: Loosen the dough from both sides of the parchment before cutting your cookies. Peel off the top layer, replace it loosely, then flip the dough and remove the bottom sheet completely. This keeps the cutouts from sticking and makes transferring them easy.
- Doneness: Dark cookies can be hard to judge by color alone. For these, trust your nose-when your kitchen smells like rich, buttery chocolate, they're ready to come out of the oven. They should no longer be glossy, and a gentle press in the center should feel set and not leave a deep indent.
- Cooling: The cookies are fragile straight from the oven and will firm up as they cool. Resist the urge to move them too soon-let them cool completely on the baking sheet first.
- Baked Cookies: Store in an airtight container at room temperature for up to 1 week, or freeze for up to 3 months.
- Dough: The dough can also be made ahead. Wrap it well and store in an airtight container in the fridge for up to 1 week, or freeze for up to 3 months. When ready to use, defrost in the fridge, then let it come to room temperature before rolling.
- Pro-Tip: Consider baking a double batch and freezing the extra-it's a great way to always have chocolate wafer cookies ready for your next dessert!
- If you're using this chocolate wafer cookie recipe to make a crumb crust, use my tested chocolate wafer crust recipe to get the perfect texture and balance. These wafers make an excellent crust, but they don't follow the usual rules-their higher fat content means you'll need less butter than most recipes call for.
The first version of this recipe was originally posted in February 2022. I updated the recipe April 2025 with improvements to both ingredients and process.
Maribel Esparza says
Hi Kathleen,
Thank you for the recipe! I was wondering if you could share the old recipe? I’ve made these before but don’t recall using two different types of cocoa powder though. I lost the tab that had the original recipe, and all recall is a picture of the wafer cookies with some type of greenish background or logo?
Any help would be most appreciated!
Thank you!
Maribel
andrea says
Hello Kathleen,
I want to try this today. I only have salted butter. Will it make any difference? Should I skip or reduce salt? I will try to make a double batch using table salt. According to recipe and using unsalted butter, I should use 1/4 teaspoon of salt. How much salt should I put if using salted butter?
Thank you so much for helping us. I will post my experience later.
Kathleen Culver says
Hi Andrea,
Great question! It actually gets a bit complex because of the different types of salt.
For your double batch, use the salted butter and omit the additional salt the recipe calls for.
Here’s the simple reason: The salt in butter is fine like table salt, while my recipes use fluffy Diamond Crystal kosher salt.
Adding any table salt on top of the salted butter would likely make the cookies too salty.
The butter itself should provide all the salt you need for a perfectly balanced, delicious cookie.
Kathleen
andrea says
Thanks Kathleen.
I finally made a few test recipes and finally got to my near desire result. Here are my adjustments so far.
I dont know why but unsalted butter + added salt gives a better taste than salted butter without adding salt - go figure.
I always have to add some fat - I prefer a bit of butter + vegetable oil + a few drops vanilla. I find that too much butter takes away the chocolate flavor while vegetable oil does not.
Next time I will add a little bit more sugar (2 teaspoons for a double recipe). This is my personal preference.
For a icebox cake, rolling the dough into a log, chill and slice did not work for me. Even with a very sharp knife I was not able to cut the cookies as thin as 3mm. Result : whipped cream had not enough moisture to soften the cookies. Taste was not too bad but the texture was definitely not as the cookies were still hard. Icebox cake really needs thin cookies.
As I did not have pastry guides, I used 2 wood sticks (used for mixing paint) on each sides of my dough over the top parchemin paper. It worked perfectly as these sticks are exactly 3 mm thick.
For my oven, 12 minutes is enough, I tried 14, but cookies had a little taste of burn so I reduced it to 12 minutes.
Thanks again for sharing with us this recipe. My grandkids will surely enjoy my icebox cake just like their dad did a very long time ago !!!!
PS I used regular FRY (Dutch process) cocoa and dark cocoa - no name - from my local bulk store (I live in Canada).
Vivian A Nesbitt says
Thank you!! These are amazing. I made them today and will use in ICEBOX cake tomorrow for my husband’s birthday. We have really missed having our favorite dessert. This recipe is soooo good. These dough required an extra Tbs of butter as mentioned in the troubleshooting comments, which solved the crumbling issue.
Kathleen Culver says
Thanks so much, Vivian!
If you have a moment, I'd love to know the cocoa powder brand you used.
I'd like to make notes about which brands impact the crumbling most.
Kathleen
Amy Calkins says
I tried this recipe first using the weights. Followed the recipe exactly. The dough was so crumbly it was very difficult to work with. The cookies baked up ok but I only got 24 cookies. I wanted to make the icebox cake for company so I needed more cookies. I made the second batch using the standard measurements. Again, so crumbly very hard to work with. I am an experienced baker, 50+ years baking. Not sure I will use this recipe again. They taste fine and I think the cake will be fine.
Kathleen Culver says
Hi Amy,
Thank you for using my recipe - I'm sorry you encountered trouble with it.
I appreciate the details you provided.
Would you let me know what cocoa powder you used?
I'd love to help you troubleshoot.
Regarding the quantity - do you have a rolling pin with thickness rings so that you are sure the dough is rolled as close to 1/8" as possible?
This helps ensure that you get the indicated yield of cookies.
Thanks very much,
Kathleen
Sandi says
Question: I want to recreate the original maniaco ice box cake. Does the 2” cookie cutter make the cookies that size? It seems small to me.
Baking tomorrow. Thanks!
Kathleen Culver says
Hi Sandi,
I'm afraid I'm not familiar with the maniaco ice box cake.
I hope that you were able to find the right size.
It's often helpful to calculate the cookie dimensions to fit the final pan size, whether in individual cookies or slab form.
Kathleen
Peggy says
Would it be possible to make a log of the dough rather than rolling it into a sheet? My fridge is tiny and won’t accommodate a baking tray.
Kathleen Culver says
Hi Peggy,
I haven't tried it myself, but there are many recipes that ask you to roll the dough into a log shape for slicing.
Please let me know if you give it a try - I'd be happy to update the notes for others.
Kathleen
Peggy says
Thank you for the reply. I want to make an icebox Buche de Noel and thought I could shape the log and side branch in a more convincing way than if using uniform sized cookies, though putting it back together might be a bit of a jigsaw. I’ll report back after Christmas.
Kathleen Culver says
That makes perfect sense!
I hope it turns out wonderfully, and I look forward to hearing about it.
Kathleen
AMK says
I just made this recipe, however my crumbs aren’t sticking together, I have gone over the ingredients several times, and decided to read the comment section, where I see someone asked if their was an egg substitute they could use, to my surprise I was like egg!!!! There is no egg in this recipe, so I dole checked again and yup no egg ! I’m going to put everything back in the food processor and add an egg and see what happens.
Kathleen Culver says
Hi AMK,
Thank you for the feedback!
You're correct, this recipe does NOT contain eggs.
An older version of the recipe did, so I've removed that old comment so that it doesn't cause any more confusion.
I actually removed the egg because it made the wafers more tender and less crisp/snappy.
This is one of those recipes that REALLY benefits from weighing ingredients with a scale.
A bit too much flour or cocoa powder, or a little less liquid than called for, can make the dough too dry for rolling.
Did you use a scale to measure?
That will help me understand how I can better clarify or add troubleshooting tips for others.
Thank you!
Kathleen
BG says
I’m wondering if one could simply cut the dough into squares or rectangles with a pizza cutter or pastry/pasta wheel to save time and excess waste? I’ve yet to master re-cutting leftover dough into more pieces. Somuchso that I cut my biscuit dough into squares as well, rather than the subsequent dough turn out tough for adding too much more flour
Kathleen Culver says
Hi Becky,
I think this would work just fine - a great suggestion!
This dough is pretty forgiving, so it does handled being rolled out again pretty well.
Thank you!
Kathleen
Andrea says
Hello! I'am peruvian. Tengo una duda: ¿la receta requiere mantequilla (que proviene de la leche) o margarina (de origen vegetal)?
Kathleen Culver says
Hola Andrea,
Siento contestar tan tarde!
Todas mis recetas utilizan mantequilla (de la leche) - no utilizo margarina.
Gracias desde EEUU!
Kathleen
Rege says
Hello Kathleen:)
On the rare occasions when Oreos make their way into our home. I always eat the chocolate cookie, and leave the cream; this drives my family crazy btw. So I thought, why not just find a good chocolate wafer/biscuit recipe? I just made a batch of these for my rainy Saturday afternoon baking project. They are SO much better than Oreos, and easy to make. Simple but full of flavor. I agree with another commenter that it took a good deal more time than expected when rolling, cutting, and chilling time were factored in. I also loved that you included the ingredient amounts in each step of the instructions, so I didn't have to scroll back to the ingredients. My wafers didn't turn out crisp. but I think that is my fault for rolling a bit thicker than 1/8". I will definitely be making these again, and can't wait to try other recipes on your site. If I could make a request: could you please share a recipe for Lattemiele (Italian milk and honey) cookies? Trader Joe's discontinued them, and they were our absolute favorite to have with tea and coffee, or milk after school for the kids. Thank you! ❤
Andrea Parsons says
Kathleen, Very pleased with how these turned out and they are quite yummy! Followed your instructions exactly with no substitutions. Please note if you double the recipe you must follow the gram weights provided as the cups/tablespoons do not convert. It took way more than 15 minutes - more like 2 hours to prep by the time you chill, roll out etc. Saving this recipe for another go!
Kathleen Culver says
Hi Andrea,
Thank you so much!
My recipe card now has the ability to adjust the cups and tablespoons when doubling.
I'll get it updated soon.
I've estimated 15 minutes for making the dough, and allowed 30 for chilling and 12 for baking.
I will add some additional time for rolling too!
Great to have your feedback.
Kathleen
julie says
i am in the middle of trying this recipe. i started weighing the ingredients and it seemed really off. started over using cups etc the mixture isn't combing. is something missing from the recipe?
Kathleen Culver says
Hi Julie,
Can you give me more details?
What about the recipe didn't work well for you?
I'd love to help you troubleshoot.
I've made this recipe many times with great results.
Kathleen
Jane says
I made these today and have eaten most of them. They. Are. So. Good. I made them with my toddler, all to say the recipe is super easy to follow and we had fun making different cookie shapes.
Kathleen Culver says
Hi Jane,
Yay!
I love hearing that you've baked these with your kiddo!
Cutting them into different cookie shapes is a great idea. : )
Thanks for the note!
Kathleen
Sue Julian says
I just have a question before I try out this recipe- could I substitute Black Cocoa instead of Dutch Process Cocoa? I noticed that the Famous Chocolate wafers by Nabisco used the Black Cocoa. Thank you.
Kathleen Culver says
Hi Sue,
Yes! You can substitute black cocoa at a 1:1 ratio for the Dutch process.
You could also try 1/4 cup black cocoa and 1/4 cup Dutch process if you want to maintain a bit more of the rounded chocolate flavor.
Kathleen
DocP says
just made these cookies...the taste is amazing. so easy to follow the directions love how you put the ingredients in the how to steps so no need to scroll back. i cooked a bit crispy and will leave out to get hard to use crushed in ice cream cake layers. ty I will be keeping this with my go to recipes!
Meredith P. says
Can I use natural cocoa powder instead of Dutch processed?
Kathleen Culver says
Hi Meredith,
In the ingredient notes I mention that you can indeed substitute with natural cocoa powder, but it may have an impact on the final recipe, especially in terms of color and chocolate flavor.
If you do give it a try, please let me know as I have only tested this recipe with Dutched cocoa!
Thank you,
Kathleen
Laurie says
I've made these before for icebox cakes because I can no longer find Famous. But this time I'm crumbling them to make a crust for a cheesecake. Will a single batch make enough crumbs for a standard 10 inch spring form pan cheesecake crust?
Kathleen Culver says
Hi Laurie,
I've updated the chocolate wafer cookie recipe, and have developed a recipe for wafer cookie crust as well!
Thanks,
Kathleen
Katy says
So glad I discovered your site, and this recipe is exactly what I have been looking for. As I will be shipping these for the holidays, the only slight change I made was to add mocha powder to the cookie recipe. I was afraid the cream filling might not travel well and may make the cookies soggy. As for the cookies I will be delivering locally, I am very much looking forward to using both your dark chocolate buttercream recipe as well as the salted caramel buttercream recipe. Of course, I must make a few "test batches" to share with my neighbors! 🙂 Your tips are suggestions are very much appreciated.
Kathleen Culver says
Hi Katy,
Thank you so much for the comment!
You're going to make lots of people happy this holiday season. : )
Happy baking to you!
Kathleen