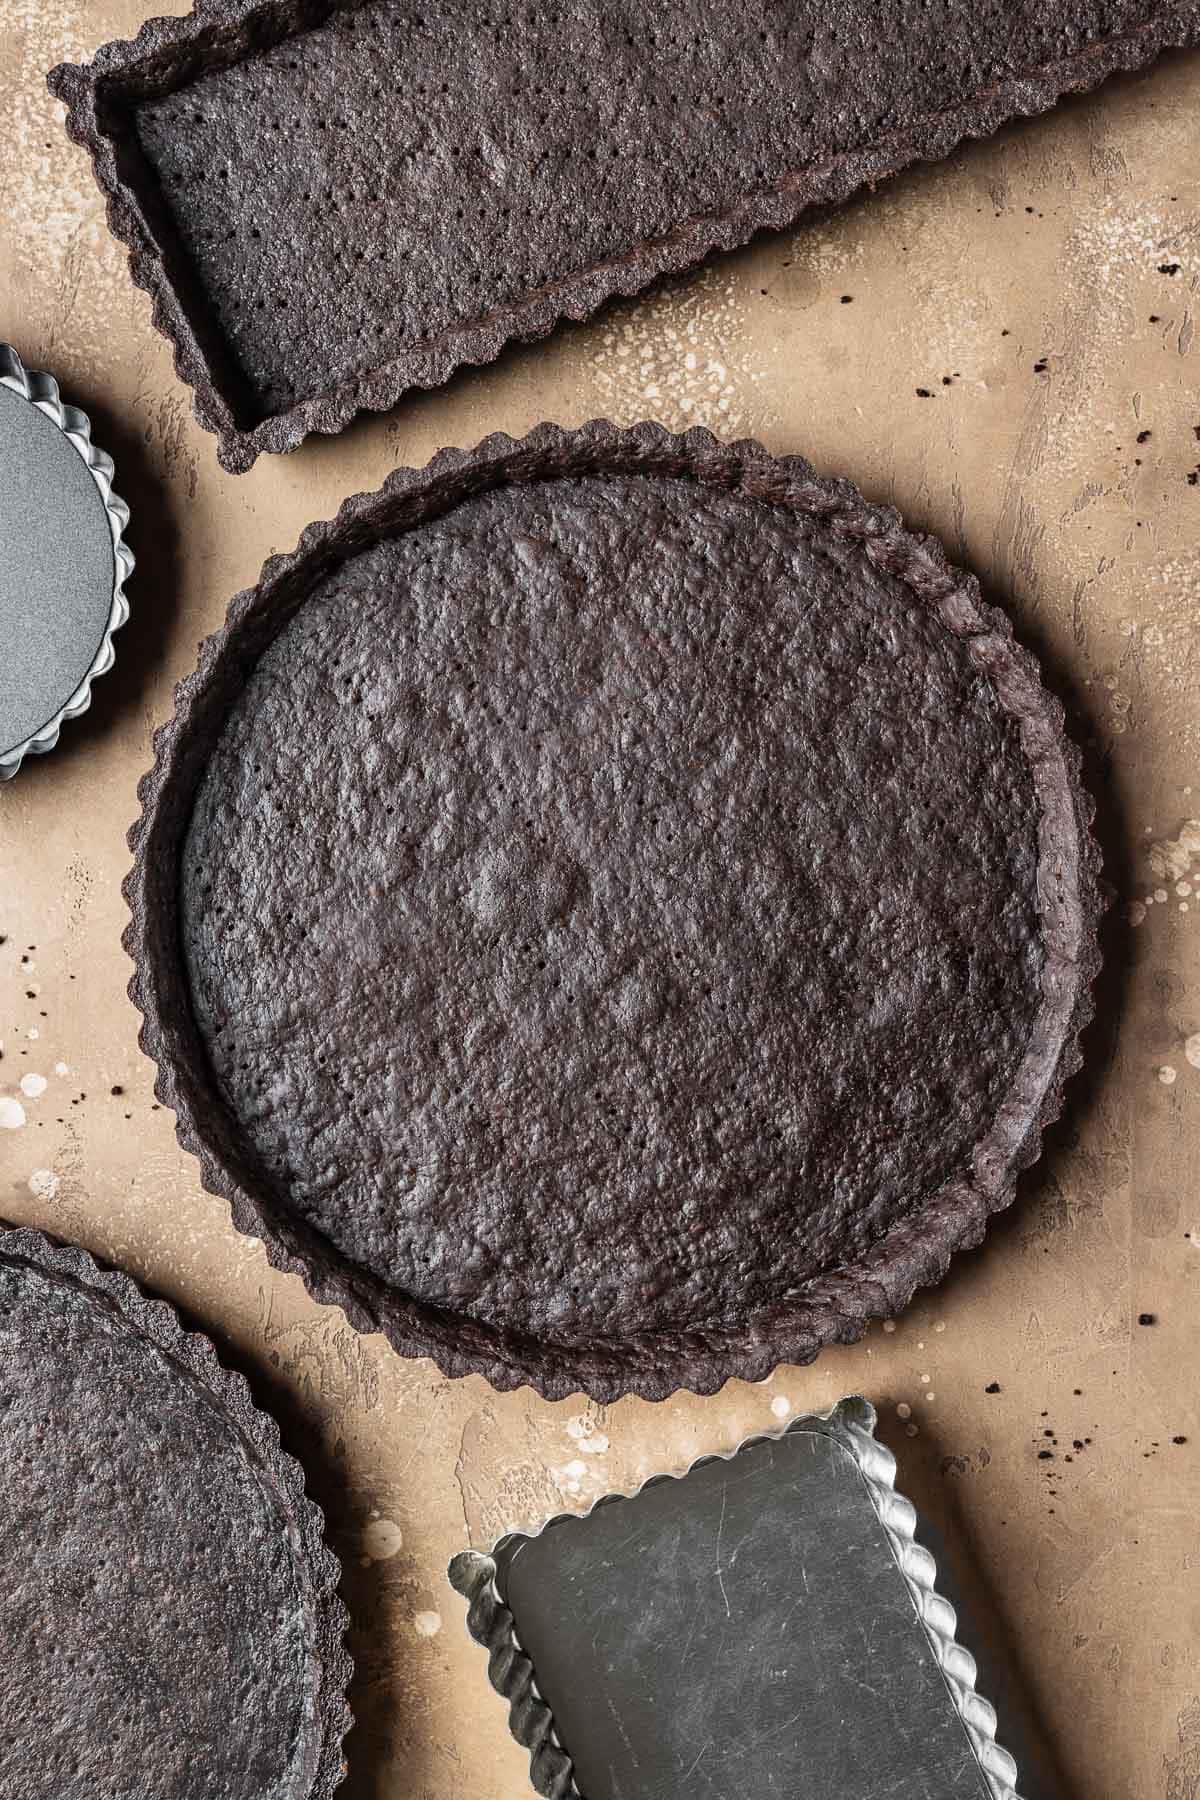
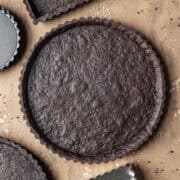
This chocolate tart dough (pâte sucrée au chocolat) is crisp, tender, and deeply chocolatey-a perfect base for your favorite fillings. It rolls out easily, holds its shape well when baked, and has a texture somewhere between a cookie and a buttery pie crust. It's a versatile, make-ahead recipe that works beautifully for tarts and tartlets alike.
Detailed photos and step by step instructions walk you through the process. No pie weights (of any kind) needed!
This chocolate pâte sucrée recipe is excellent for both beginner and experienced bakers. It's quick to make and incredibly forgiving, whether you use a mixer, food processor, or make it by hand.
It can be par-baked for a frangipane or custard filling that needs baking in the oven, or blind-baked for tart fillings like ganache, pastry cream, and panna cotta.
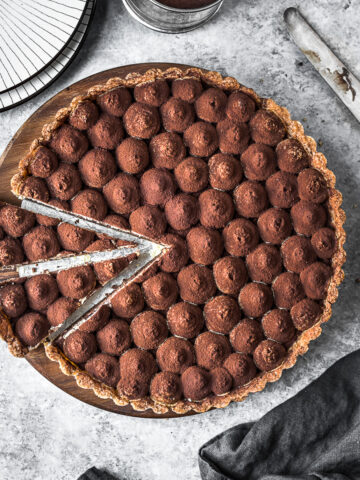
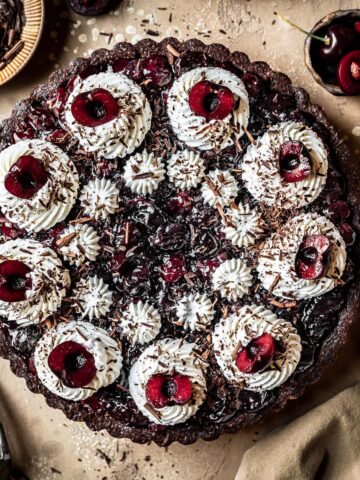
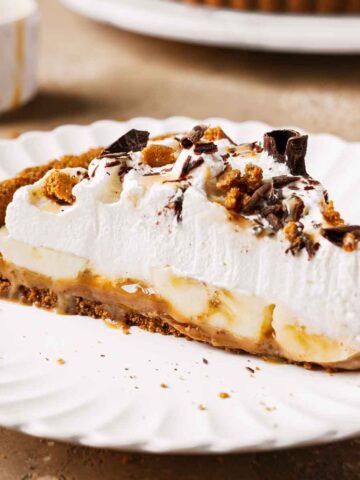
I've used chocolate dough in my black forest version of a sour cherry chocolate tart, as well as in a decadent salted caramel chocolate tart. I even used it as my starting point when testing chocolate wafer cookies.
The cocoa powder adds a deep chocolate flavor and complements the buttery taste beautifully.
The original version of this tart dough used 1-2 tablespoons of cream to help bring the dough together, but I've simplified the recipe by replacing it with butter. It's just as delicious, binds beautifully, and saves you from buying cream you might not need-especially if your chosen filling doesn't call for any.
After successfully baking classic pâte sucrée without pie weights, I was hopeful the simplified method would work just as well with the chocolate version. Good news-it does!
This method eliminates the stress of handling a hot pan, fragile parchment, and heavy pie weights over a delicate, soft crust. If you've been there, you know how tricky it can be. Now you can skip that and focus on the fun part-baking a beautiful tart.
Find all my tart recipes here-there's a wide variety of flavors and fillings to inspire you. And for another crust option, check out this press-in chocolate wafer cookie crust!
Jump to:
Ingredients
* See recipe card for full list of ingredients and quantities.
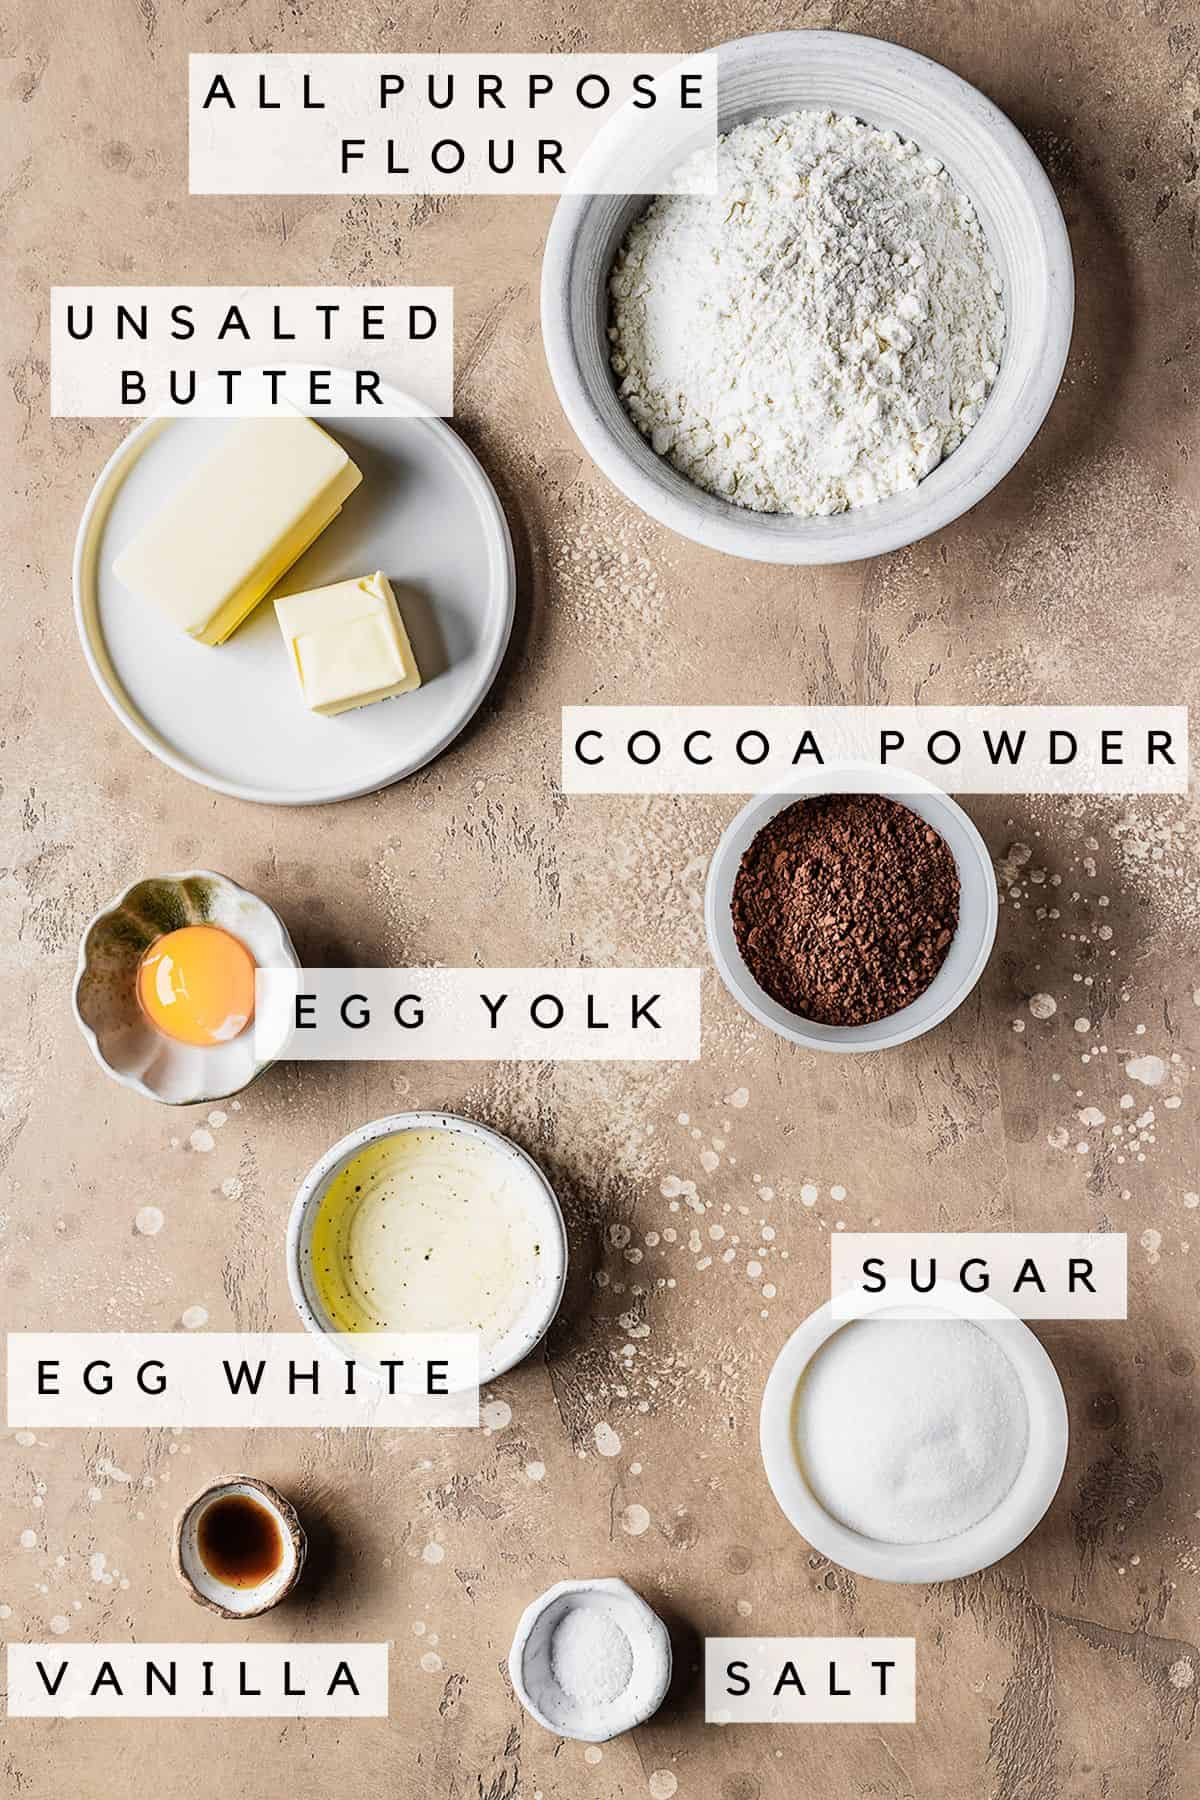
Unsalted butter - This recipe calls for room temperature butter. Pastry making often requires chilled ingredients, but here we're using a creaming method that needs softer butter.
Granulated sugar - I like to use granulated sugar as it's always in my pantry. Some chocolate tart shells call for powdered sugar, which is much finer. Feel free to use an equal amount of either. Note that using powdered sugar might give you a slightly more dense tart crust.
Kosher salt - Desserts taste better with a bit of salt! I use Diamond Crystal kosher salt, which has lighter, flakier crystals than Morton salt, and therefore less sodium per teaspoon.
If using Morton kosher salt, multiply recipe amount by 0.75 (use three ⅛ teaspoons for this recipe.) If using table salt, reduce by 0.5 (¼ teaspoon for this recipe.)
Egg - One large egg works twofold in this recipe:
The yolk (approximately 17 grams) serves as a binder to provide structure to the dough. There's enough moisture from the egg yolk to pull the dough together. It doesn't need any additional liquid.
The white is reserved for an egg wash brushed onto the baked crust. The egg wash helps seal the base and sides, plugging any small holes and forming a protective layer against wet fillings.
If you don't have an egg white, you can skip this step. If you're concerned about sealing the tart, brush a very thin layer of chocolate (white, milk or dark, depending on your filling) onto the cooled tart interior instead.
Instructions
These photos provide basic visual cues. Find the detailed instructions in the recipe card.
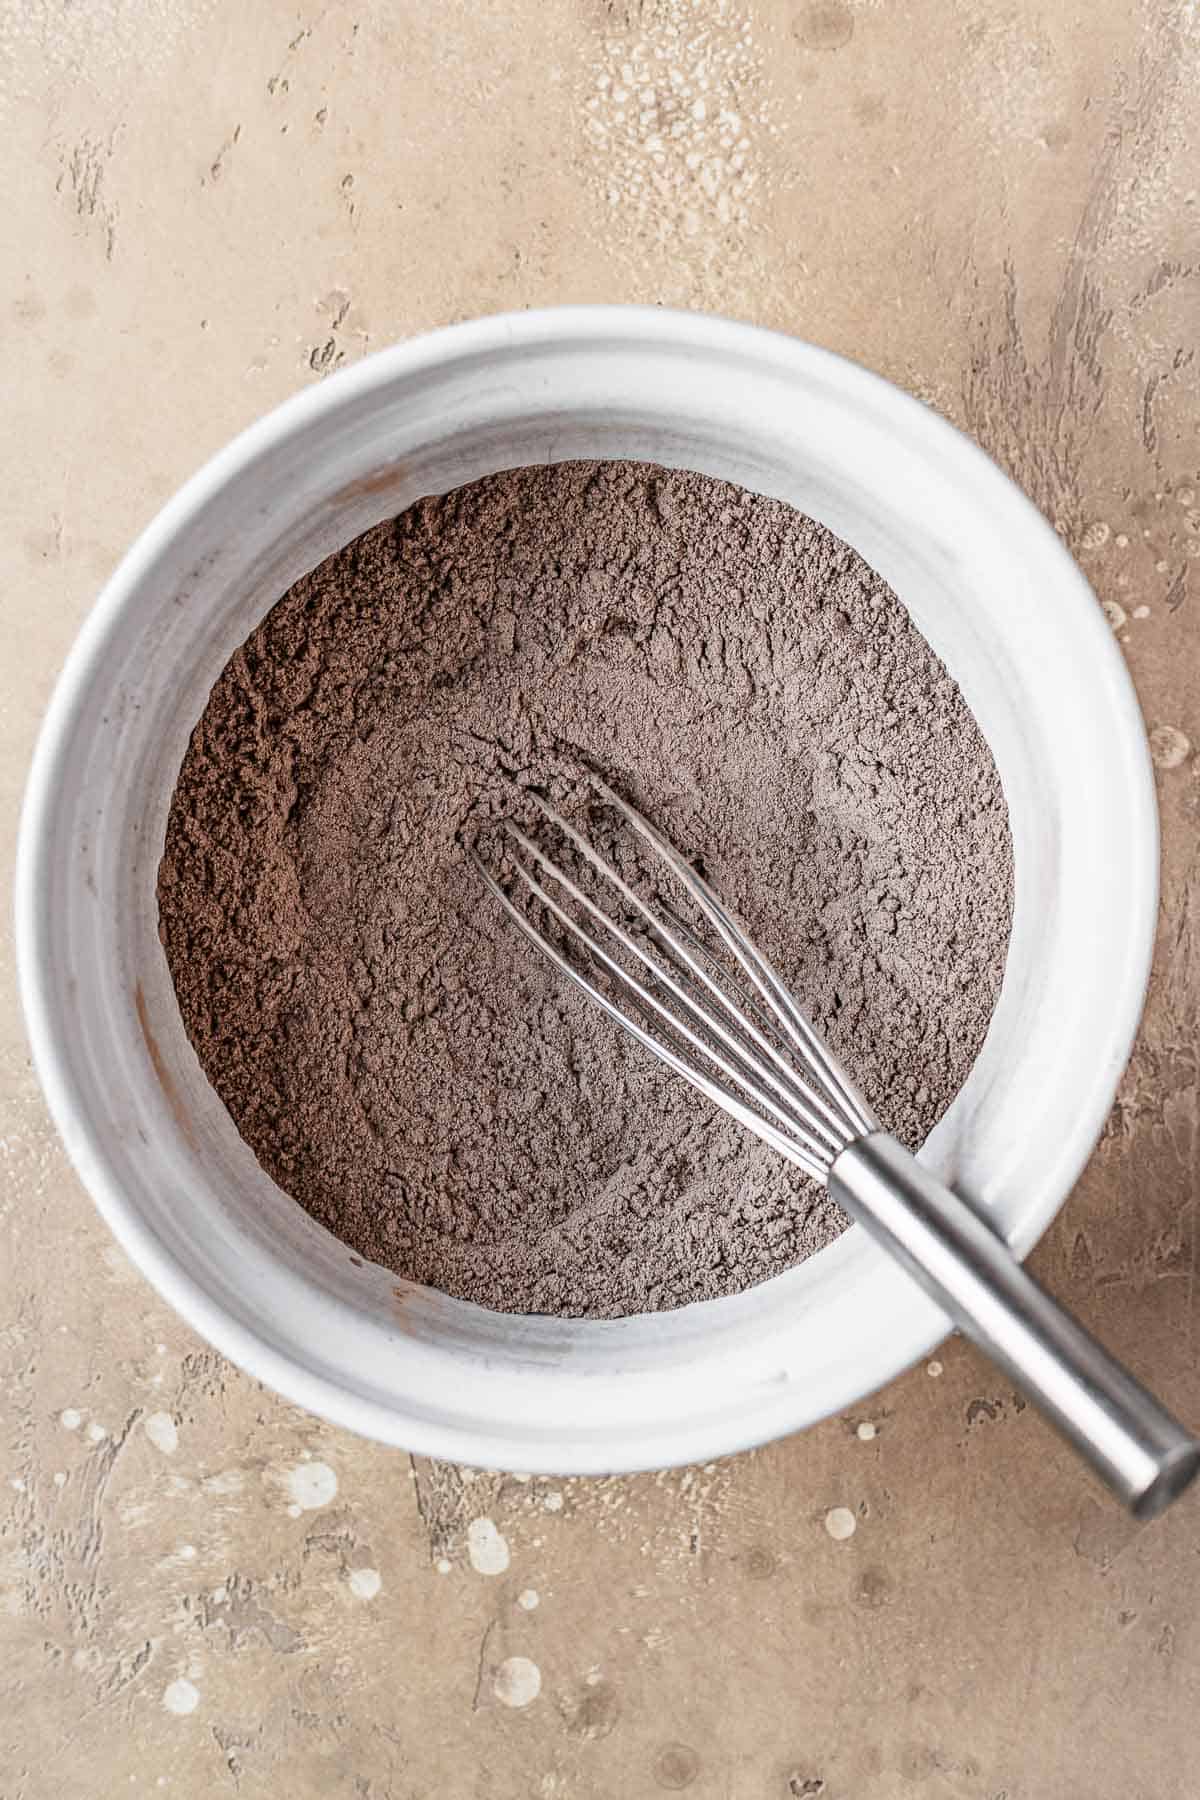
Whisk together flour, cocoa and salt in a medium bowl. Set aside.
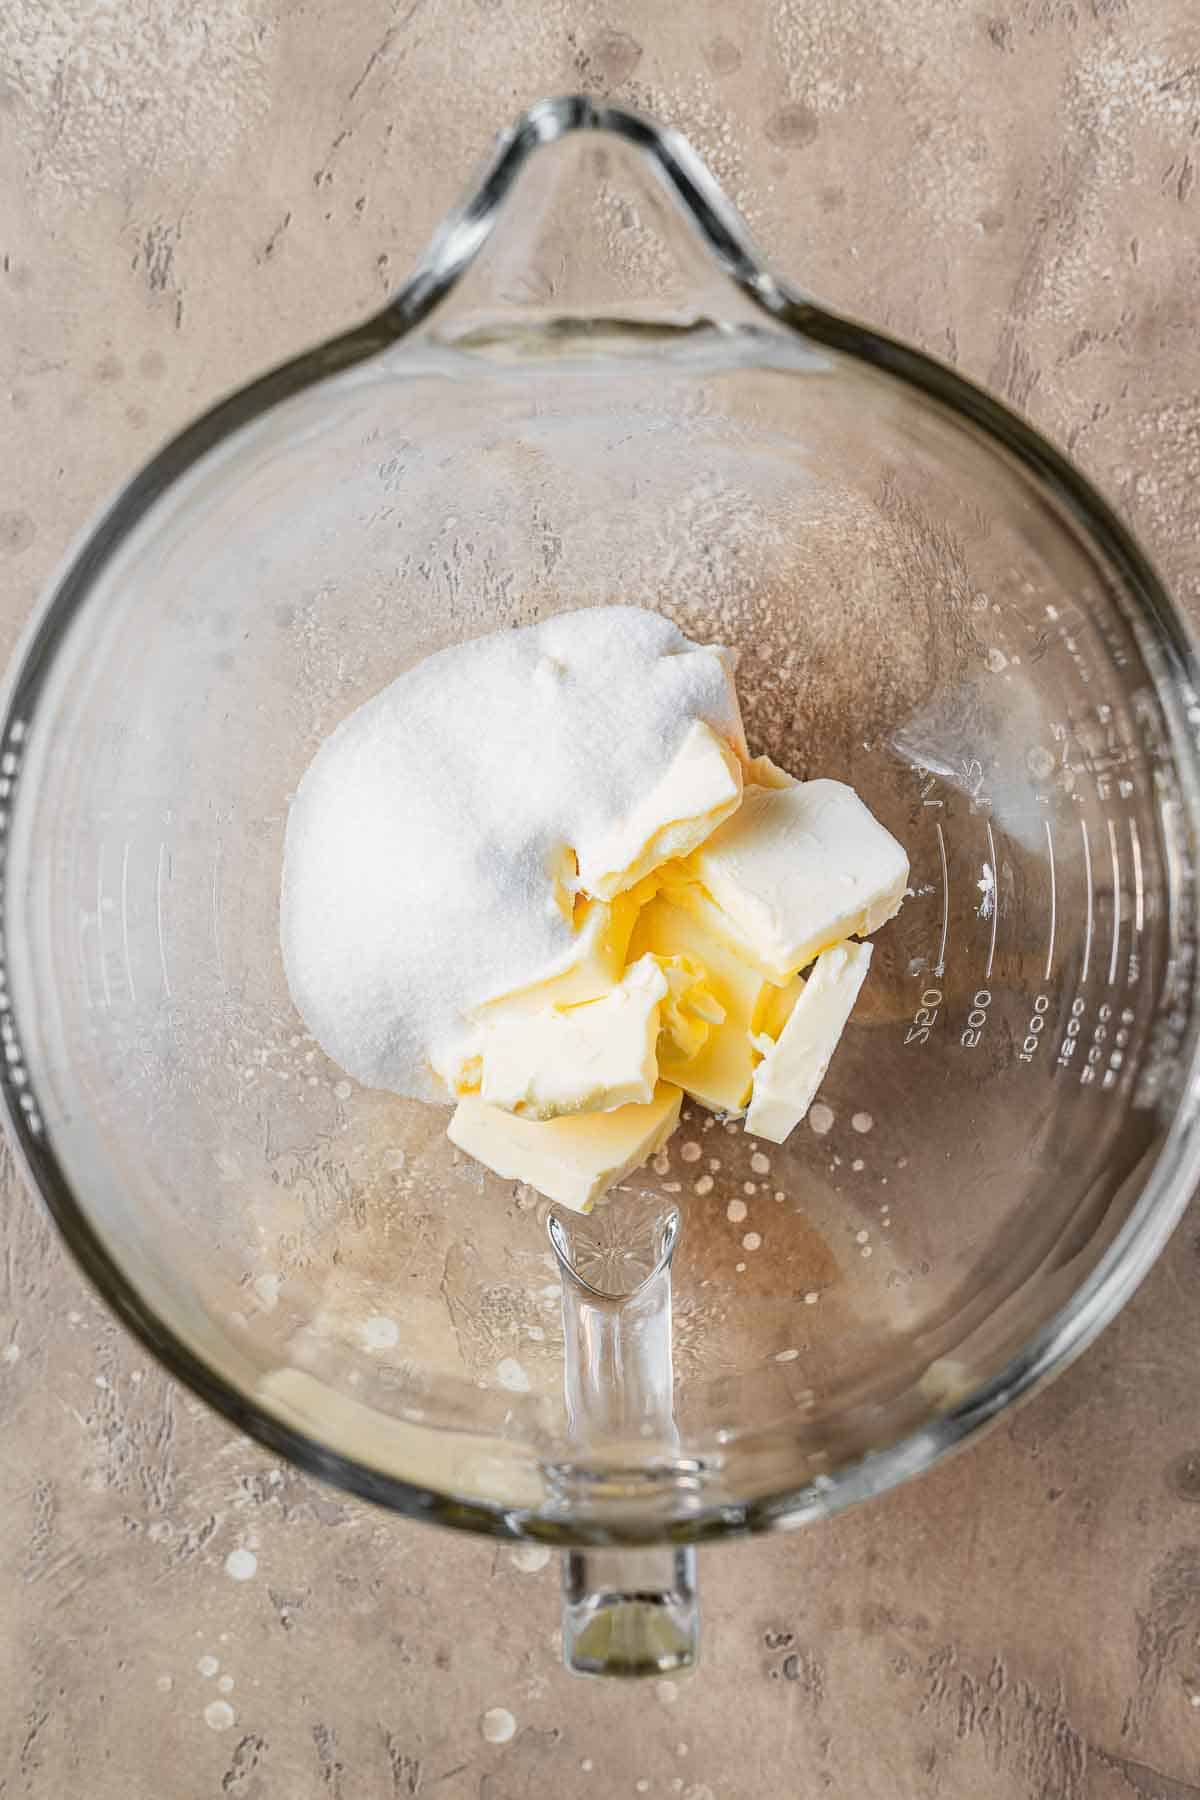
Add butter and sugar to bowl of stand mixer fitted with paddle attachment.
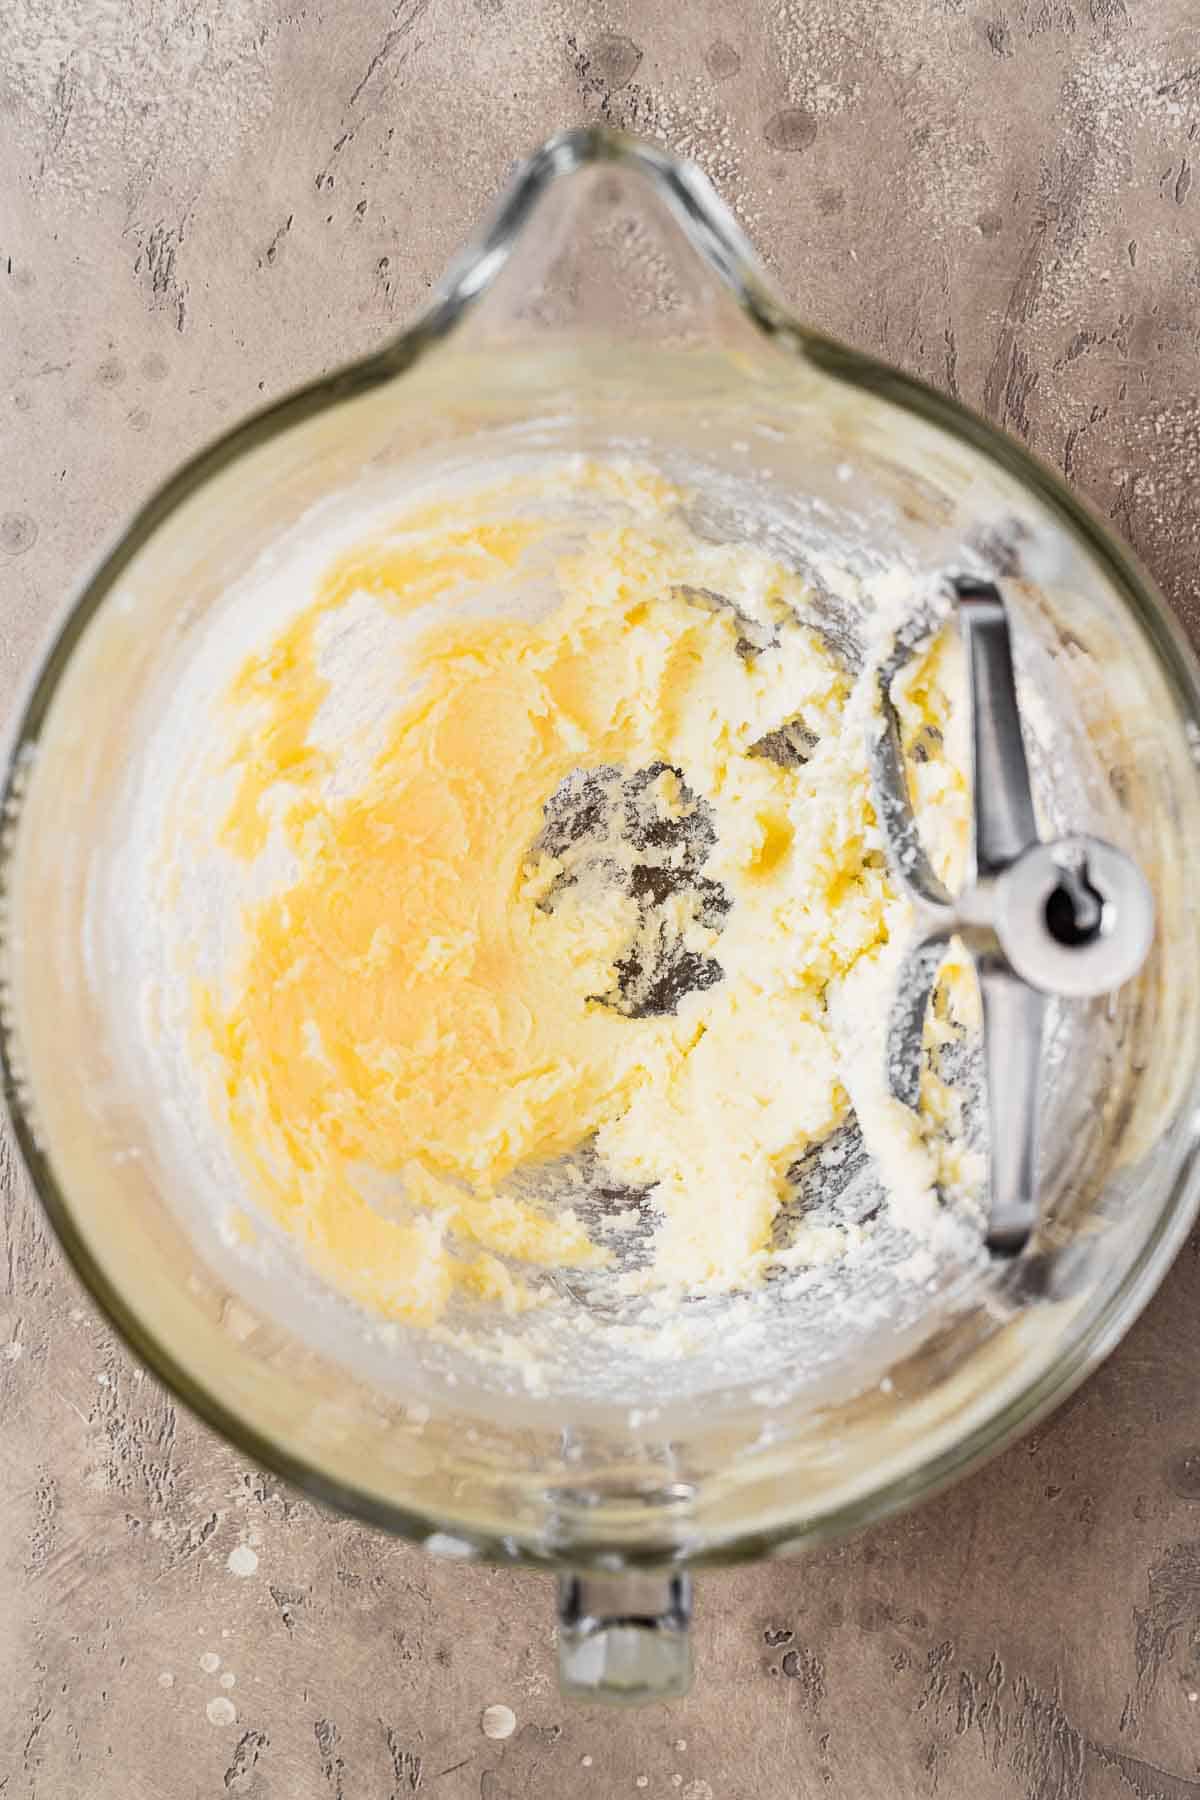
Beat on medium speed until mixture is well combined, 2-3 minutes.
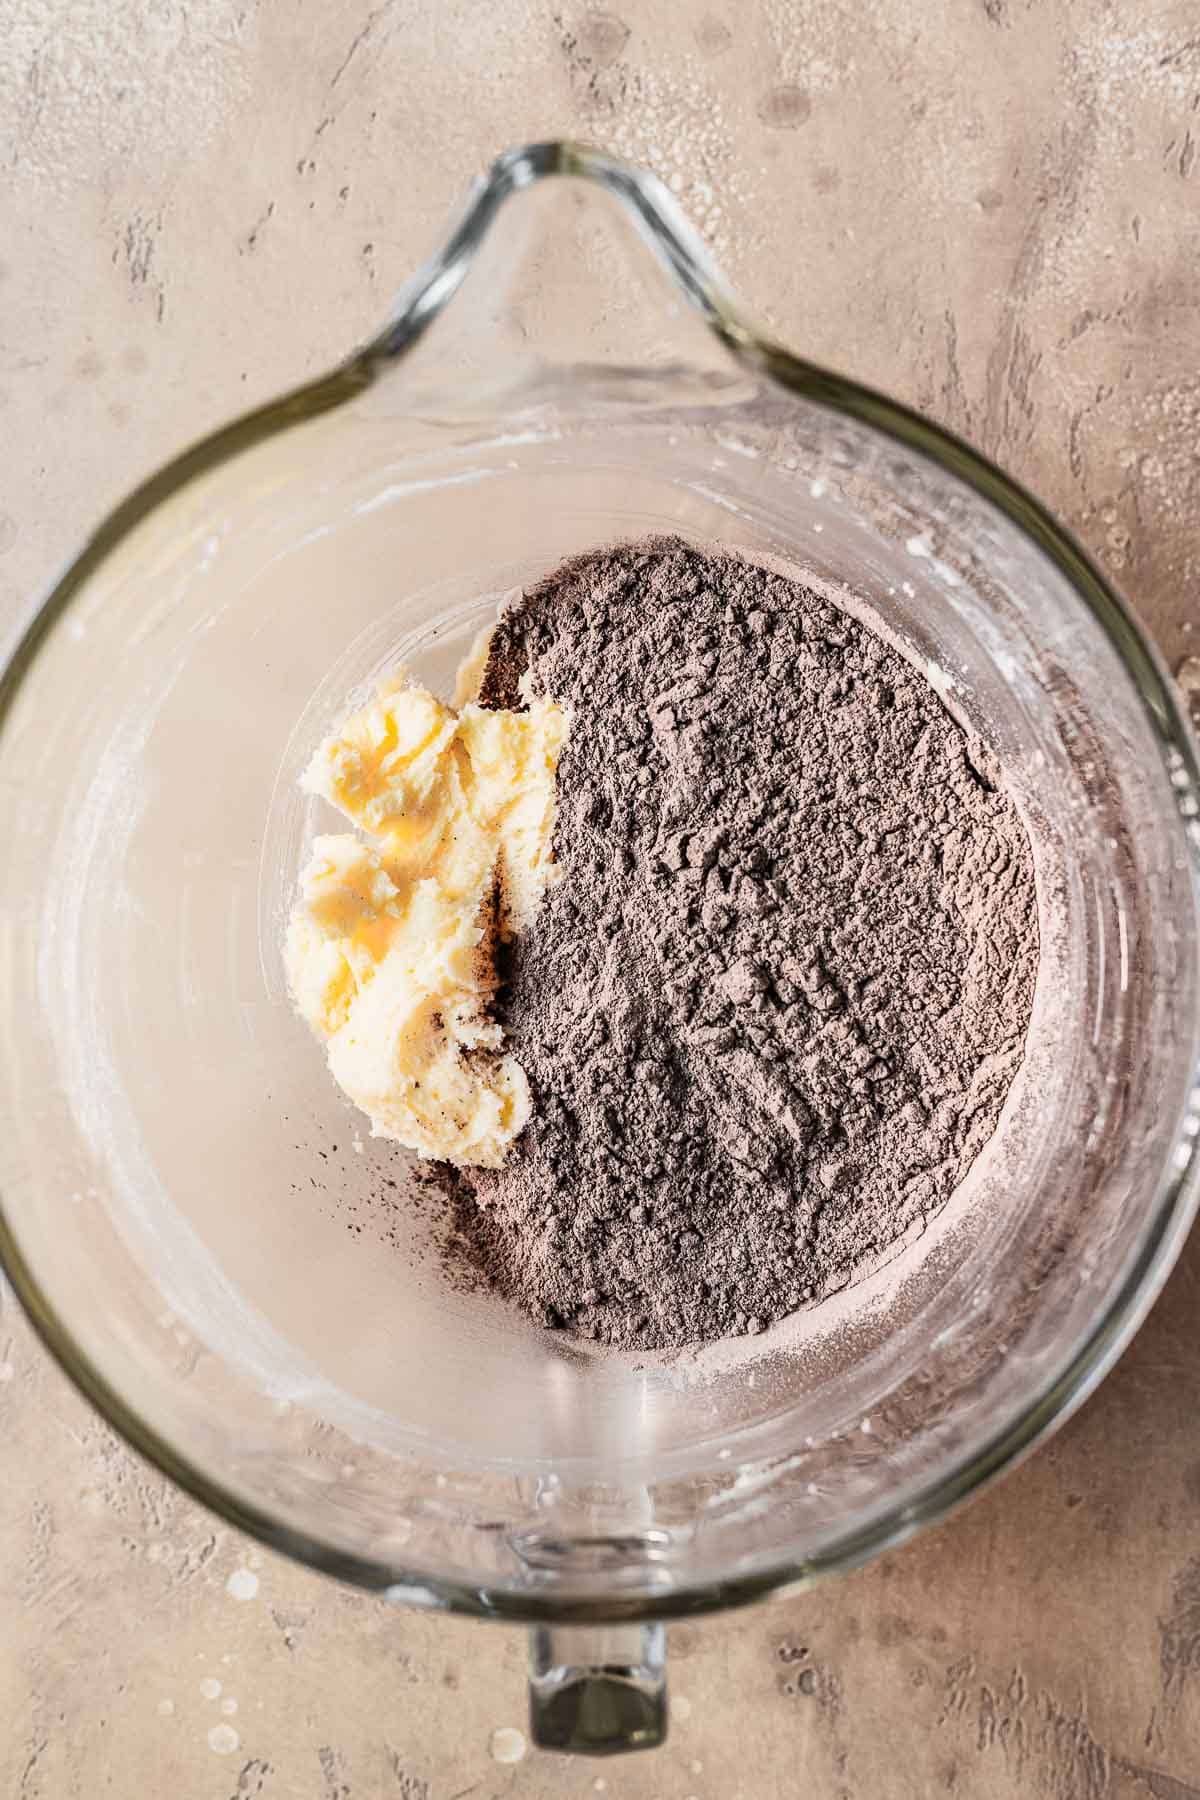
Add flour.
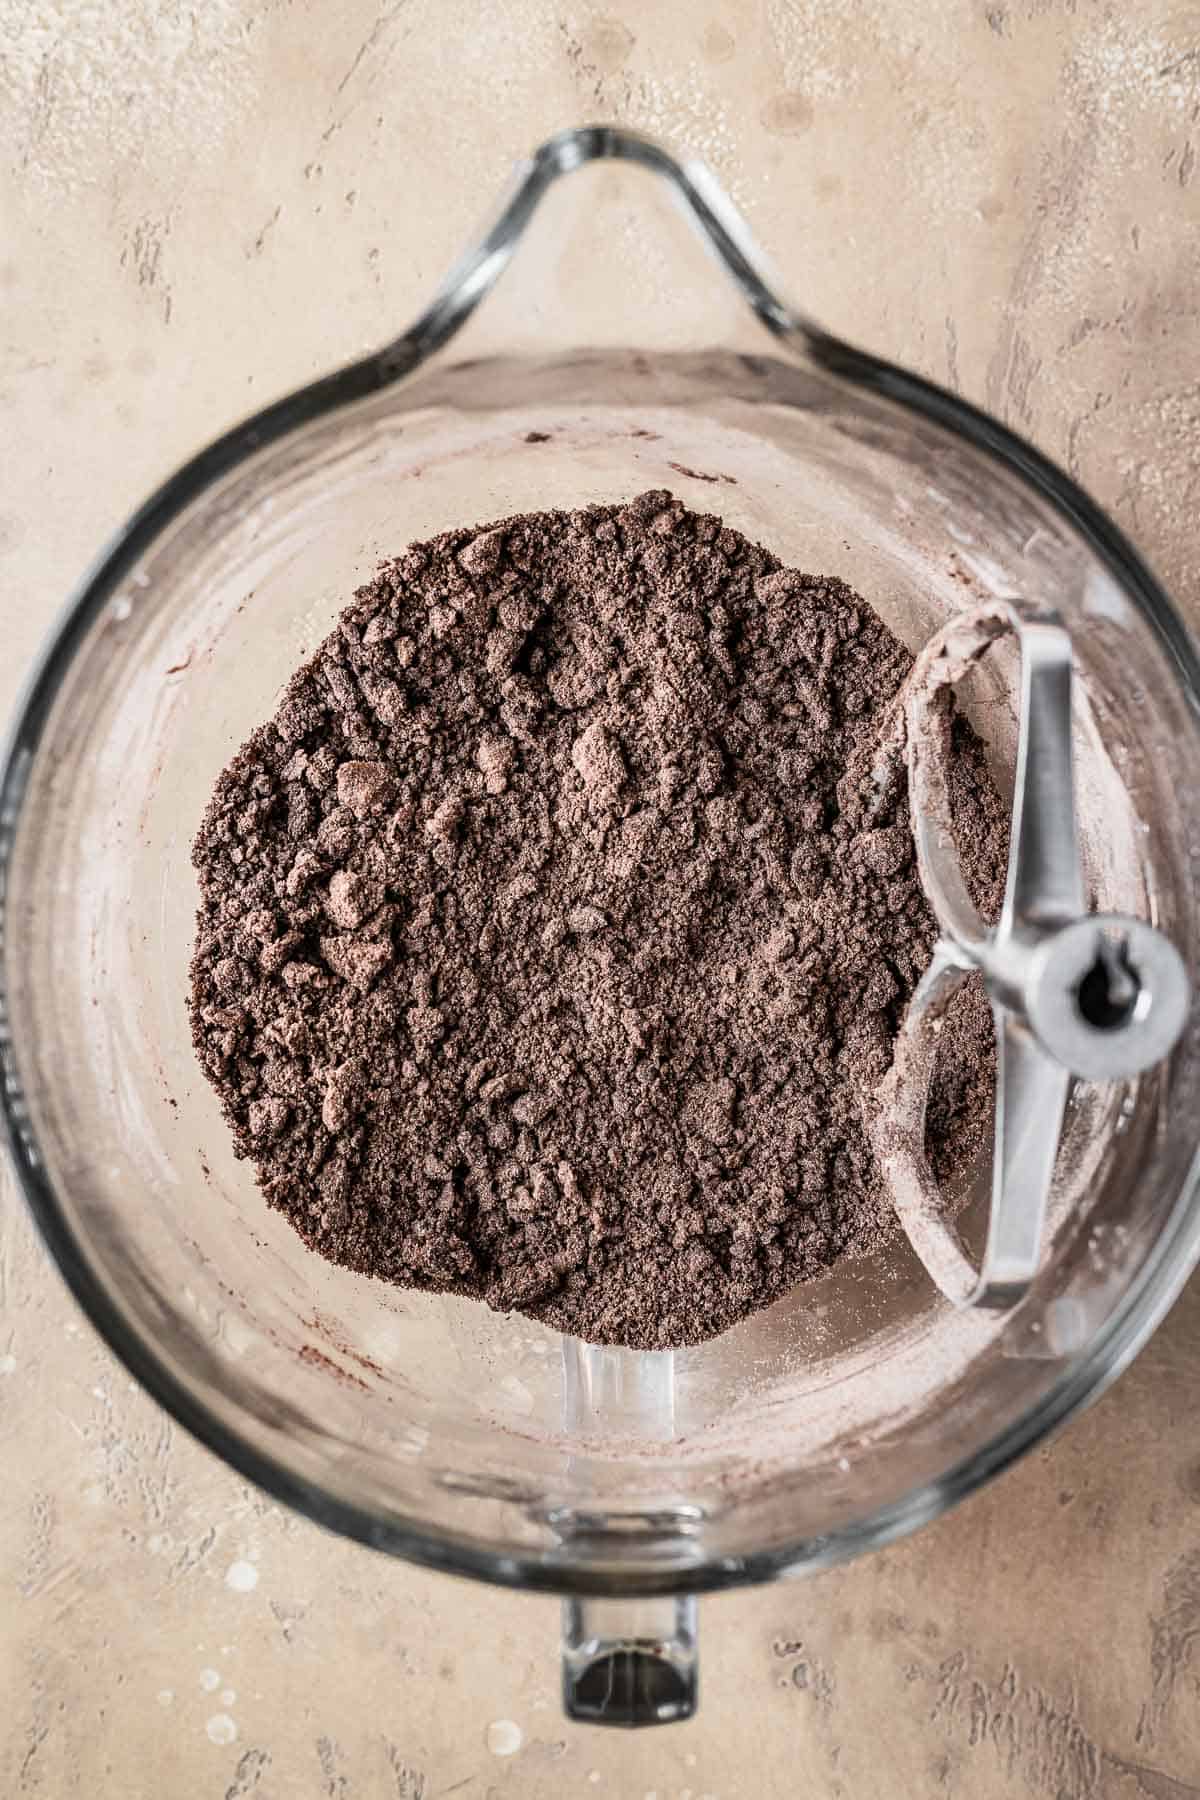
Mix on low speed until coarse and grainy, about 1 minute.
Butter pieces should break down into a combination of coarse sand and pea sized lumps.
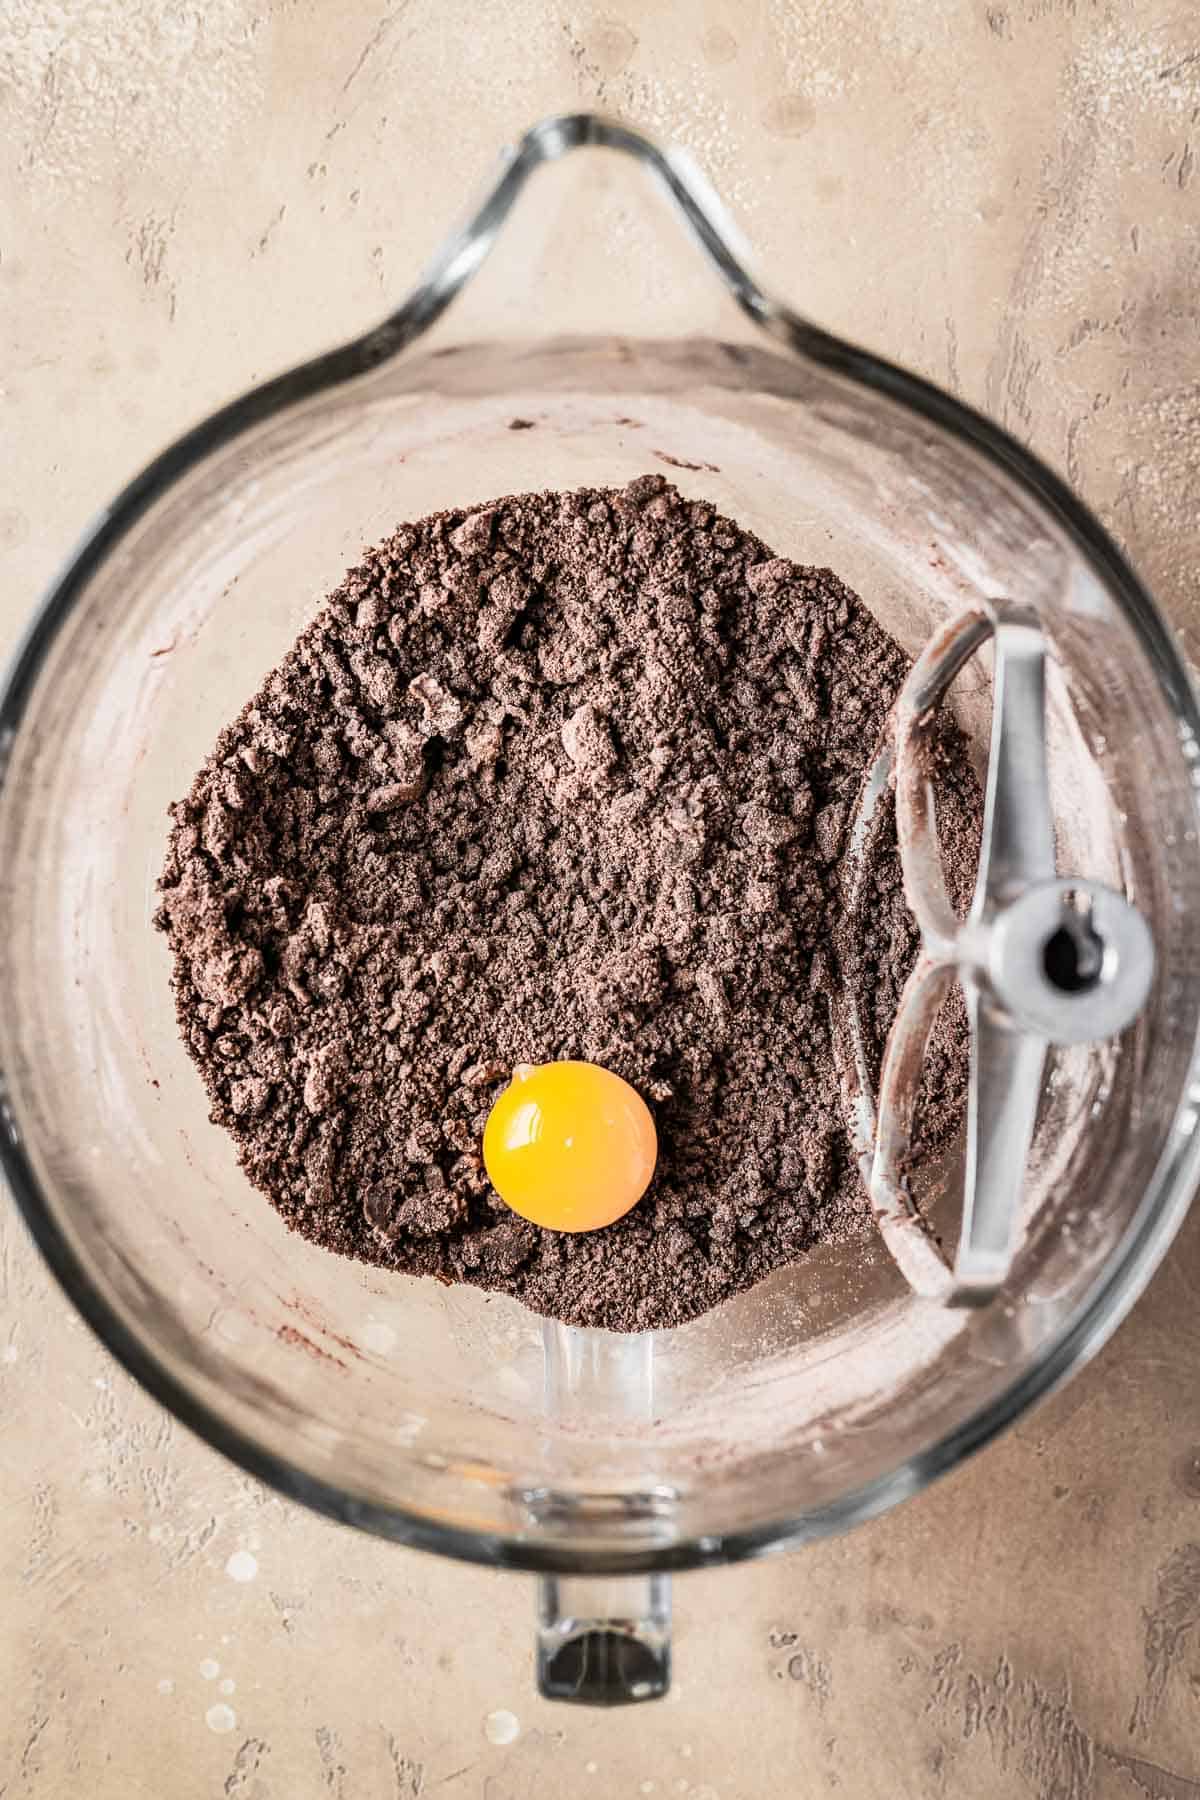
Scrape bowl to incorporate all butter. Add egg yolk.
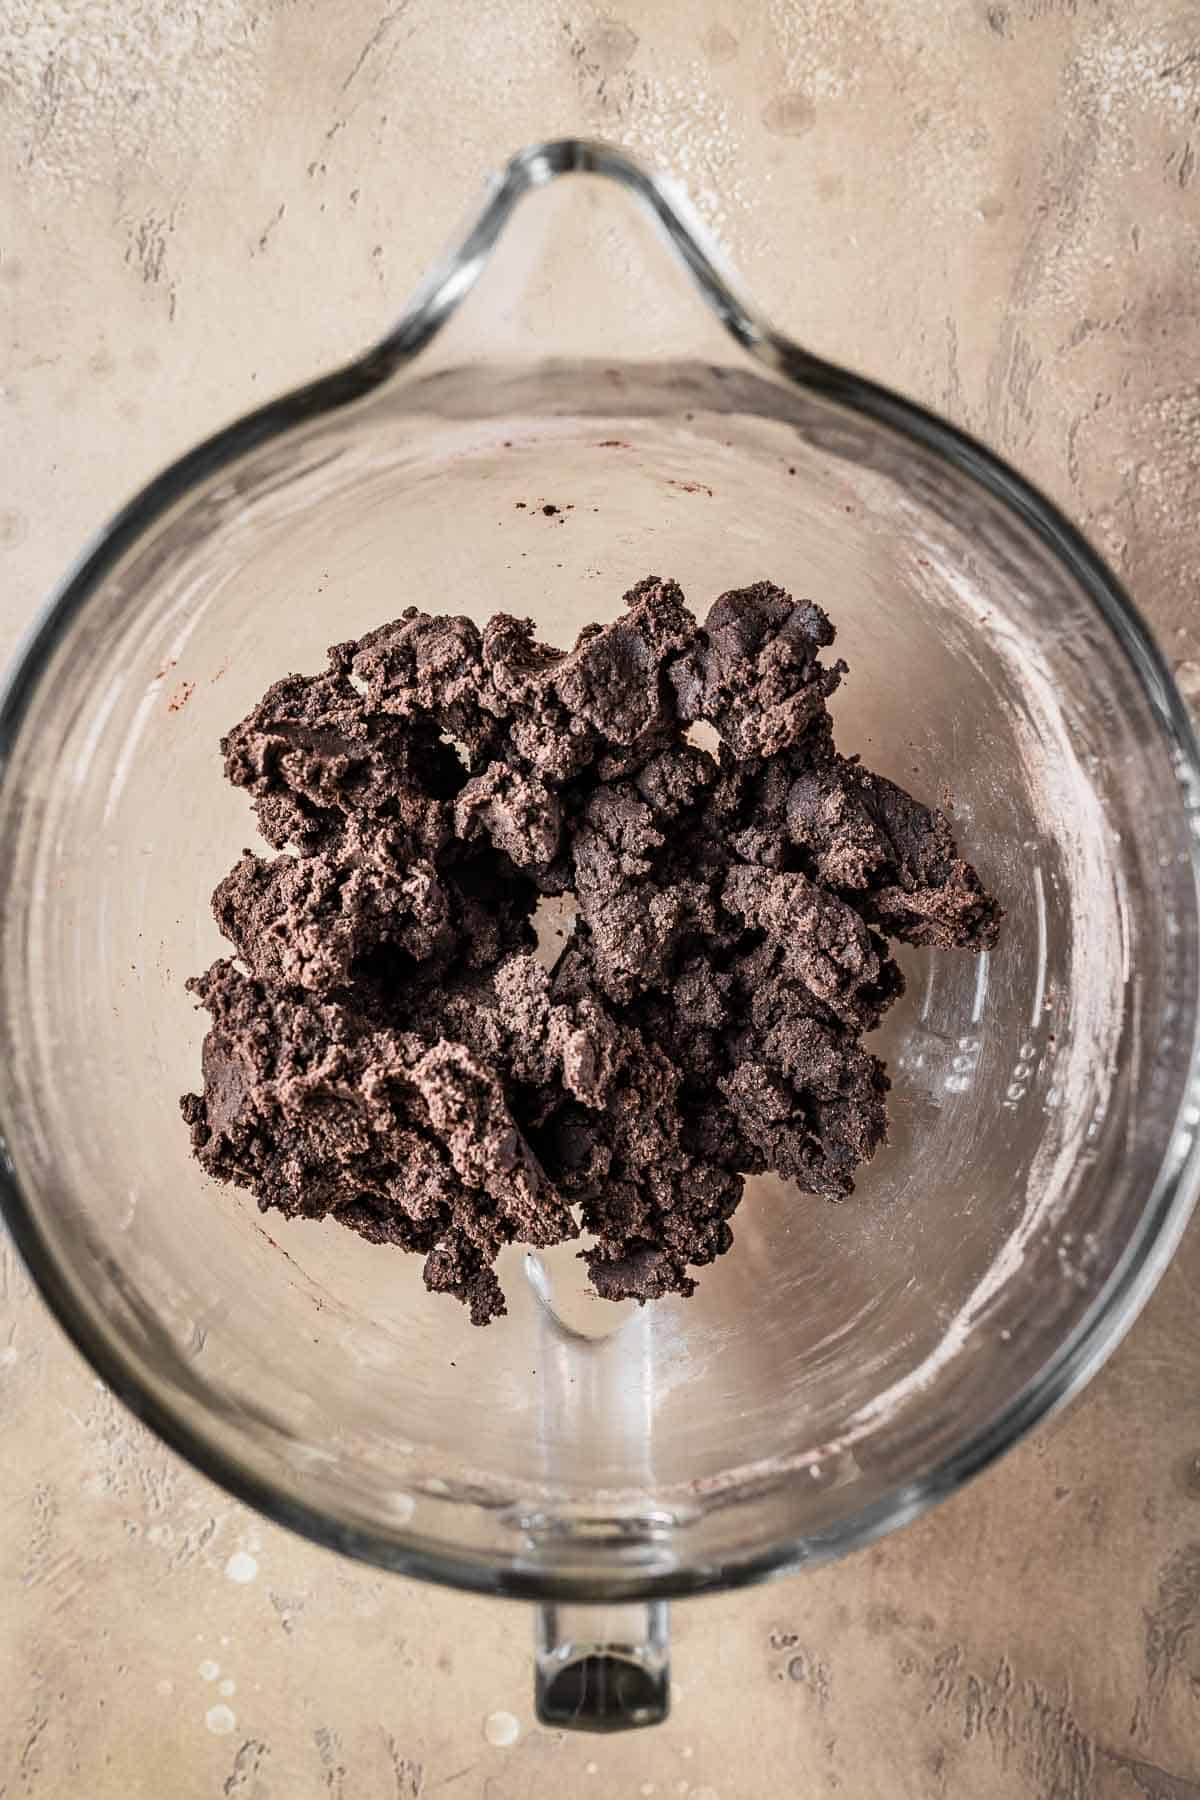
Mix on low just until dough pulls together. Scrape bowl to incorporate all egg yolk.
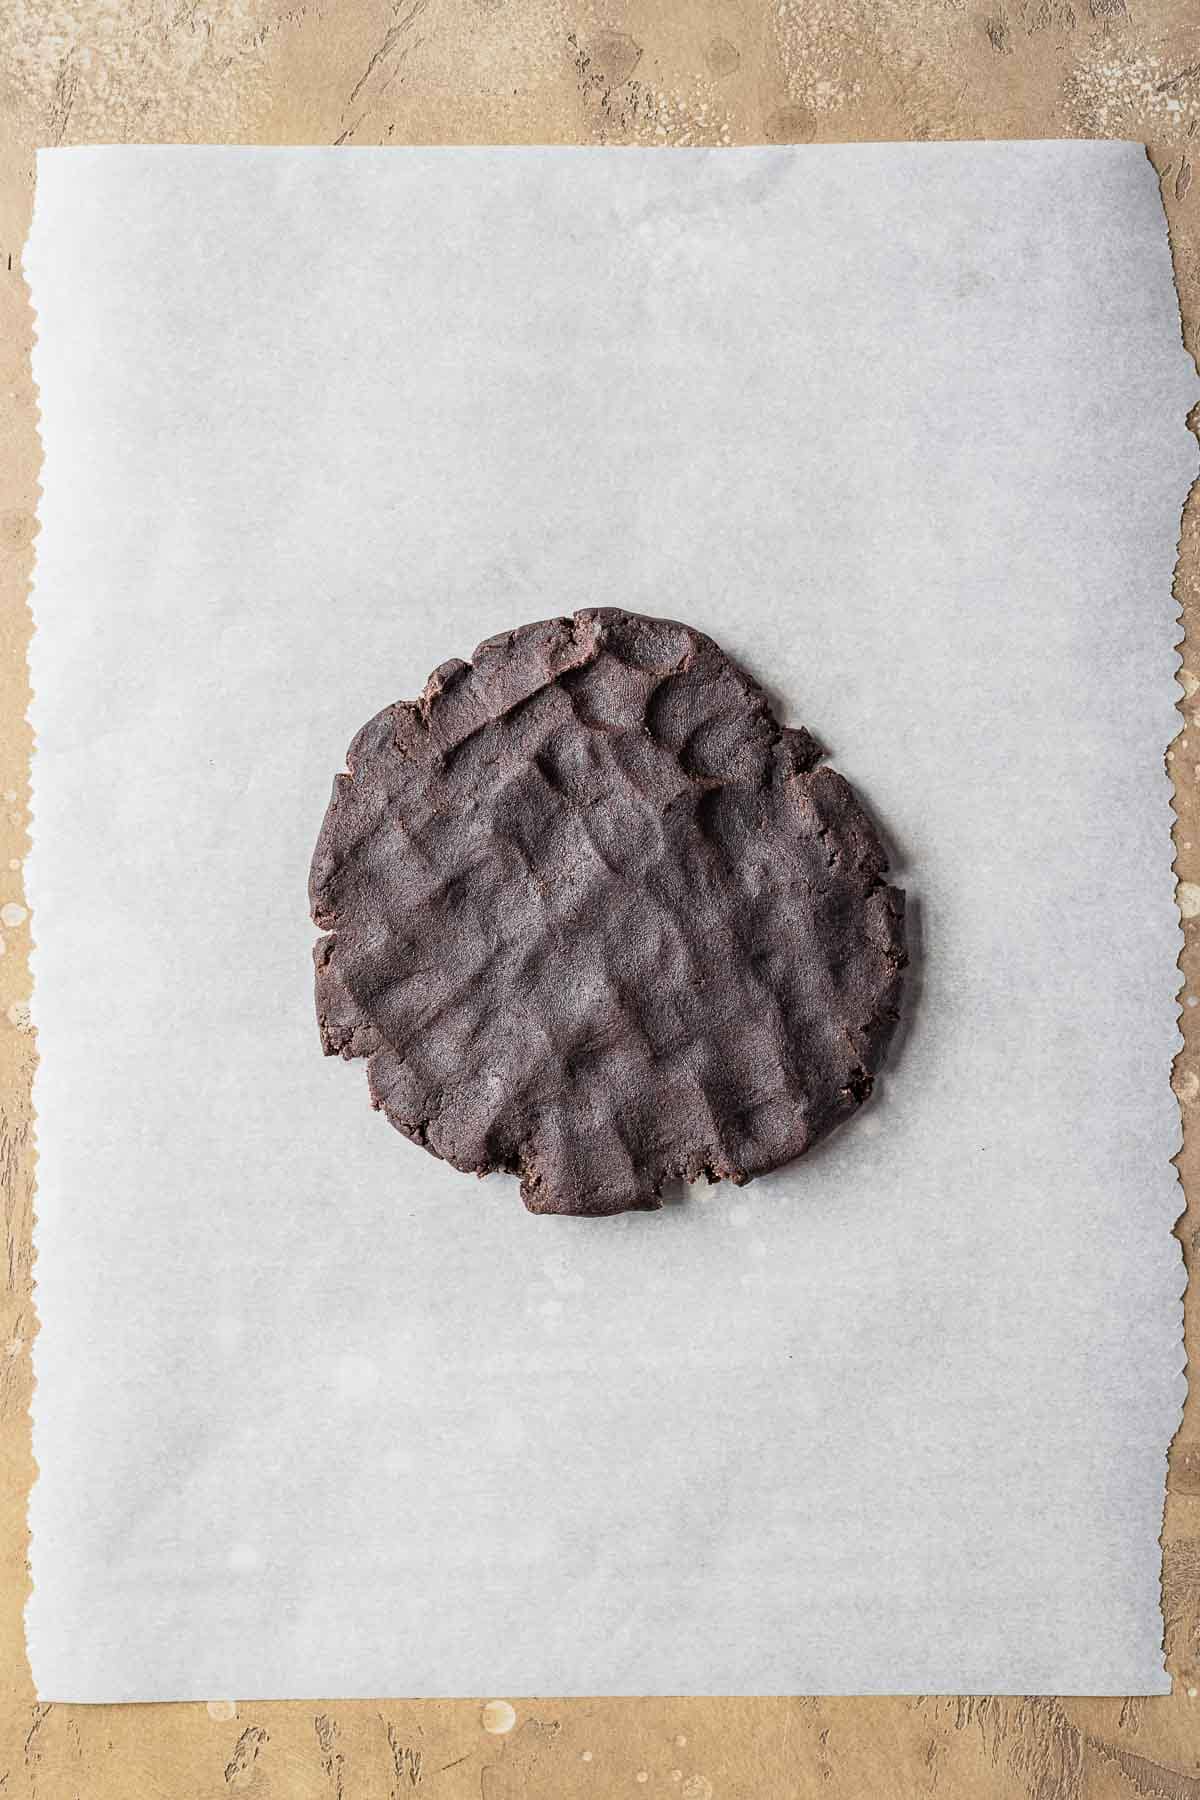
Form dough into a disc shape and place between two layers of parchment paper.
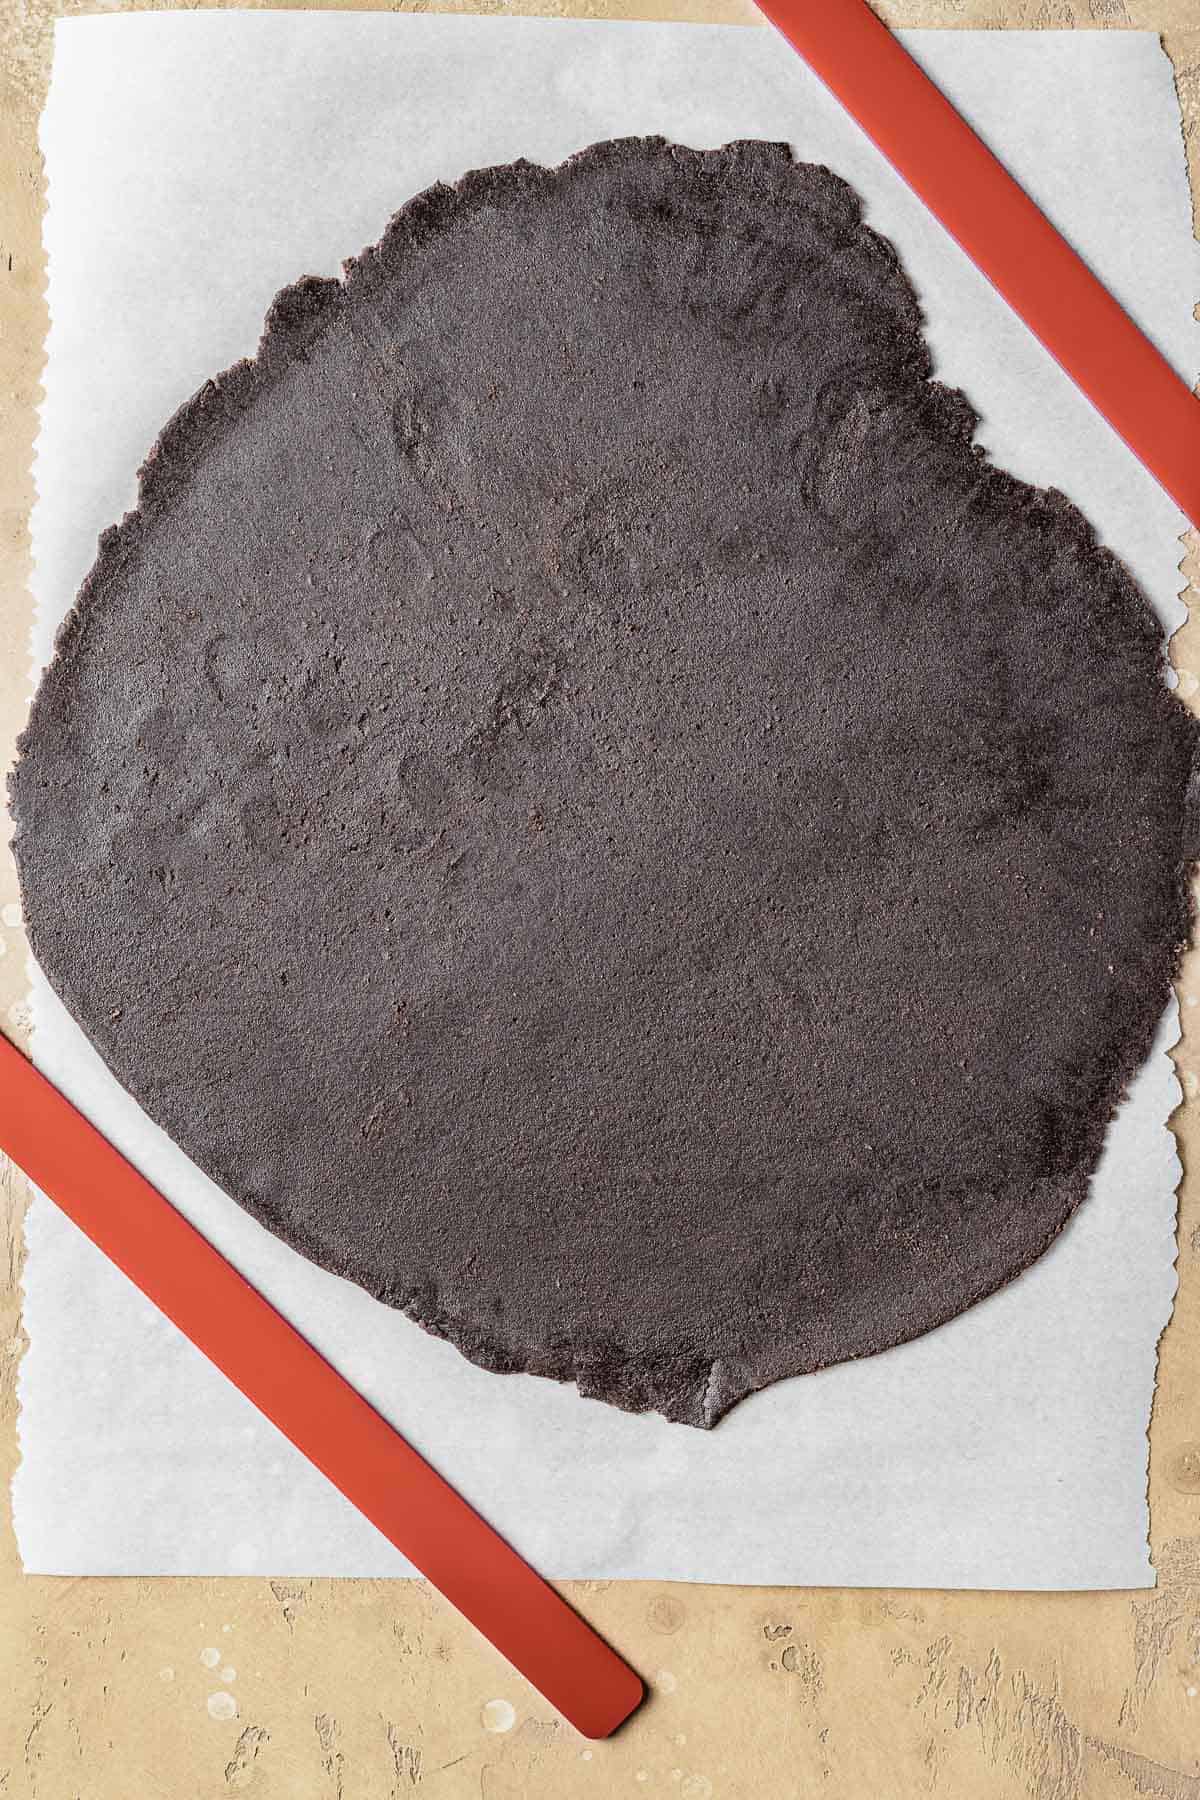
Roll dough into 11 inch (28 cm) circle with a thickness of ⅛ inch (3 mm).
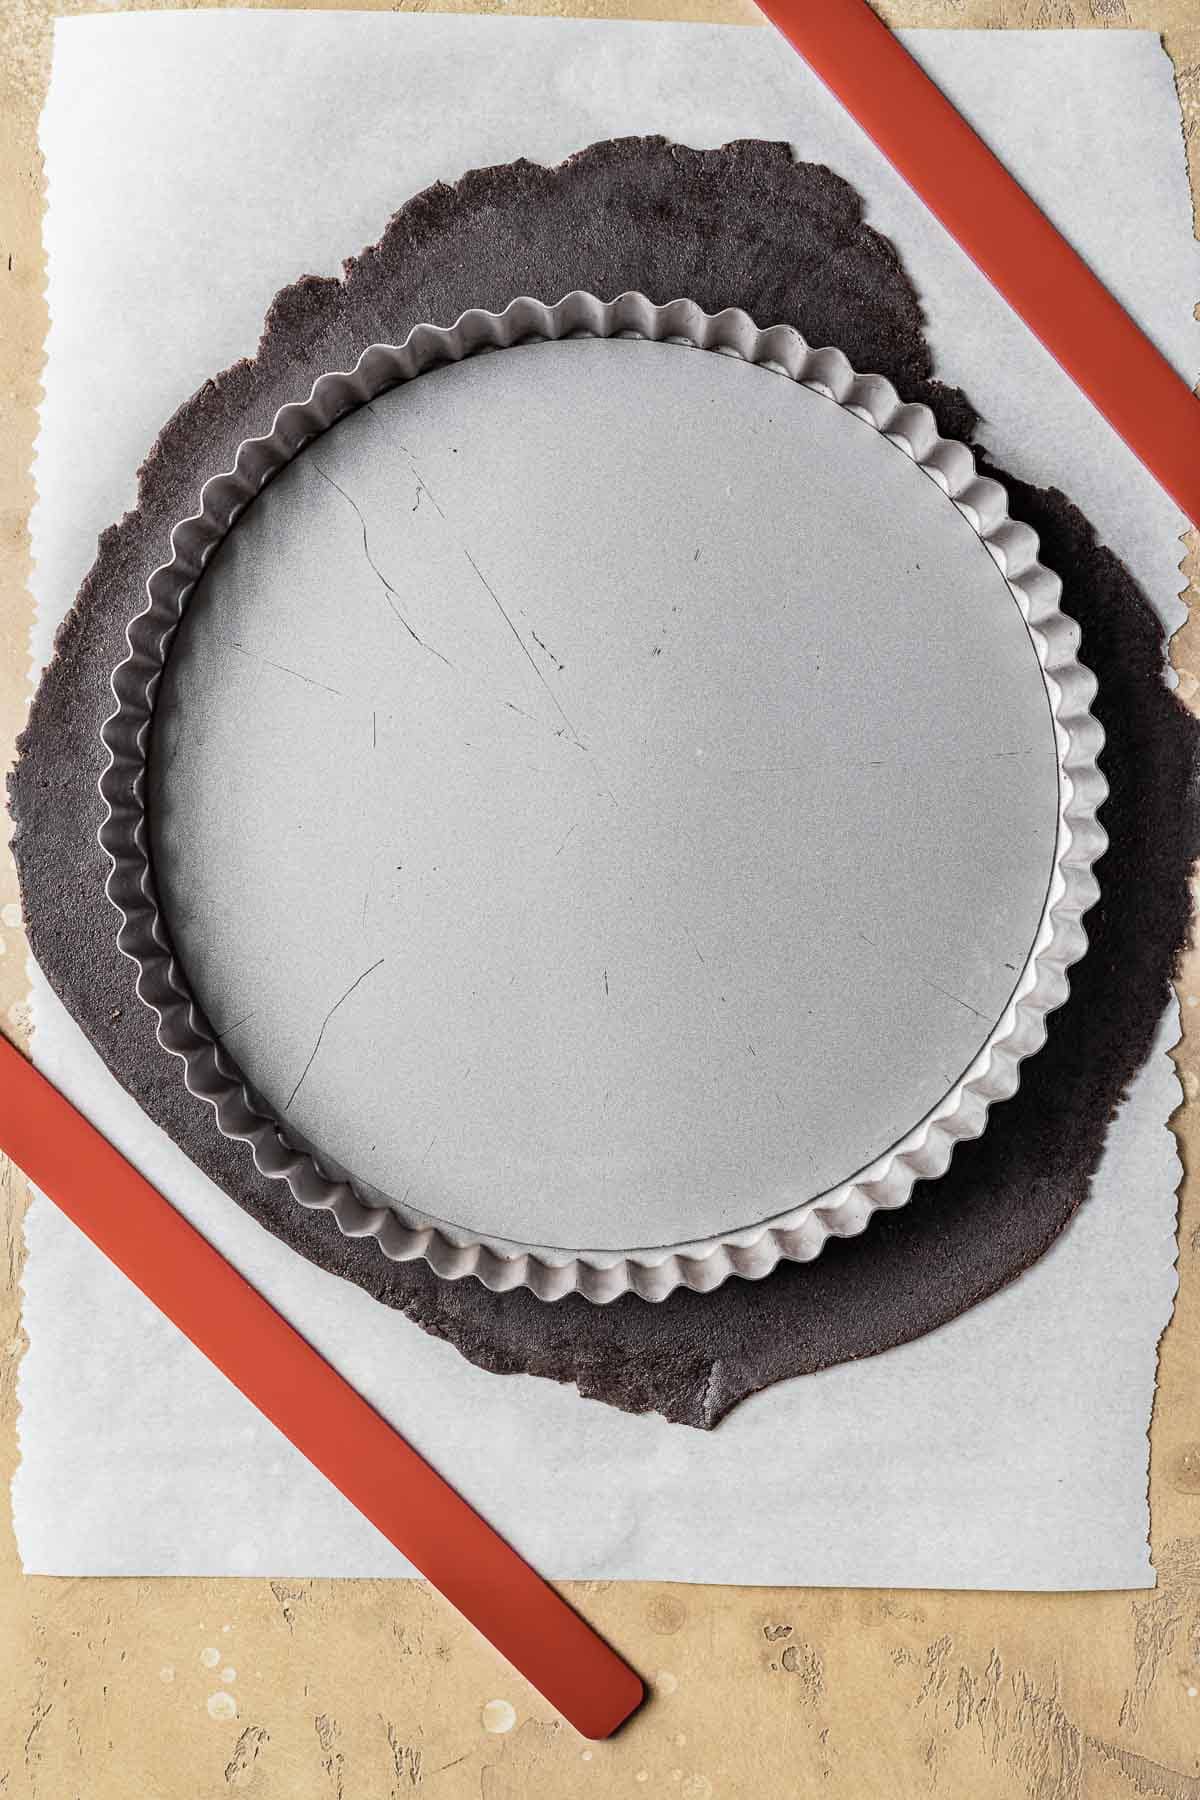
Check size using tart pan for reference.
If dough is still cool enough to be workable, proceed. If dough is sticky and warm, place in fridge on a baking sheet for 5-10 minutes before moving on to next step.
Peel top layer of parchment off dough. Loosely replace parchment, flip dough over, and discard top layer of parchment.
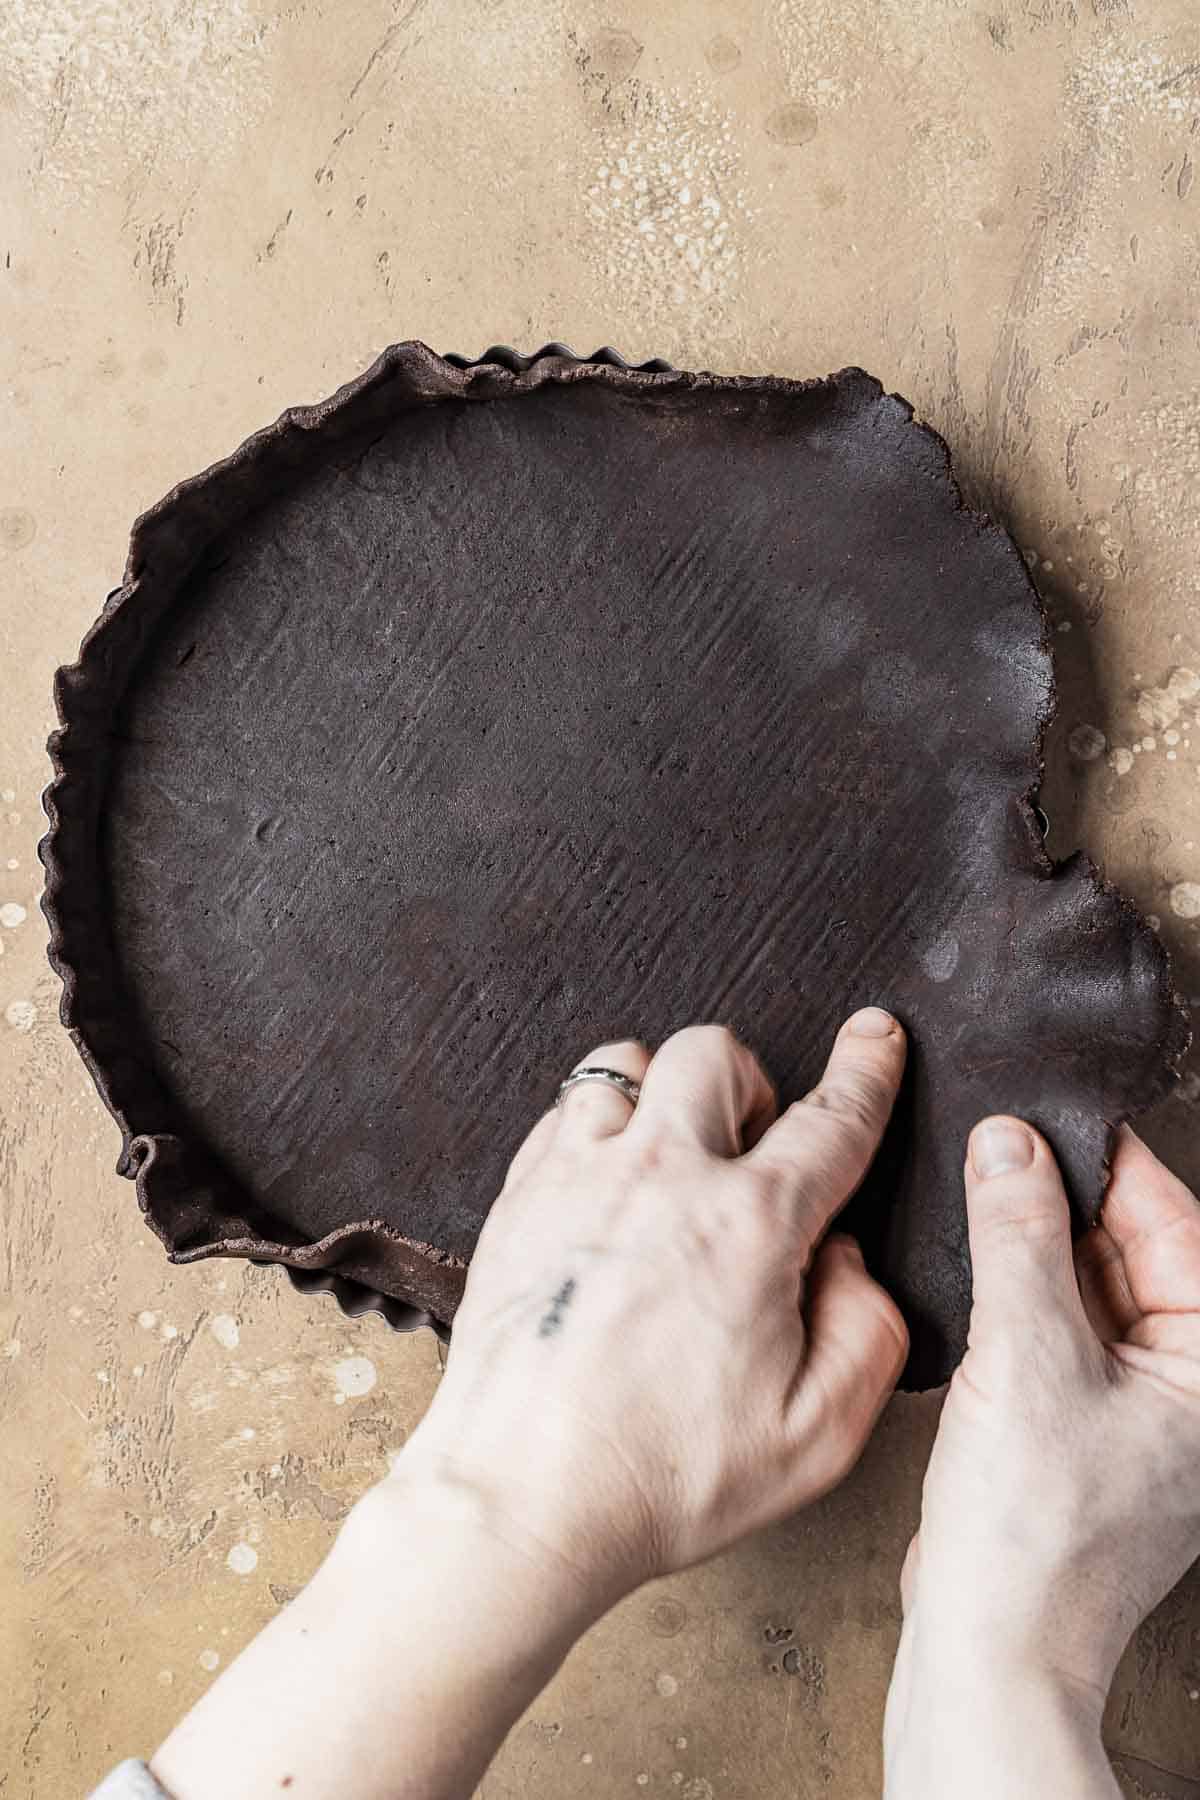
Carefully flip rolled out dough onto tart pan. Lift sides of dough up and away from sharp tart edge. Press dough into base and corners of pan. Do not trim excess dough.
Chill in the fridge, uncovered, for minimum 1 hour.
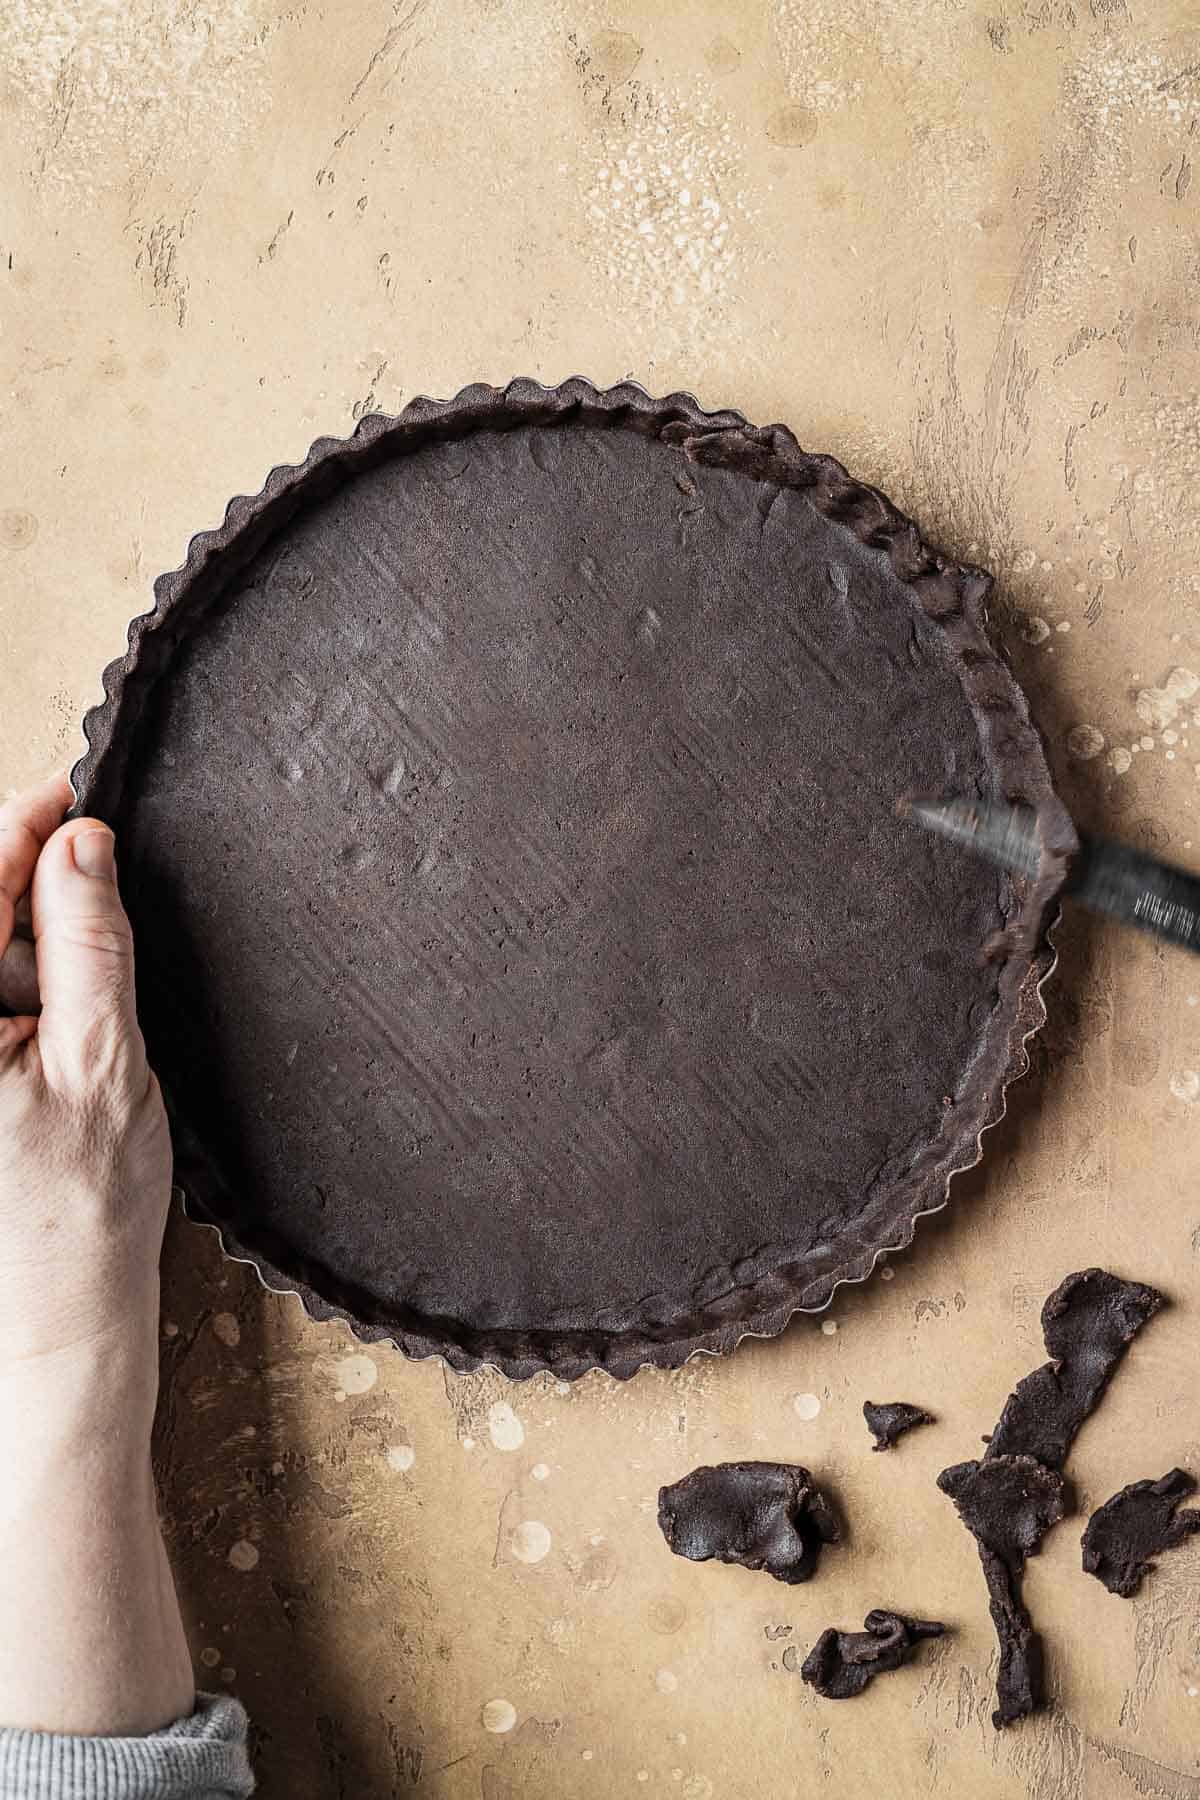
Remove chilled tart from refrigerator. Trim excess dough with knife held parallel to work surface to ensure tart shell has a clean edge.
When placing dough in pan, make sure to press dough gently into all corners for a tight fit. If any cracks or tears occur, patch with extra dough scraps. It's very forgiving!
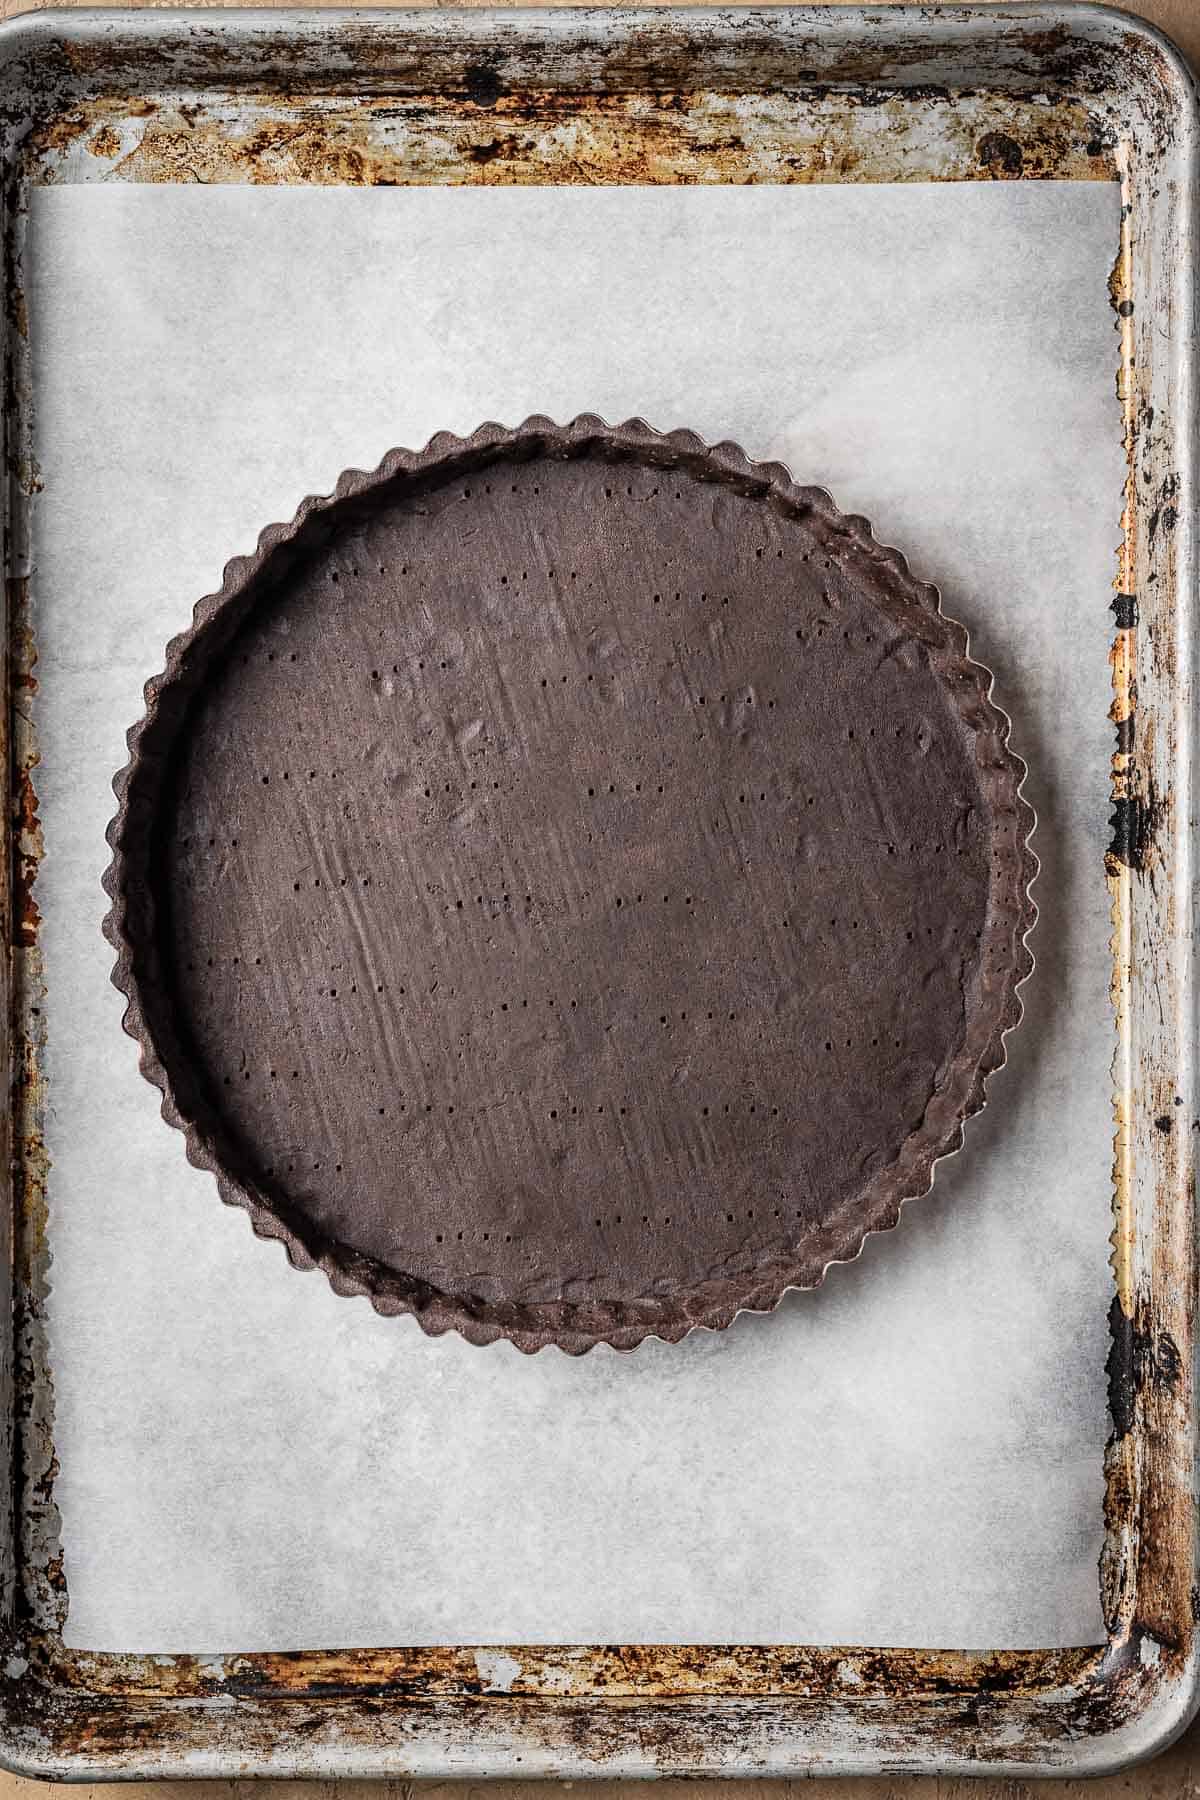
Use a fork to dock the base of the dough. (Dock: prick holes in dough to allow steam to escape while baking.)
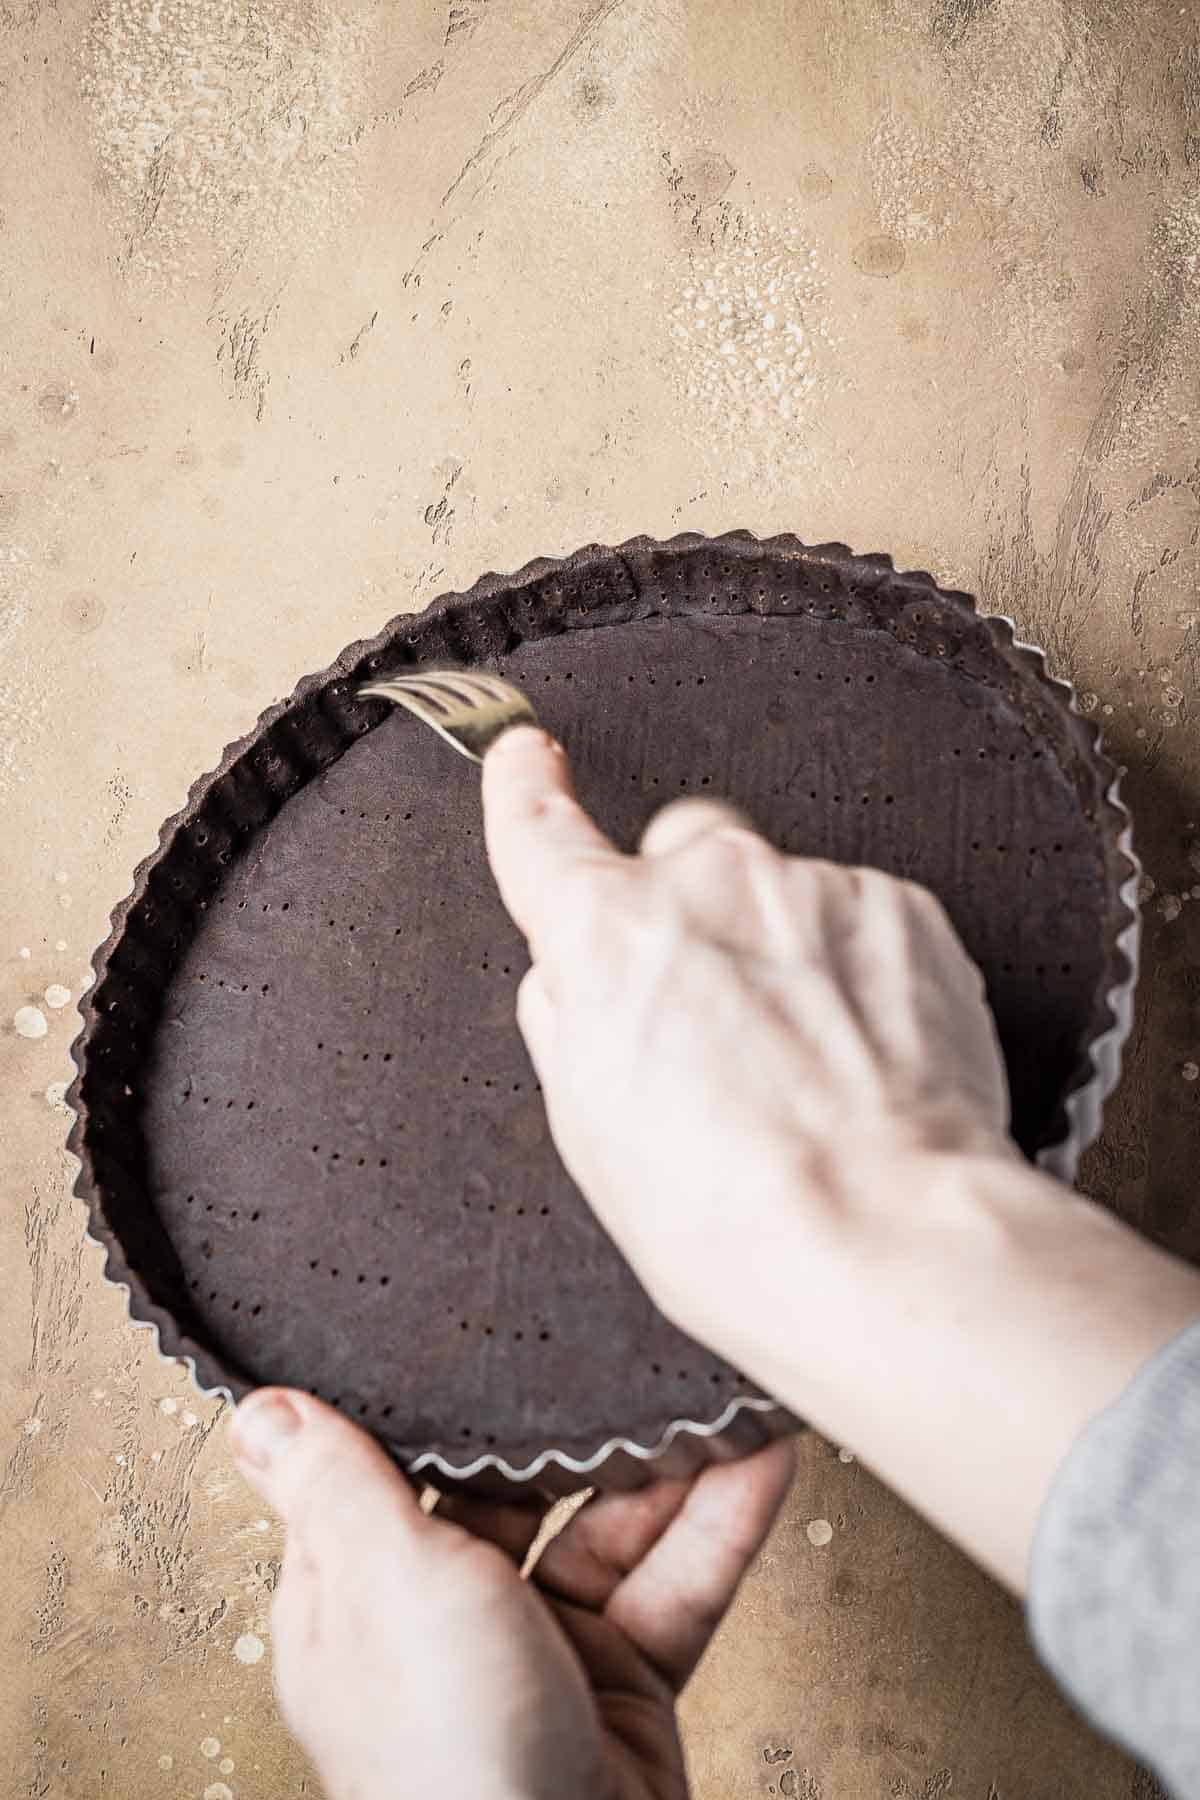
Hold the fork flat to dock the sides of the tart in two horizontal rows.
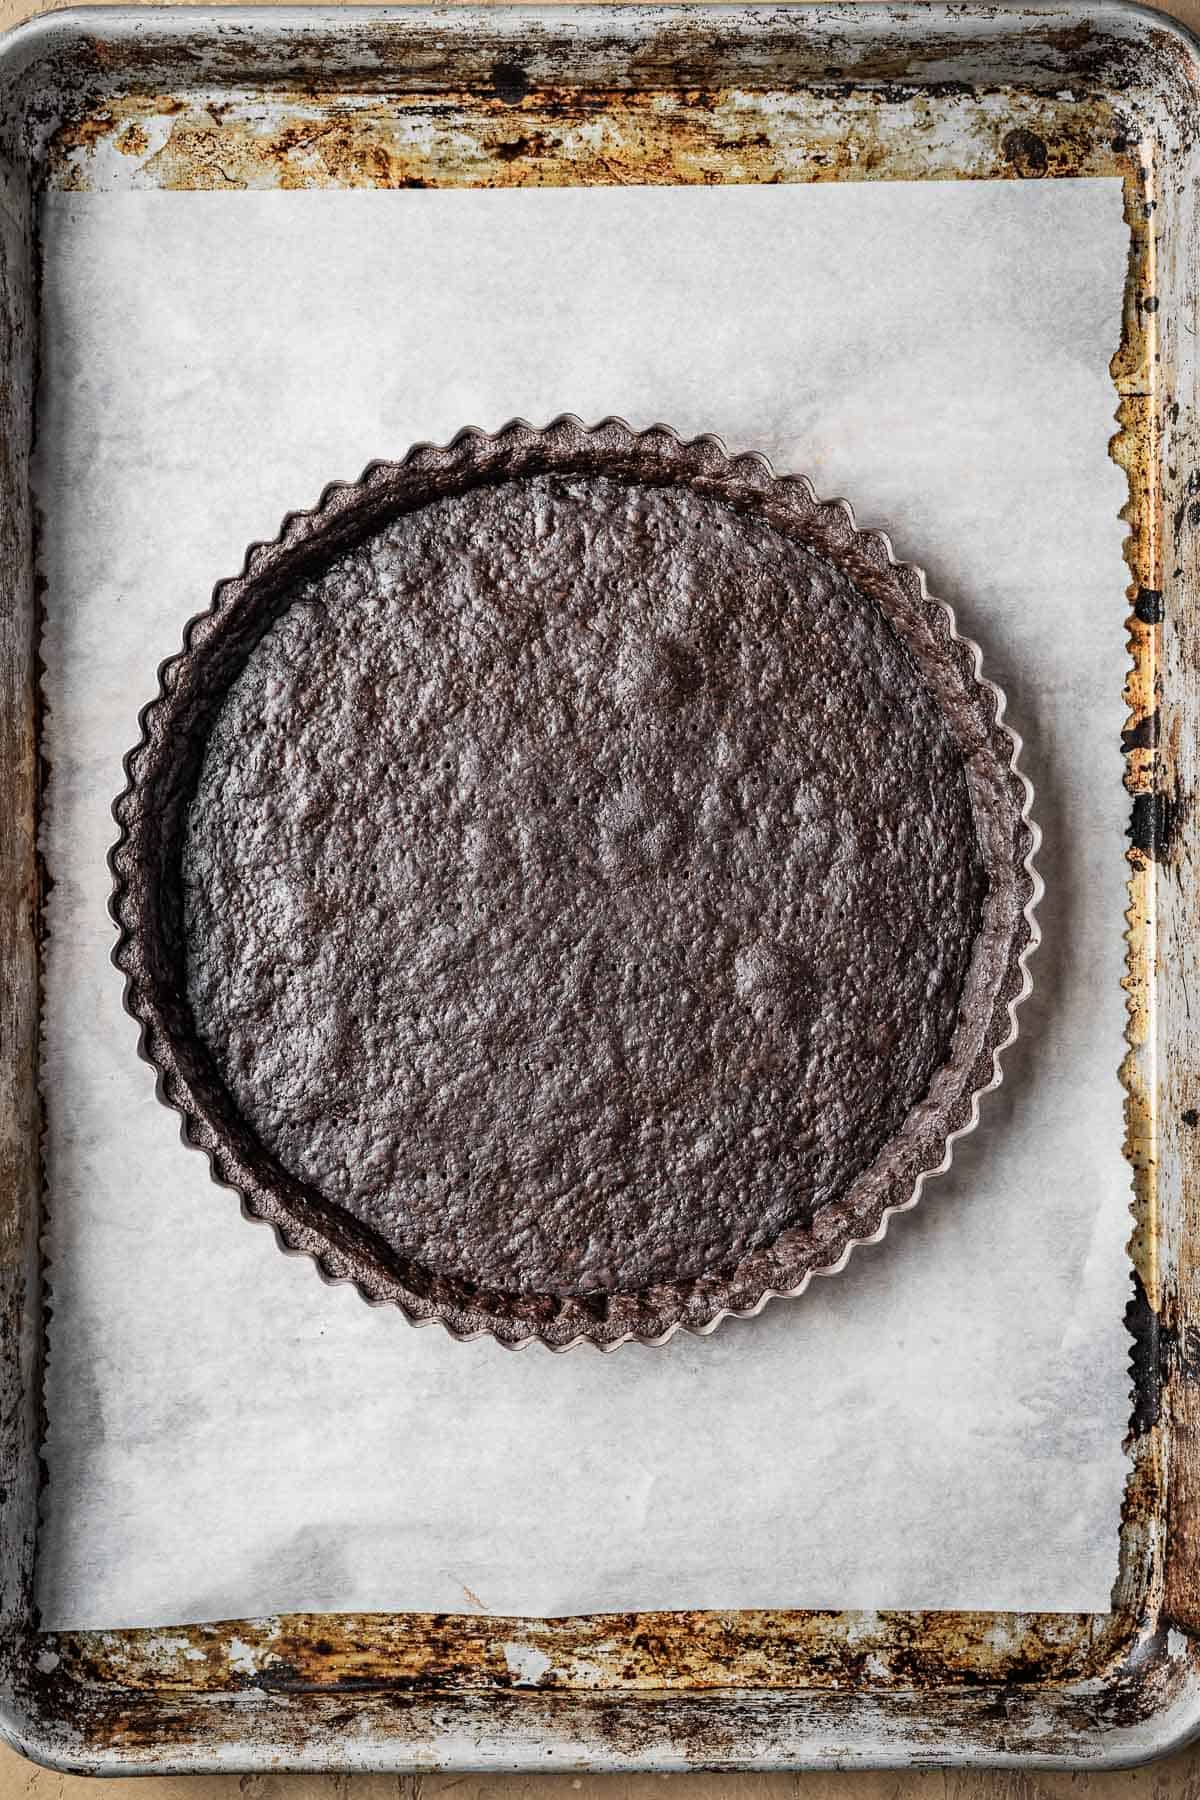
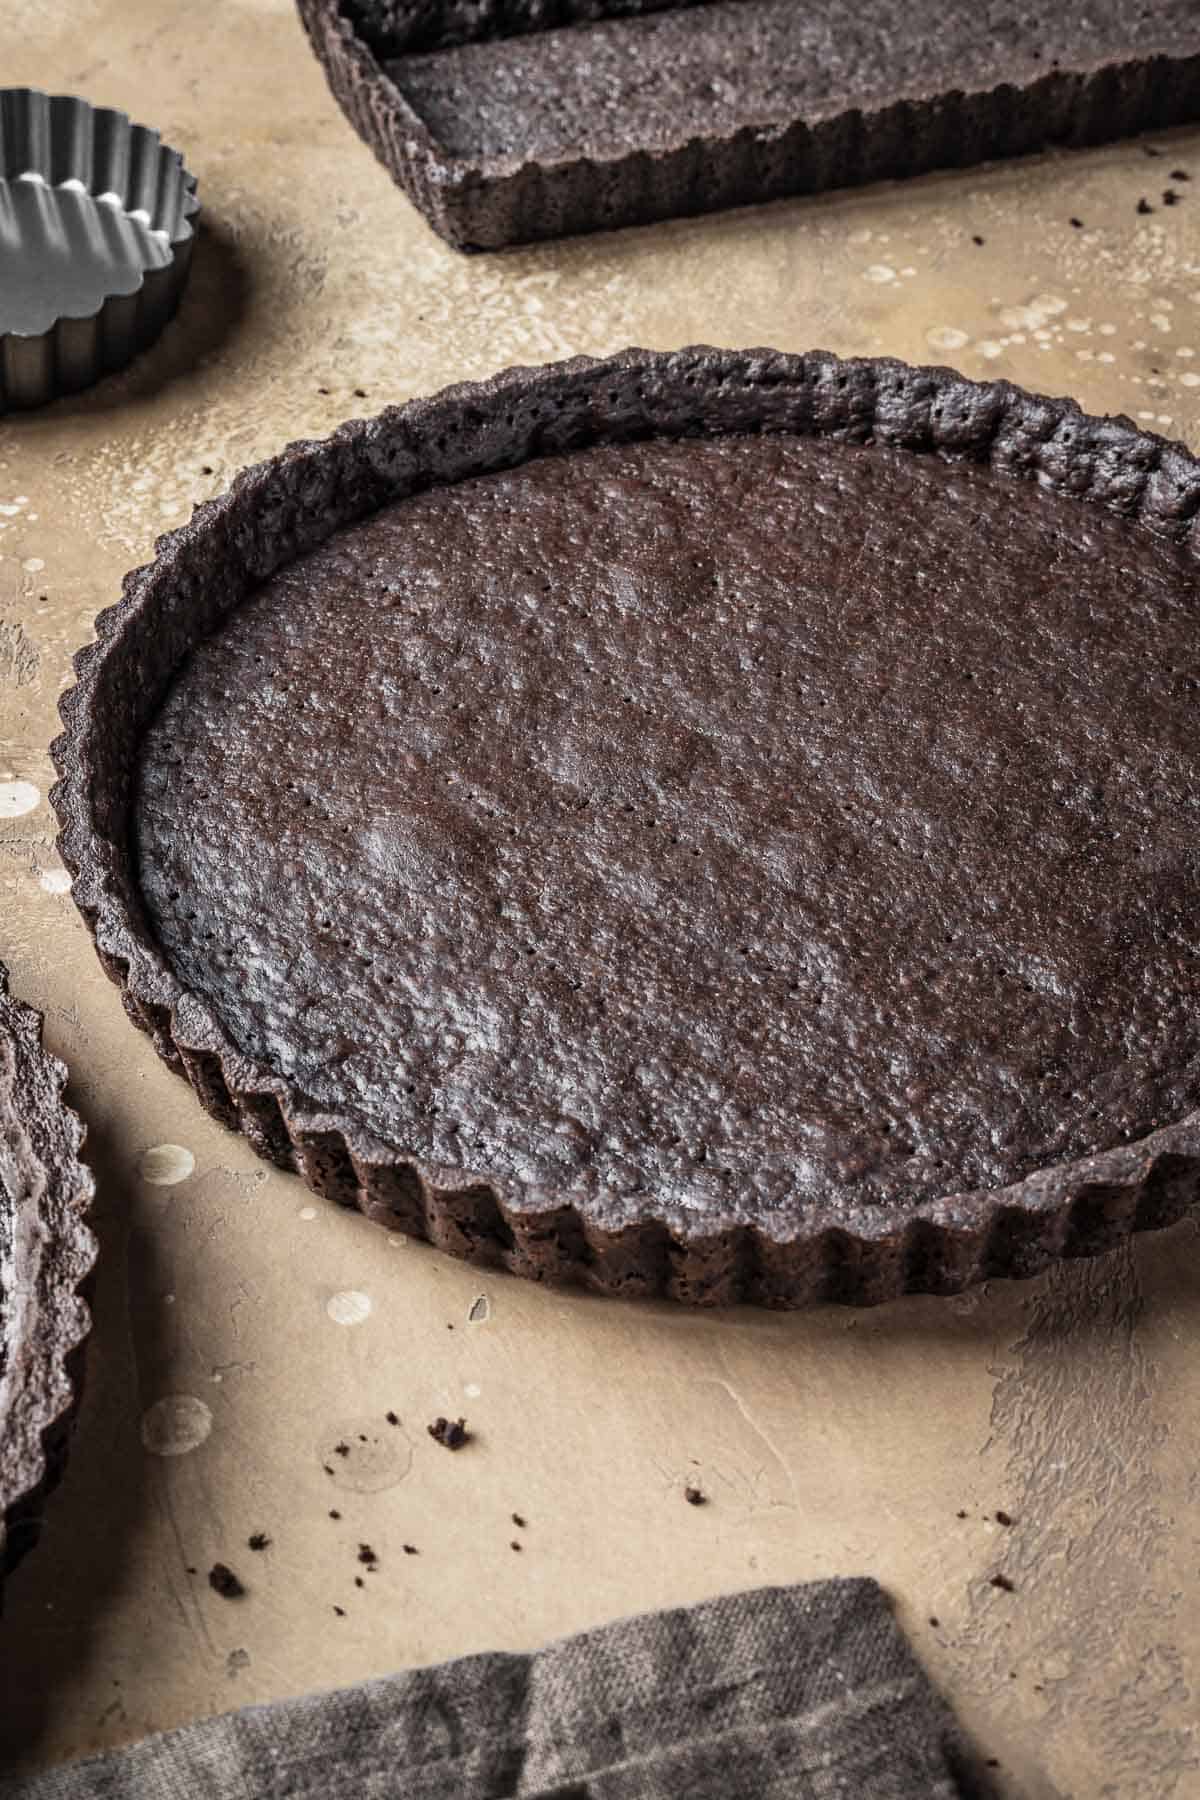
Place tart shell onto parchment lined baking sheet and bake for 20-25 minutes. Turn off oven and remove tart. Let tart cool 10 minutes.
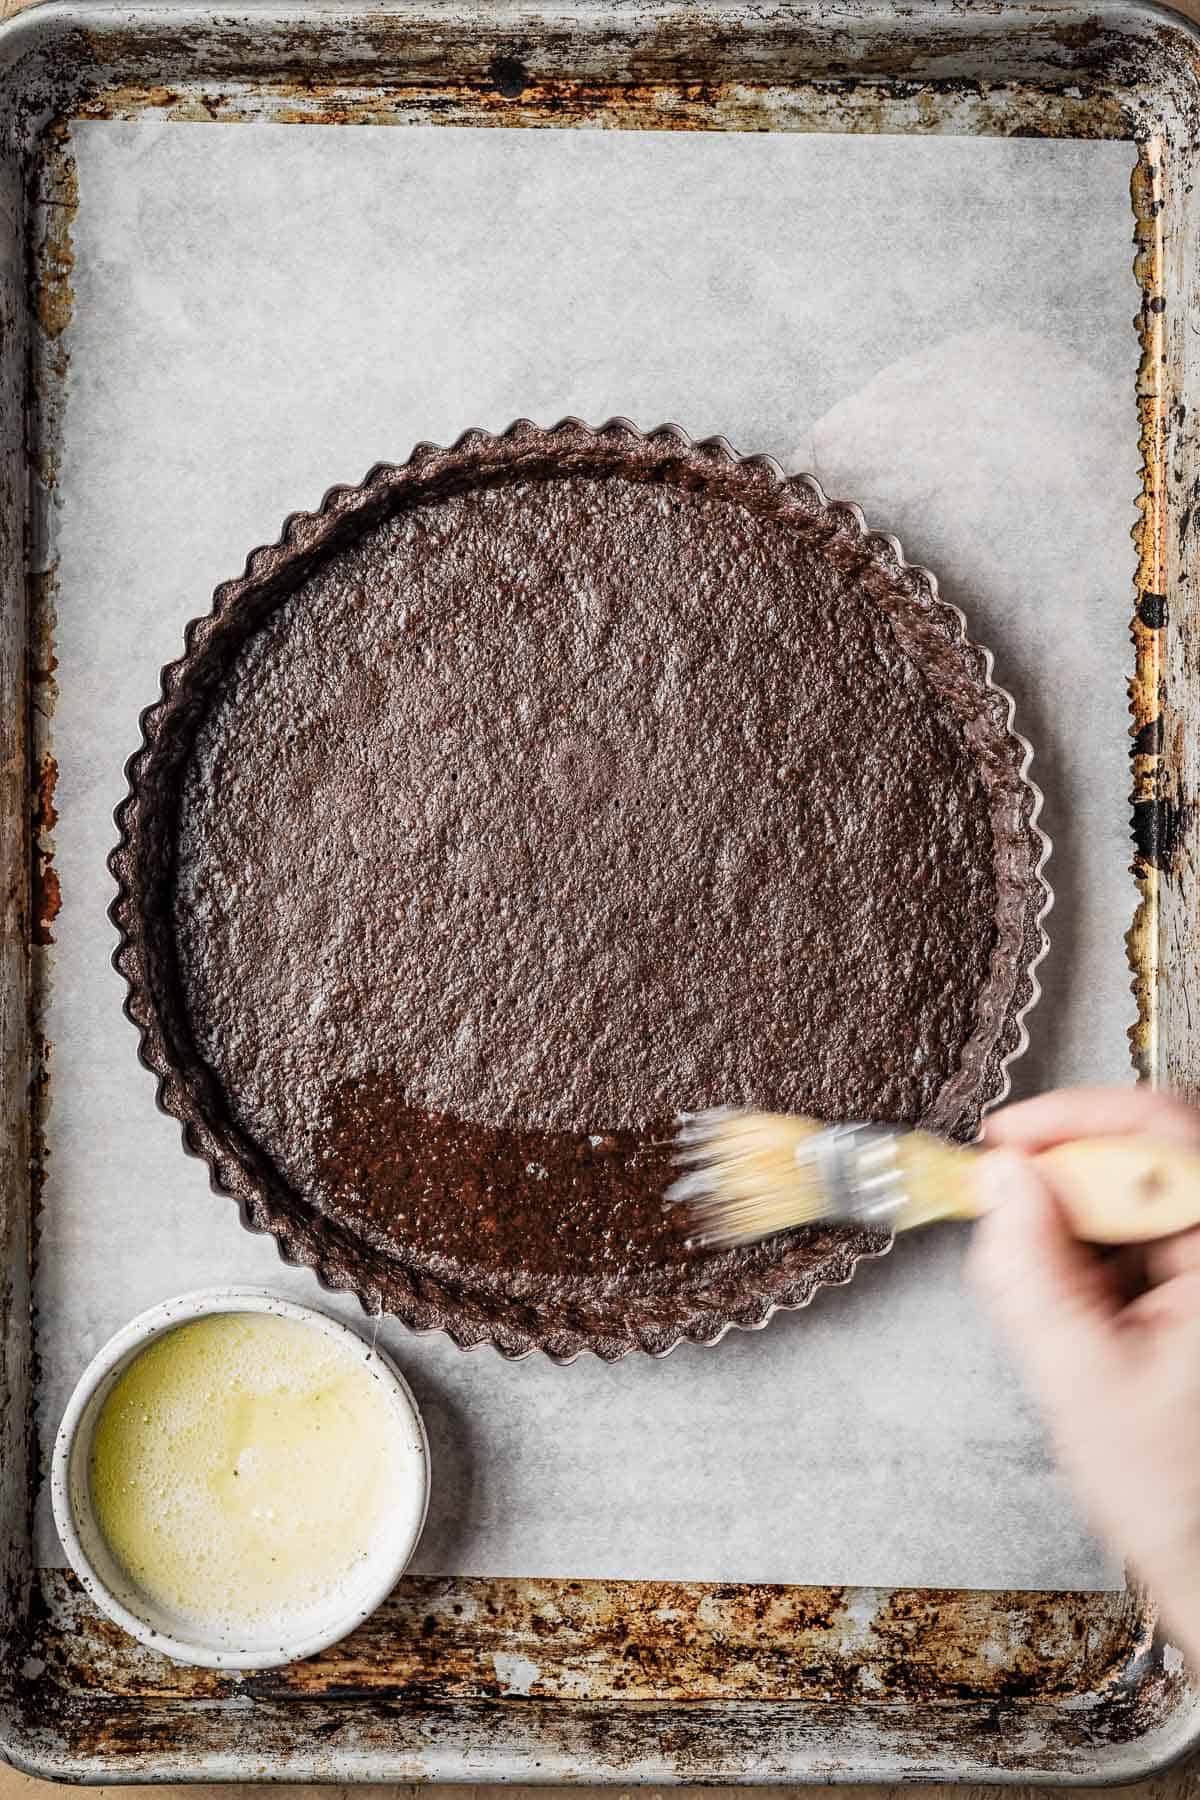
Using a pastry brush, brush the base and interior sides of tart with egg white and water mix.
Return to oven (still warm, but turned off) for 5 minutes to set the egg white.
Let cool completely in tart pan on a cooling rack.
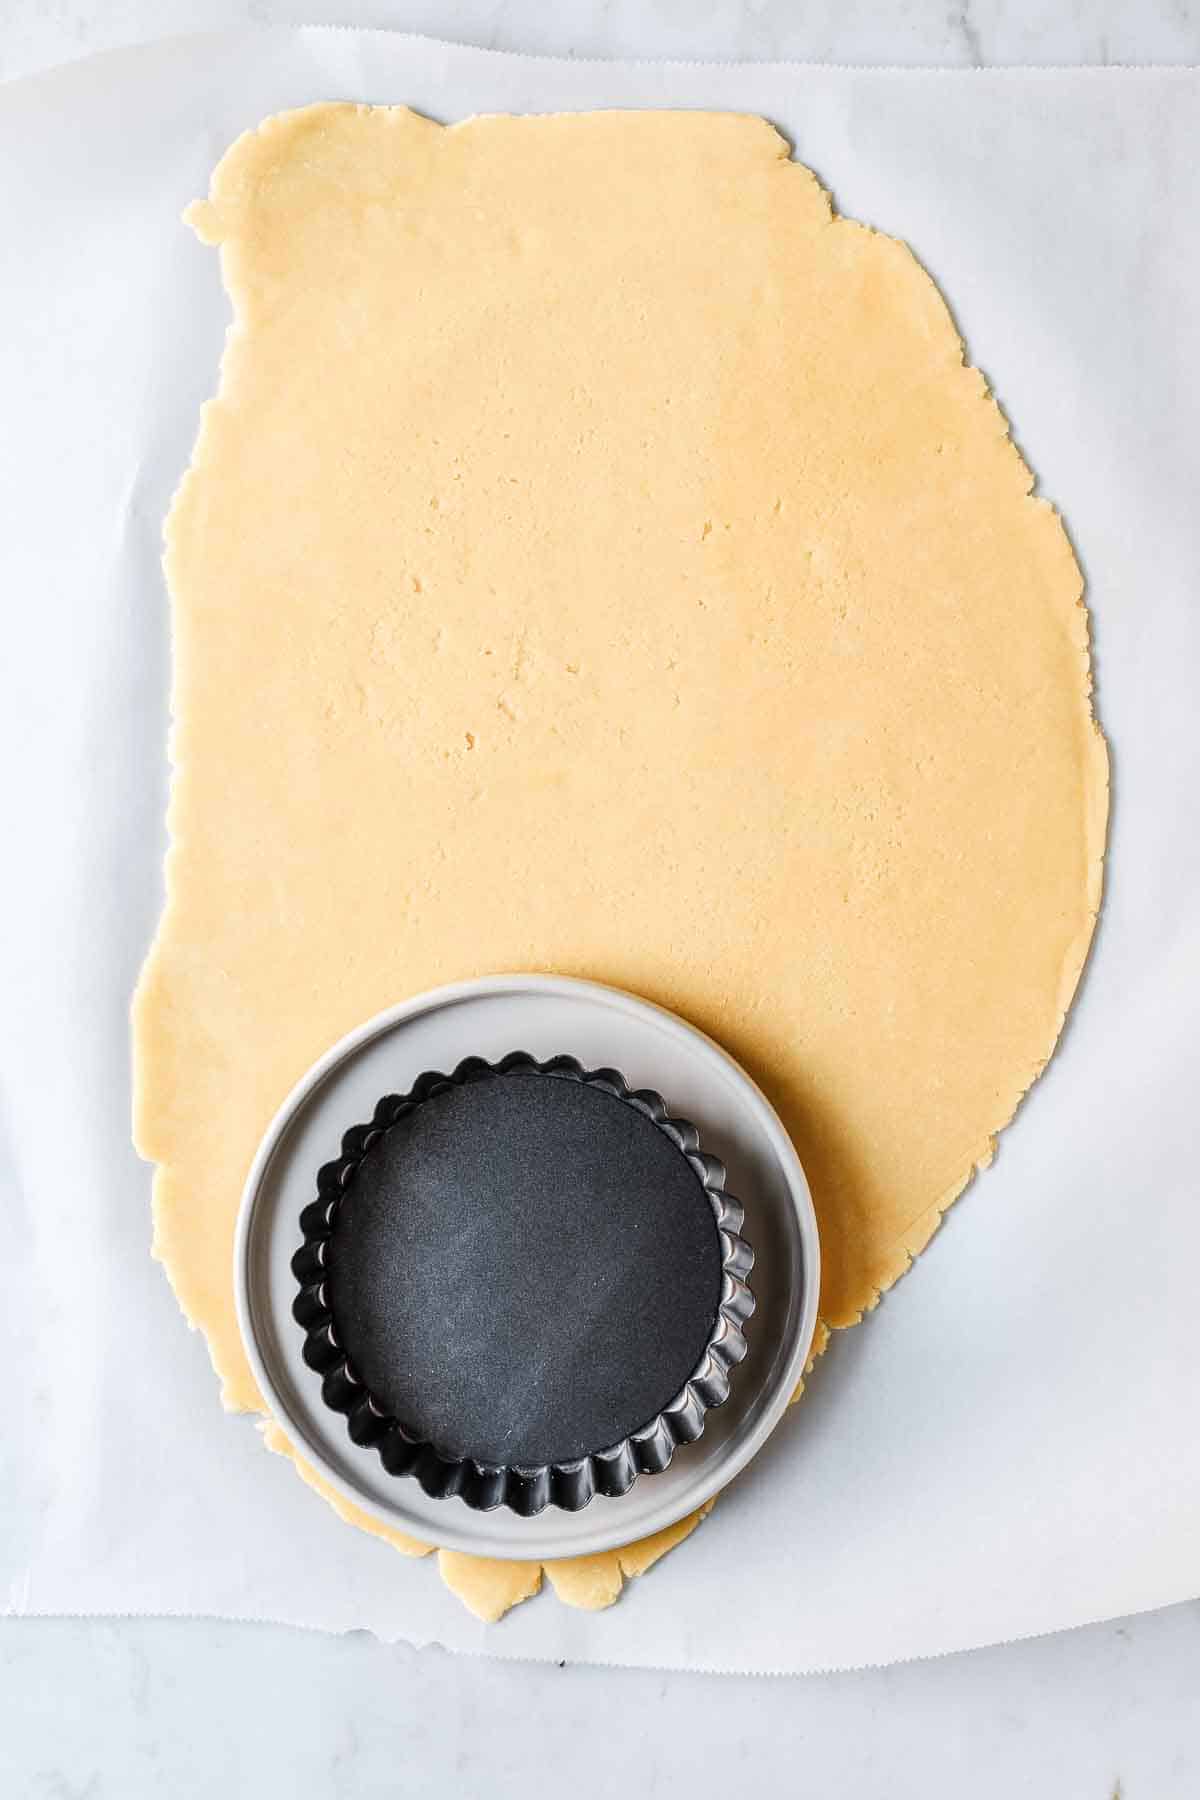
For 4 inch mini tarts, use a larger plate or bowl as a guide to cut out circles (as shown with classic pâte sucrée).
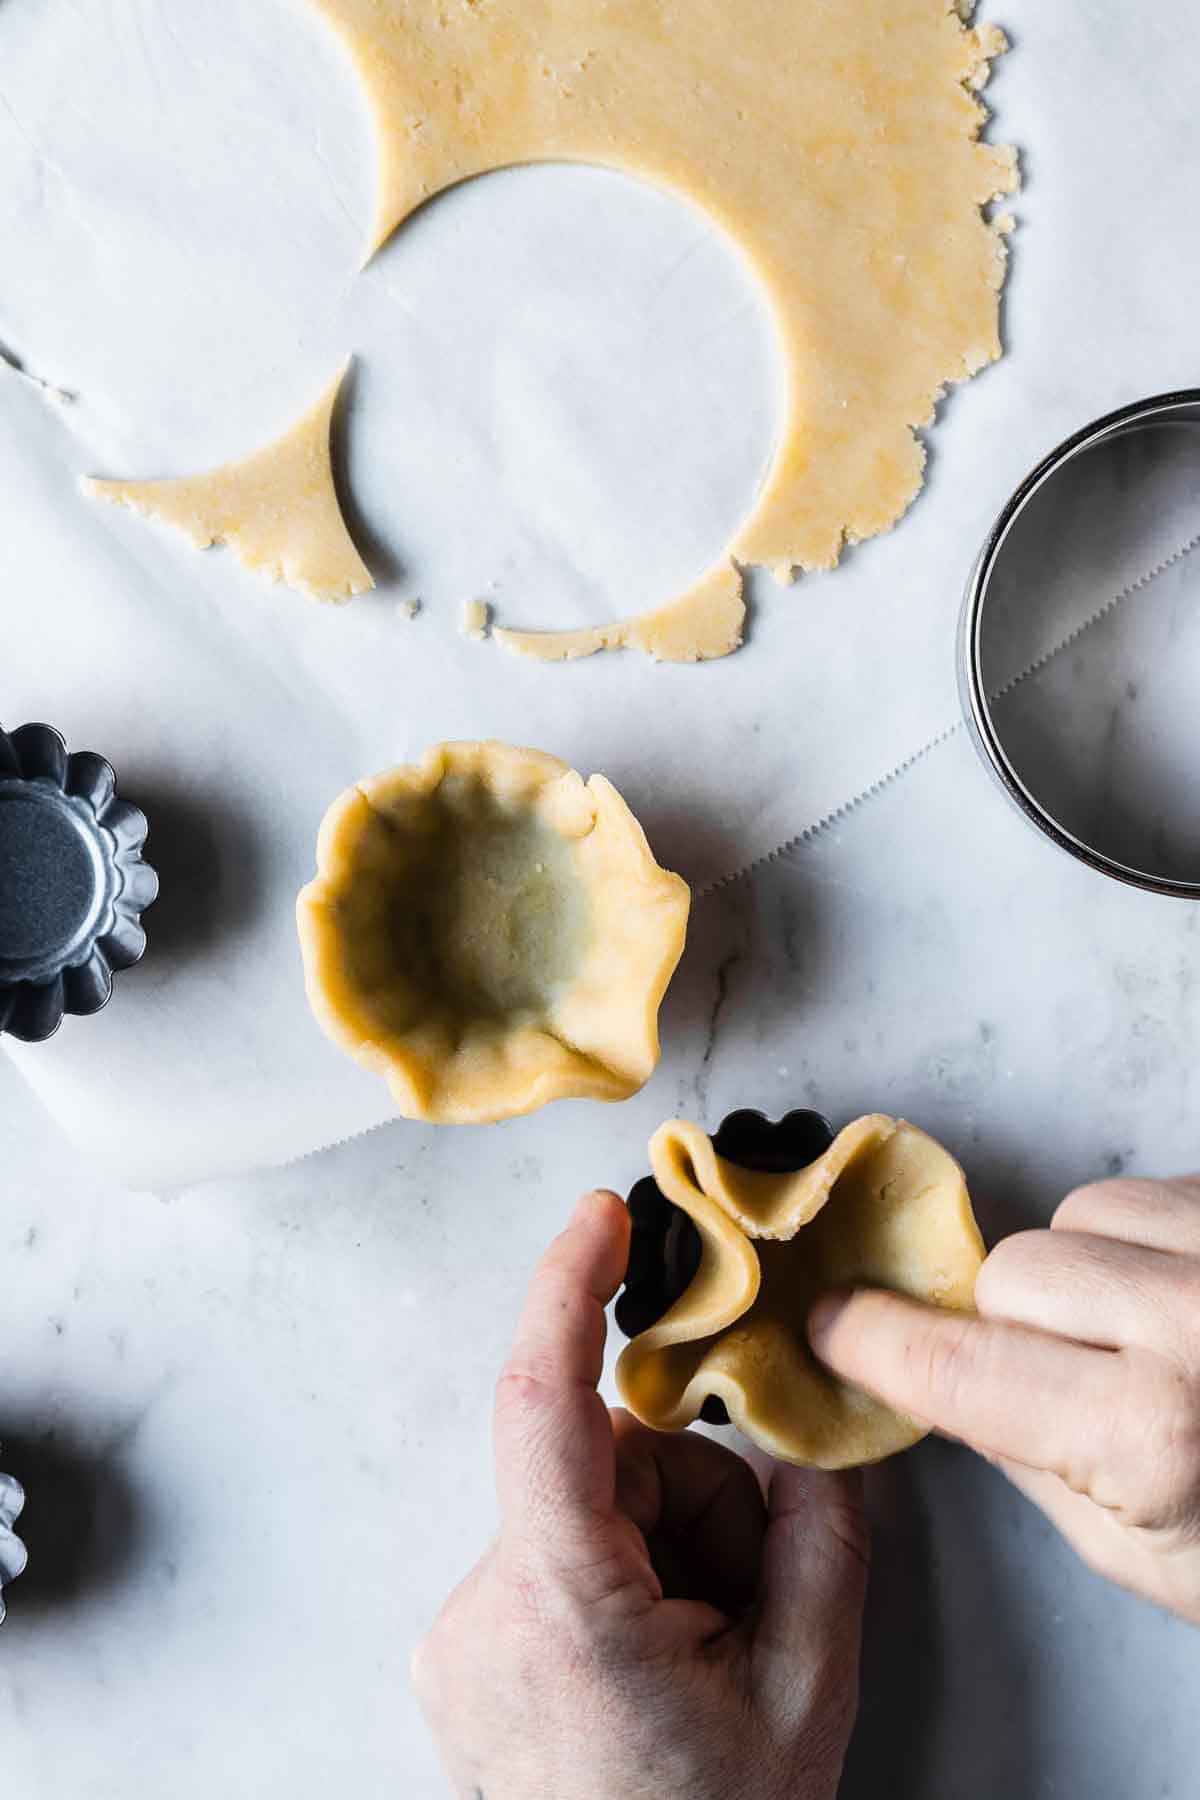
For 2.6 inch tartlets, use a glass or a 3 ¼ inch round cookie cutter.
Par Baking vs Blind Baking
Par Baking - The tart shell is partially baked while empty, then filled and fully baked.
Blind Baking (also called pre-baking) - The tart shell is fully baked while empty, then cooled and filled with no-bake fillings like pastry cream, ganache, or fruit curd.
This recipe includes baking times for both methods, so you can make any tart your heart desires!
Variations
While the chocolate dough is delicious as is, small additions can add another layer of flavor. When considering an add-in, think about how it will complement your filling of choice.
- Orange zest - Use a microplane to zest the peel of an orange into the granulated sugar. Rub the citrus oils into the sugar with your fingers and proceed with the recipe.
- Herbs - Add a teaspoon of finely chopped fresh rosemary to the dough along with the sugar.
- Spices - Add a bit of ground cinnamon, ginger, cardamom or nutmeg to the dough for a warm spiced flavor. You could also try ground anise seeds, cloves, chili powder or even black pepper. Start small (¼ teaspoon) and add more as needed.
- Espresso powder - Whisk 1 teaspoon of espresso powder into the flour for a subtle espresso taste.
Equipment
Tart pans - For my standard tart recipes, I use a 9.5 inch round tart pan with a removable base. I also use 4 inch round mini tart pans and 2.6 inch round tartlet pans.
Pastry guides - Pastry guides helps easily roll dough out to a precise thickness every time! I use a set of acrylic Fat Daddio pastry guides that are independent of the rolling pin. I find them more versatile than rolling pin rings, and I can still use my favorite vintage wooden rolling pin.
Pie shield - I use a simple metal Mrs. Anderson pie shield to protect the outer crust from browning too soon. If you don't have a pie shield, you can use strips of aluminum foil.
Baking pan - A half sheet baking pan (13 x 18 inches) keeps the base of the tart from browning too quickly and catches drips and spills. Sometimes a bit of butter leaks from the bottom of the tart. Save yourself the work of cleaning the oven and use a baking sheet underneath!
Storage
Baked tart shells - Store fully baked, empty tart shells in an airtight container at room temperature for up to 2 days, or in the refrigerator for up to 5 days.
To freeze, wrap well with plastic wrap and place in an airtight container in the freezer for 2-3 months. Unwrap and place on a cooling rack to defrost at room temperature before filling.
Unbaked tart shells - Follow recipe through step 12, docking the crust. Wrap well with plastic wrap, and place in an airtight container in the freezer for 2-3 months. Bake directly from frozen.
Note: This method only works if you don't need your tart pan in the meantime, or if you have more than one pan available!
Frequently asked questions
If the dough gets too soft or warm, transfer it to a baking sheet and refrigerate for about 5 minutes. It should be cool but still pliable enough to avoid cracking when pressing it into the tart pan.
The dough rolls out easily, but if you prefer, you can also press it directly into the tart pan with your fingers.
Nope, no pie weights needed-hooray! This tart shell bakes beautifully on its own. For best results:
Rest and chill the dough for at least 1 hour in the refrigerator before baking.
Dock the base and sides well with a fork to allow steam to escape and prevent large bubbles from forming.
I made a LOT of these tarts while testing both this recipe and my basic pâte sucrée, and I really wanted to use up the leftover egg white instead of cracking another whole egg.
In my tests, I brushed egg white mixed with water onto the base of partially baked tarts and returned them to the oven for an additional 5-10 minutes to set.
While this created a nice shiny layer, the base kept cracking dramatically as the egg white dried and tightened-definitely not ideal. The tart base didn't crack when I baked the tarts without an egg wash.
Eventually, I fully baked a tart without the wash, then removed it from the oven and let it cool for about 10 minutes. I then added the egg wash and returned the tart to the still-warm oven-about 200°F (93°C)-for 5 minutes.
At last-no cracks! The base was perfectly sealed and ready for filling.
According to the American Egg Board, egg white proteins start to coagulate at temperatures between 144-149°F (62.2-65°C), so the residual heat from the oven is enough to set the egg wash.
Yes, though the slightly awkward part is dividing the egg yolk. If you don't have a digital scale, beat the yolk lightly and measure out half (roughly 1½ teaspoons by volume).
Prefer not to fuss with halving? Make the full batch and freeze half. Shape the extra dough into a flat disc, wrap it well in plastic, and place it in a freezer-safe bag. It'll keep for up to 2 months. Thaw overnight in the refrigerator before using.
Love this recipe? Please leave a comment and star rating. ★★★★★ Your feedback, suggestions, and adaptations are very helpful to other bakers!
📖 Recipe
Pâte Sucrée Au Chocolat (Chocolate Tart Dough)
INGREDIENTS
- 180 grams all purpose flour
- 40 grams cocoa powder, sifted. Either Dutch or Natural are fine. I use Dutch for darker color and flavor.
- ½ teaspoon kosher salt
- 170 grams unsalted butter, room temperature
- 100 grams granulated sugar
- 1 large egg yolk, room temperature
- 1 teaspoon vanilla extract
- 1 large egg white, room temperature, for egg wash
- 1 Tablespoon water, for egg wash
INSTRUCTIONS
- To a medium bowl, add flour, cocoa powder and salt. Whisk well to combine and set aside.180 grams all purpose flour, 40 grams cocoa powder, ½ teaspoon kosher salt
- To the bowl of a stand mixer fitted with paddle attachment, add the butter and sugar. Cream on medium speed 2-3 minutes, until light and fluffy. Scrape down sides of bowl.170 grams unsalted butter, 100 grams granulated sugar
- Add flour mixture. Mix on low speed until coarse and grainy, about 1 minute. Scrape sides to incorporate all butter. Butter pieces should break down into a combination of sandy mixture and very small lumps.
- Add the egg yolk and vanilla and mix on low for about 30 seconds to 1 minute.The dough should start to pull together into a ball.1 large egg yolk, 1 teaspoon vanilla extract
- Gather the dough into a disc shape and place between two sheets of parchment.
- Roll the dough into an 11 inch diameter circle (28 cm) with a thickness of slightly less than ⅛ inch thick (3 mm).If dough is still cool enough to be workable, proceed. If dough is sticky and warm, place in fridge for 5-10 minutes before proceeding to the next step.
- Peel the top layer of parchment off the dough. Loosely replace the parchment, flip the dough over, and discard the top layer of parchment.
- Use your hand under the parchment to carefully flip the rolled out dough onto the tart pan.
- With one hand, carefully lift the sides of the dough away from the sharp tart edge. Using your other hand, gently press the dough into the base and corners of the pan. Do not trim the extra dough yet.Ensure that no empty air space remains between the dough and the pan. If any cracks or tears occur, patch with extra dough scraps. It's very forgiving!
- Move untrimmed tart onto a baking sheet and and chill in the fridge, uncovered, for a minimum of 1 hour.
- Remove chilled tart from refrigerator. Trim the excess dough with a knife held parallel to your work surface to ensure the tart shell has a clean edge.
- Use a fork to dock the base of the dough (prick holes in it.) Hold the fork flat to dock the sides of the tart in two horizontal rows.See process photos in recipe instructions for reference. If using a perforated tart pan, docking should not be necessary.
- Place docked tart shell in freezer to chill while oven preheats.
- Preheat oven to 350 degrees Fahrenheit (177° Celsius, Gas mark 4) with rack in center of oven.
- Place tart shell onto a parchment lined baking sheet and bake for 15* minutes if par-baking. For a fully blind baked crust, bake for 25* minutes. The aroma of buttery chocolate is a helpful indicator. Remove from oven and turn off oven. Let tart cool for 10 minutes.*Reduce bake times by 5 minutes for 2.6" tartlet and 4" mini tart pans to start.
- Whisk together the egg white and water in a small bowl. Using a pastry brush, thinly brush the egg white mixture onto the base and interior sides of the tart.1 large egg white, 1 Tablespoon water
- Put tart back into cooling oven for 5 minutes to set the egg wash.You may need to add a pie shield here to protect the edges of the tart from browning too much. Strips of aluminum foil are fine, too.
- Remove from oven. Cool completely in tart pan on a cooling rack.
EQUIPMENT
- 9.5 inch round tart pan (24 cm)
- or 4 inch round mini tart pans (10 cm)
- or 2.6 inch round tartlet pans (6.6 cm)
NOTES
- 2 round tarts (9.5 in / 24 cm)
- 8 mini tarts (4 in / 10 cm)
- 20 tartlets* (2.6 in / 6.6 cm)
Noelle Maine says
This is a great recipe. I typically use pate sucre for cheesecake but wanted to make a grasshopper pie for Christmas this year and don't really care for cookie crust. Came upon your recipe and knew it would be perfect for a cream pie. As a lazy chef, I simply pressed the dough into a 9 inch pie pan and chilled it while the oven was heating up. It was perfect and I'll definitely be using your recipe again. Thank you and Merry Christmas, everyone!
Kathleen Culver says
Thank you so much, Noelle!
Grasshopper pie is a family tradition of ours as well.
I love hearing that you used this crust for it!
Thanks so much for your kind words.
Merry Christmas to you and yours,
Kathleen
Nicky says
hello, this recipe looks great! if skipping the egg white wash would I still return the shell to the oven for 5 minutes or omit that step entirely? thank you.
Kathleen Culver says
Hi Nicky,
If you aren't doing the egg wash, you don't need to return the shell to the oven.
Thanks!
Kathleen