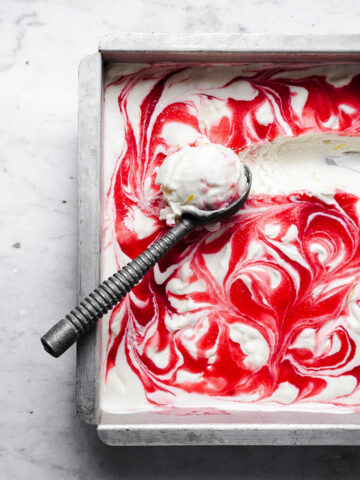
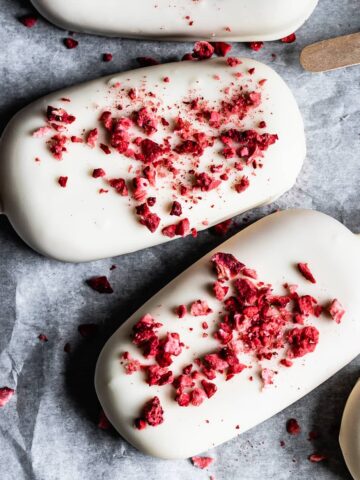
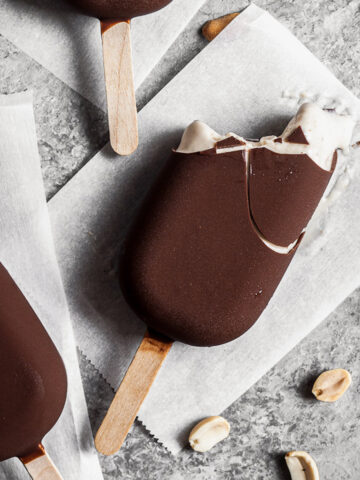
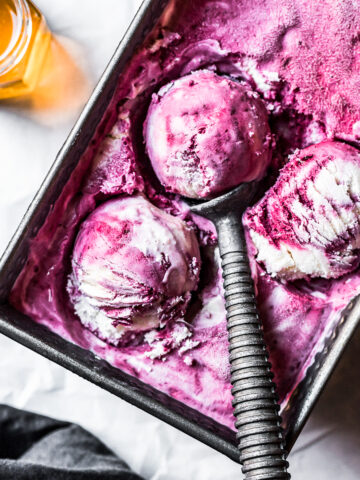
• Skip to main content
  • Skip to primary sidebar
The Floured Table
menu icon
go to homepage
  • About
  • RECIPE INDEX
  • SUBSCRIBE
  • Free Ebook
    • Instagram
    • Pinterest
  • search icon
    Homepage link
    • About
    • RECIPE INDEX
    • SUBSCRIBE
    • Free Ebook
    • Instagram
    • Pinterest
  • ×

    Home » Recipes » Ice Cream and Frozen Desserts

    Chocolate Blood Orange Ice Cream Sandwiches

    By Kathleen Culver: Mar 13, 2019 · Updated: Dec 11, 2021 · This post may contain affiliate links. · 2 Comments

    Jump to Recipe Print Recipe
    Stack of three chocolate blood orange ice cream sandwiches with bite taken out and ice cream drip

    Blood orange season

    It's nearing the end of blood orange season. Before they disappear for another year, pair these dark chocolate orange cookies with a creamy blood orange ice cream for the perfect way to use this unique citrus.

    Process shot of chocolate blood orange ice cream sandwiches being built - cookies on silver tray with ice cream on top and ice cream scoop nearby

    These chocolate blood orange ice cream sandwiches have a special color and tart flavor thanks to a generous amount of freshly squeezed juice. People often say that blood oranges have a somewhat berry-like taste, sort of like raspberry. I also find they have a distinct floral note. One of the things I like most about using blood oranges is their tartness. Here, the slight tang helps balance the sweetness of the chocolate orange sandwich cookie.

    Chocolate blood orange ice cream sandwiches piled on a metal tray with parchment underneath on a grey background

    The blood oranges that I found had variegated color on their exteriors - from standard orange to blush red to dark crimson, with similar variation on the inside. I squeezed approximately 10 small blood oranges to yield the amount of juice necessary for the recipe (your yield will vary depending on the size of the orange). By the time I finished, the counter top was littered with an ombré pile of empty orange halves. And! I had completely stained the butcher block with the dark juice. Take note and use a cutting surface that is not precious, and preferably something that isn't permeable. You'll be glad you did.

    Side view of chocolate blood orange ice cream sandwich with bite taken out, resting on parchment paper and a black metal tin

    I searched for weeks for just the right chocolate cookie for these ice cream sandwiches. I wanted something really specific. It needed to have great chocolate flavor, bake up round and flat, have a crispy exterior/chewy interior, and freeze to a consistency that supports the ice cream yet has enough give so you can bite through without the insides squeezing everywhere. I should have known that Sarah Kieffer would have the key. A few modifications to her chocolate sugar cookie recipe and I had the ice cream sandwich cookie of my dreams.

    Top view of metal tray filled with chocolate blood orange ice cream sandwiches with pink linen napkin

    My cookie modifications included subbing black cocoa powder for a portion of the cocoa powder - that's how they obtained that amazingly rich, dark color - and a generous amount of orange zest, plus some alterations to batch size, cookie size and baking time and method that helped me target the right ratio of sandwich cookies to ice cream for you all.

    Stack of three ice cream sandwiches with others nearby and ice cream scoop in foreground on grey background

    You can easily divide the making of these chocolate blood orange ice cream sandwiches over several days. My favorite recipes are those that don't require everything to come together in a mad dash all at once. For these, I mixed the dough and baked the cookies one day, made the ice cream base that evening, and churned the ice cream the next morning. By the afternoon, the ice cream had set. A few minutes of assembly later and I was happily biting into my (second) ice cream sandwich.

    Top view of metal pan filled with chocolate blood orange ice cream sandwiches, resting on parchment paper

    Blood oranges near me?

    If you've read this far and you're lamenting the lack of blood oranges in your vicinity - never fear! You can easily swap the blood orange juice for another citrus with equally delicious results. The original recipe that inspired these is from Stella Parks on Serious Eats; she makes it with Meyer Lemons. Since you're pairing it with chocolate orange cookies, I'd stick with orange, but who am I to limit your kitchen creativity? I'm sure orange varieties such as navel, cara cara, mandarin, and the like would create an amazing creamsicle flavor. You don't have to pass on this recipe if you don't have blood oranges. While they do provide a unique flavor, the orange - chocolate pairing is incredible no matter what. The ice cream won't have that subtle blush tone, but no matter. These are so good you'll spend half of your time eating them with your eyes closed anyhow.

    Top view of chocolate blood orange ice cream sandwiches balancing on edge on a grey background
    Chocolate cookies sandwich pink hued ice cream. There are six ice cream sandwiches on a vintage metal baking sheet. Tucked under the baking sheet is a pink linen napkin. It all rests on a grey stone surface.

    Chocolate Blood Orange Ice Cream Sandwiches

    Print Recipe Pin Recipe
    These ice cream sandwiches feature chewy dark chocolate cookies with a generous addition of orange zest, rolled in granulated sugar for a crispy exterior. Sandwiched between them is a creamy blush colored tart-sweet ice cream made from the juice of blood oranges. 
    Prep time45 minutes
    Cook time9 minutes
    Servings15 ice cream sandwiches
    Author: Kathleen Culver

    INGREDIENTS

    Chocolate Orange Sandwich Cookies

    • 1 cup plus 1 tablespoon (154g) all purpose flour
    • 2 Tbsp (10g) black cocoa powder (optional; replace with standard cocoa powder if not using)
    • ¼ cup (20g) cocoa powder (not black)
    • ½ teaspoon salt
    • ½ teaspoon baking soda
    • 10 Tbsp (141g; 5 oz) butter
    • 1 cup (200g) sugar (plus additional to roll cookies in)
    • 1 large egg
    • 1 tsp (5g) vanilla
    • 1 generous Tbsp orange zest from 2 blood oranges; wait and grate directly into the cookie dough

    Blood Orange Ice Cream

    • 1 ½ cups (200g) granulated sugar
    • 4 Tbsp (30g) cornstarch
    • ¼ tsp kosher salt
    • 2 large eggs
    • 15 oz (428g) fresh blood orange juice, strained
    • 2 Tbsp blood orange zest
    • 12 oz (338g) heavy cream, refrigerated

    INSTRUCTIONS

    Chocolate Orange Sandwich Cookies

    • Preheat oven to 350 degrees. Line two cookie sheets with parchment paper.
    • In a medium bowl, combine flour, cocoa powders, salt and baking soda together with a whisk. Set aside.
    • In a stand mixer with the paddle attachment, beat the butter on medium-high speed until light and fluffy. Add the sugar and beat again until creamed (about 3-5 minutes), scraping down the bowl as needed to incorporate the two together.
    • Add the egg and vanilla and mix to combine. Add the flour mixture and mix on low until just combined.
    • Grate the zest of two blood oranges (approximately 1 Tbsp) directly into the dough. This will help capture the maximum flavor of the orange oil as you grate. At least I like to think that it helps. 
    • Mix the orange zest into the dough on low.
    • Form the dough into 30 round balls - about a Tablespoon full. If you have a kitchen scale, you can weigh them for more precision. Precision = similarly sized cookies, which is good when you're going to sandwich them together. Mine averaged about 17-18 grams each. Roll them into the granulated sugar and nestle together on one cookie sheet. Chill the dough balls in the fridge for a minimum of 60 minutes. 
    • Place 6 cookies onto a baking sheet. Bake on the center rack for about 9 minutes, until the cookie begins to firm up around the outside and cracks begin to form. Remove from oven. While one pan is cooling, repeat with other pan until all cookies are baked (keep unbaked cookies in the fridge until they are ready to go into oven.)

    Blood Orange Ice Cream

    • In a large stainless steel saucepan, add the sugar, cornstarch, salt and eggs. Whisk well to combine. Make sure to get into the corners of the pan to ensure every dry bit is incorporated.
    • Add blood orange juice and zest, and whisk again. Over medium low heat, whisk continuously to warm the mixture. This should take several minutes. Once warm, turn up the heat to medium and continue to whisk until the mixture thickens and is hot. Once the mixture begins to simmer, stir briskly for a count of 30 seconds (one-one-thousand, two one-thousand)...and then remove from heat.
    • Pour through a strainer into a glass or ceramic bowl (do not use metal; it might impart an unwelcome taste). Add cream and whisk to combine. Cover with plastic wrap (press onto the surface to seal) and chill for at least 6 hours or overnight.
    • Pour into ice cream maker and follow manufacturer's instructions. While it is churning, line the base and sides of a 9 x 13 pan with plastic wrap (parchment paper will absorb moisture and tend to tear). When ice cream is ready, scoop/pour into 9 x 13 pan and spread flat using an offset spatula. Cover with another layer of plastic wrap and place in freezer to harden for at least 4 hours.

    Assembly

    • Pair similarly sized cookies together.
    • Remove ice cream from freezer and gently flip ice cream out onto a wooden cutting board. Peel back top layer of plastic wrap. Using a round cookie cutter just slightly smaller than the cookies (I used a 2 ½ inch circle), cut circles out of the ice cream. Cut them very close to each other. You should be able to get 14 whole circles, and the 15th should be very nearly whole.
    • Place each ice cream circle on top of a cookie, and cover with another. Press gently to adhere the cookies to the ice cream.
    • Immediately place finished sandwiches onto a cookie sheet in the freezer to chill. After 1 hour, remove and serve. Wrap extra cookies individually in plastic wrap and place in an airtight container in the freezer for storage.

    Made this recipe?

    Please leave a comment and a star review! Share it on Instagram with
    @theflouredtable and #theflouredtable.

    Ice cream sandwiches being built - cookies with circle of blood orange ice cream on top

    Recipe notes

    • Cocoa powder - I use this black cocoa that I purchased on Amazon. It's not critical for this recipe, but if you are looking for the rich, dark color, you'll need it.
    • Cookie cutters - I purchased a set of round cookie cutters specifically for this recipe. You can certainly use whatever you have on hand at home to cut circles in the ice cream. I like this stainless steel set; each cookie cutter has a label with the diameter of the circle for easy reference. Using a cookie cutter will help you produce sharp, crisp ice cream circles and maximize the amount of circles you can cut from the 9 x 13 pan.
    • Resting time - I found these easiest to eat after letting them rest an hour in the freezer after building them. The assembly process takes long enough that the ice cream softens, leading to an easily broken, slippery, messy sandwich if you try to eat it immediately. You want the ice cream firm when you serve these.
    Top view of metal pan filled with ice cream sandwiches, resting on parchment paper
    Top view of chocolate blood orange ice cream sandwiches surrounded by additional sandwich cookies

    More recipes

    If you like these chocolate orange ice cream sandwiches, you might also like these recipes!

    • Chocolate Coffee Mascarpone Sandwich Cookies
    • Strawberry Rhubarb Ice Cream Bars
    • Blood Orange Cornmeal Shortbread Cookies
    • Chocolate Peanut Butter Ice Cream Bars
    « Mint Matcha Chocolate Thumbprint Cookies
    Cherry Rhubarb Pie »

    Reader Interactions

    Comments

    1. Carla

      February 15, 2021 at 10:53 am

      The ice cream instructions talk about eggs, but the there are no eggs listed in the ingredients. How many? Or leave them out?

      Reply
      • The Floured Table

        February 22, 2021 at 9:58 pm

        Hi Carla,
        Thanks for your comments - and apologies for my slow reply.
        I've updated the recipe to reflect the eggs.
        Thank you!
        Kathleen

        Reply

    Please leave a rating and comment, or ask a question! Cancel reply

    Your email address will not be published. Required fields are marked *

    Please rate this recipe after you've made it:


    Primary Sidebar

    Hi! I'm Kathleen. I'm the baker, food photographer and chief mess maker behind The Floured Table. I love to share my passion for beautiful, delicious tasting desserts by creating recipes you can confidently recreate at home.

    More about me →

    POPULAR RECIPES

    • Black Sesame Cookies
    • Meyer Lemon Almond Cake
    • Strawberry Shortbread Cookies
    • Chocolate Coffee Mascarpone Tart

    RECENT RECIPES

    • Biscoff Blondies
    • Torta Tenerina (Italian Flourless Chocolate Cake)
    • Torta Paradiso (Italian Paradise Cake)
    • Nutella Biscuits

    Footer

    ↑ back to top

    About

    • Privacy Policy
    • My Photo Gear

    Newsletter

    • Subscribe

    Contact

    • Work with Me
    • Portfolio

    Copyright © 2018-2022 Kathleen Culver